|
Soffit
and Fascia Repair
We have an issue with the
soffit, fascia, shingles and roof decking on the front of the
house.
|
|
|
|
|
|
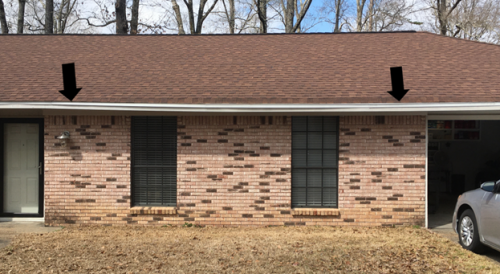
The run that is problematic is marked here. The area to be healed is ~18 feet. |
 |
|
Sag Left is above the right light at
the front door.
|
 |
|
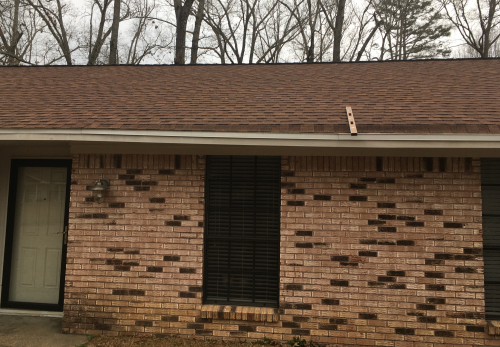
Sag Right is above the garage door.
|
 |
|
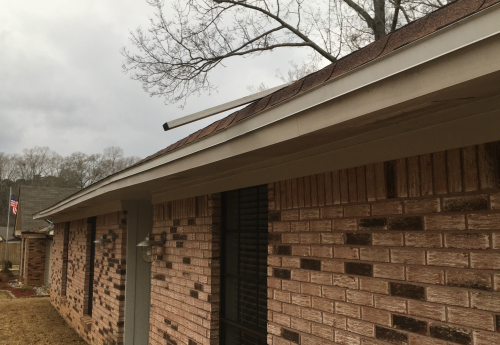
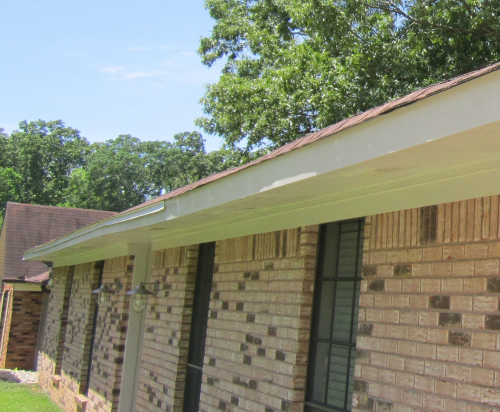
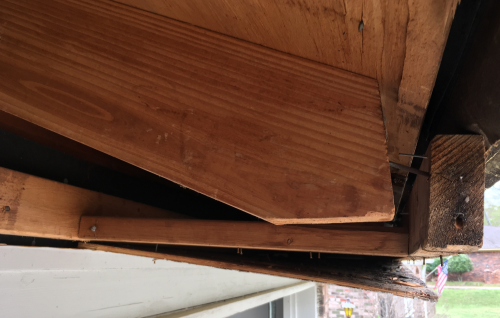
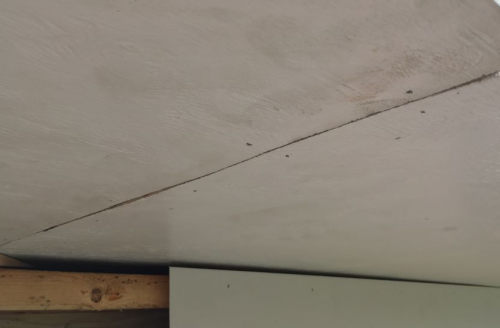
Front view of sagging soffit, fascia,
drip cap, and shingles.
There is a four foot level on roof to
add perspective.
|
 |
|
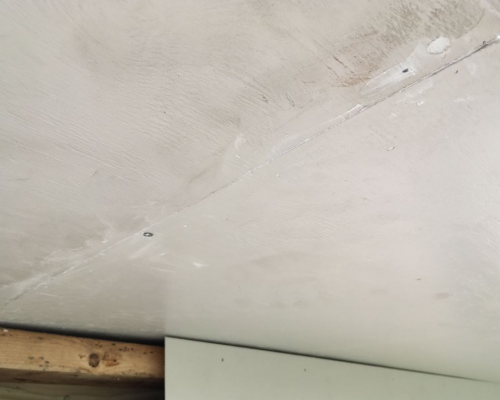
Under and left view of sagging
soffit, fascia, drip cap, and shingles.
There is a four foot level on
roof to add perspective.
|
 |
|
2007 We had a new roof put on...at that time we had
some sagging roof decking over the garage and we had the
beginning of the fascia sag issue on the font edge. The roofers were to add decking as needed and to put
in drip cap. 2014 the front fascia showed water damage and the sag
had gotten worse. Drip cap had not helped. New fascia did not help. |
 |
|
This shows the area where fascia was
replaced |
 |
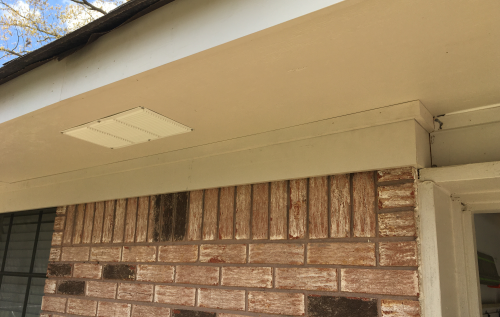
| Sag is still there after new fascia. |  |
| Image shows the sub-fascia...it
appears to be a 2x4. |
 |
|
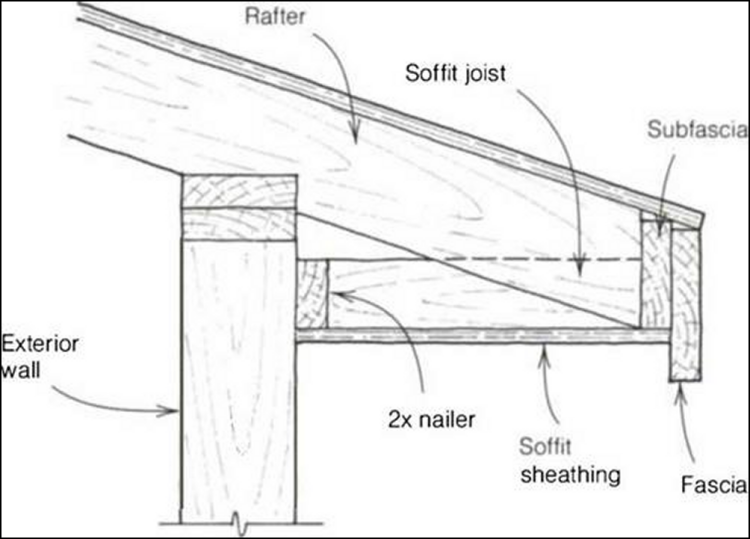
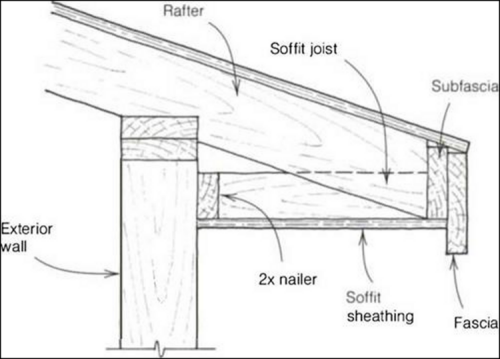
The basic setup of the soffit is shown below in the
image with terms identified...our roof design will make
soffit joist unlikely. The logical but unseen and unverified issue...the sub-fascia is not properly connected to the end of the rafters. There is a gap there and it allows the sub-fascia to move out away from the house and to droop below the line that it should maintain. Because the sub-fascia is wrong...the fascia is wrong, the soffit is wrong, the drip cap is wrong and the decking and roof shingles are wrong. The gap must be removed and the sub-fascia must be put back in alignment in the in/out dimension and the up/down dimension. |
|
|
|
|
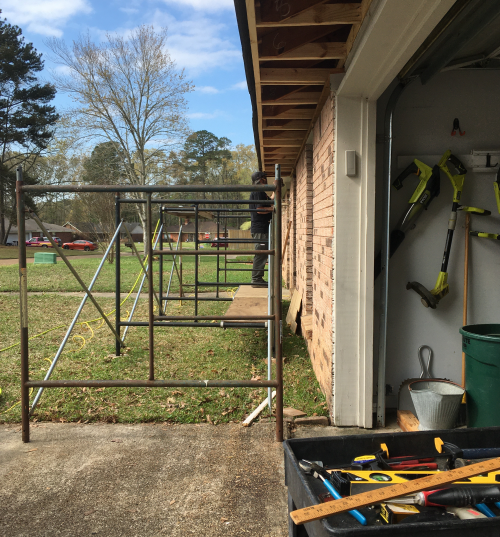
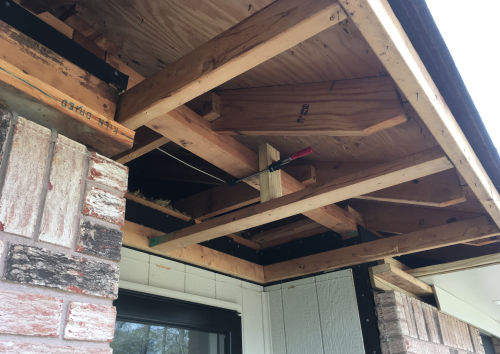
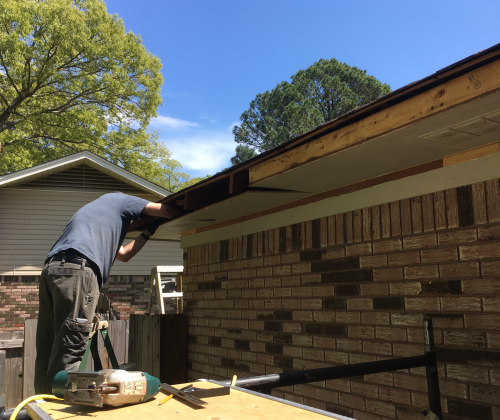
| In order to assessment the forces
that are causing the gap between the rafters and the sub-fascia,
we must expose the rafters. Three 7 foot runs of scaffolding will be placed that are centered over the main area of trouble. |
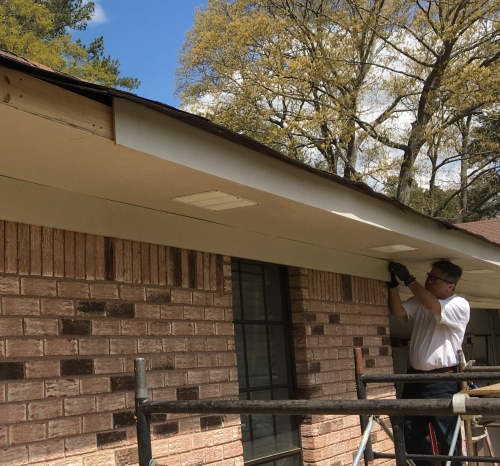
At the worst sag location...I pulled down about a ten foot run of fascia and a four foot run of soffit to expose a couple of rafters. we found the issues to be exactly as we anticipated...the sub-fascia 2x4 material was not connected to the end of the rafters. |
 |
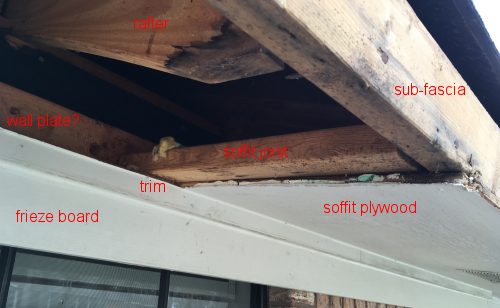 |
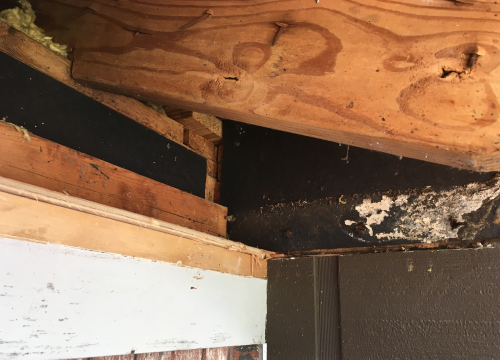
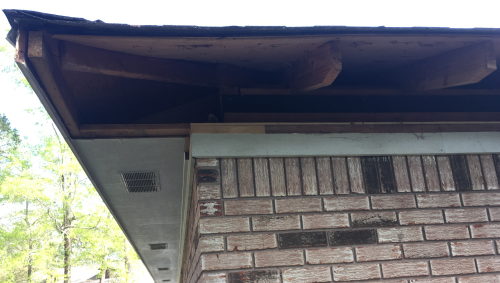
| In the foreground is a rafter
that appears to be in good shape...sheathing is attached to the
rafter at the top...but the sub-fascia on the right is not
attached to the end of the rafter...the one nail that originally
held the sub-fascia in place is out proud in space. The end of this rafter was 20 inches from the wall plates. In the background is the "bad" rafter which appears to have twisted, which has sheathing nails loose at the top, has water damage... the end of the bad rafter was 19 inches from the wall plates. |
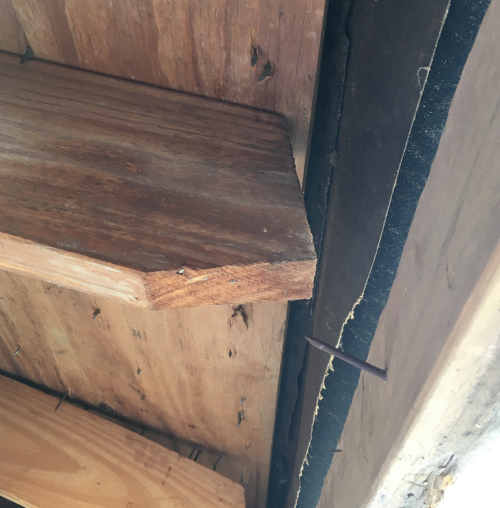 |
| A closer look at the bad
rafter... |
 |
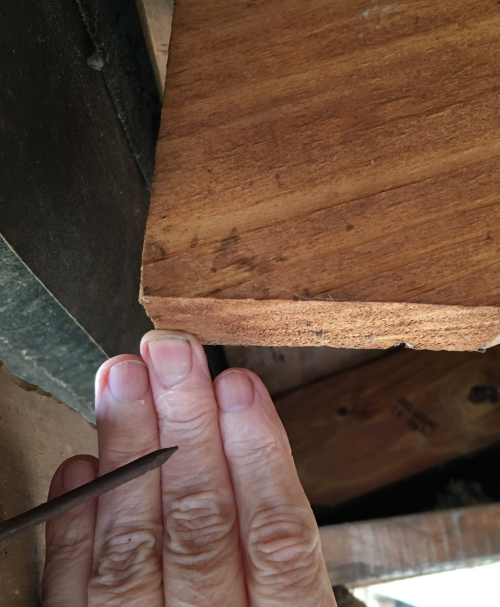
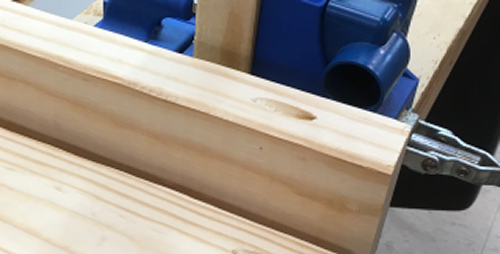
| For perspective...I put my
fingers in this image of the good rafter. The center finger is at the end of the rafter and the sub-fascia on the left is clearly a couple of inches away. The 12d nail was put in at a poor angle and only one nail was used...once the sub-fascia board pulled loose gravity took over and the board has dropped 2-3 inches. |
 |
|
|
|
| This is
an attempt to cad draw what I believe the setup is meant to
be... The 3/8" ply soffit board is ~18 inches wide...it is meant to lay onto a ledge that is 3/4 inch trim...there is a ply plate behind it this keeps the spacing correct. This means that the soffit board just lays onto that trim piece and then extends out as far as the edge of the sub-fascia and is then nailed there.  Each rafter has a birds mouth cut out that lays on the wall plates. The end of each rafter has two cuts...one to make the end plumb and the other to make the bottom squared off. This leaves an exposed end of the rafter that is ~4.5 inches tall. The 3.5 inch sub-fascia is made coplanar with the bottom of the rafter and attached. |
|
| The plywood roof sheathing stops at about the end of the rafter ...the shingles will then extend over the fascia and the drip cap. 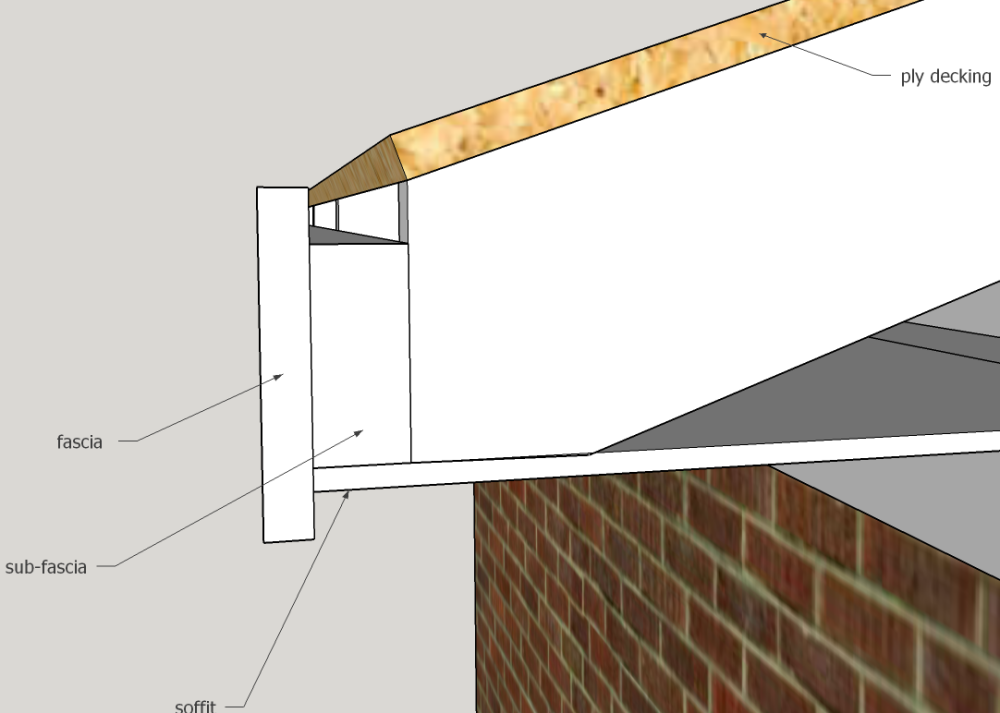
|
|
|
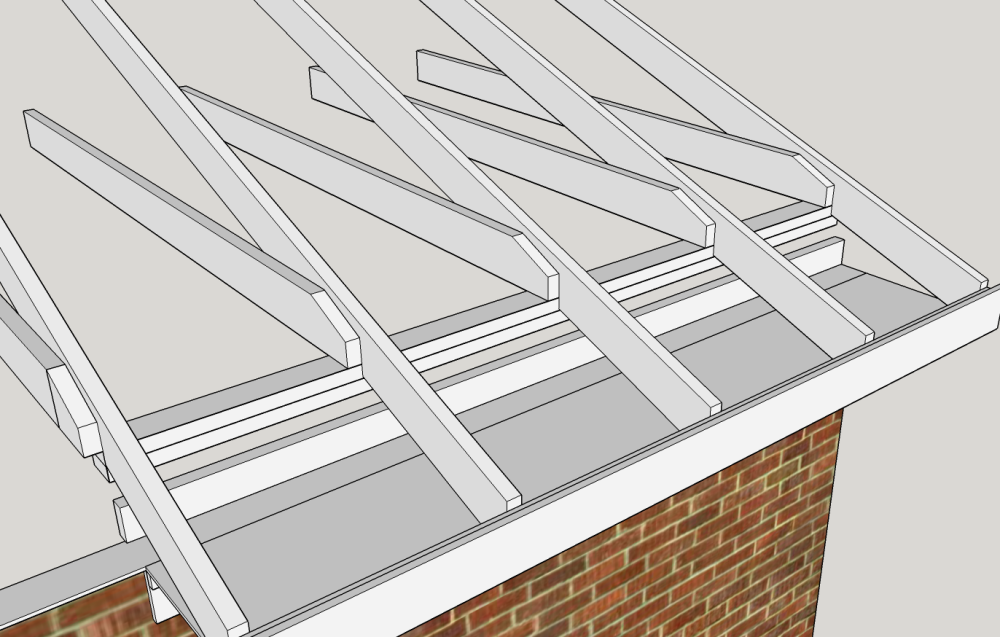
The attic joists lay on top of
the wall plates and the are attached to the rafters.
They are cut so that they do
not coplanar with the top edges of the rafters.
For our job, the joists will
not be involved at all.
|
|
Where
there is a soffit joist...at joints and at vent openings...the
joist lays on top of the ply plate on the inner side and then it
is coplanar with the sub-fascia on the outer edge...will be
toe-nailed at back and nailed through sub-fascia from the
outside on the front.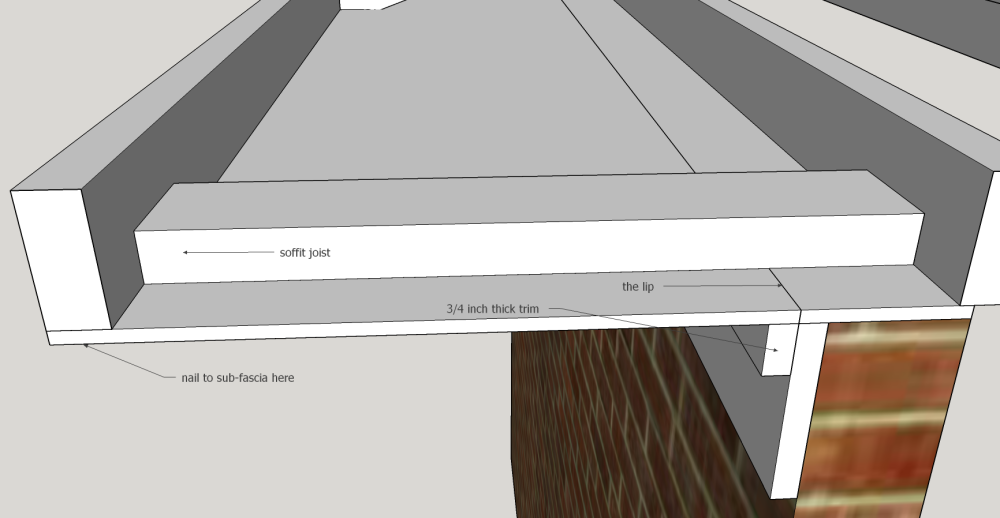 |
|
|
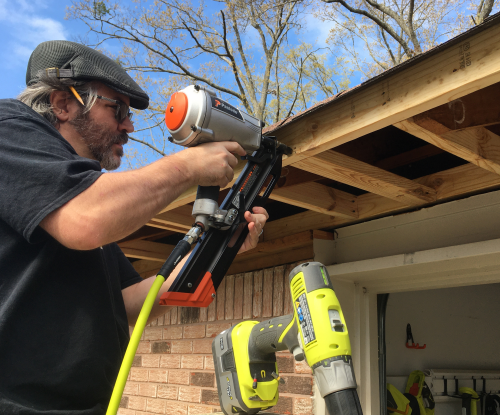
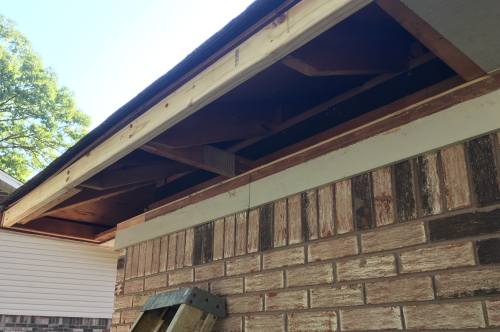
The work began by pulling off
all of the sub-fascia toward the garage.
 We then found that the area
above the garage door...where we thought there was no sag...
had the same problem as the sag run.
The sub-fascia never was
never really nailed to the end of the rafters.
We assumed this was
done so that variations in the lengths of the rafters would
not be fully visible on the fascia.
The soffits and the sub-fascia
had to have been constructed on the ground and then installed.
None of us thought this made
any sense...the design certainly made difficult the act
wrecking soffits out...
|
|
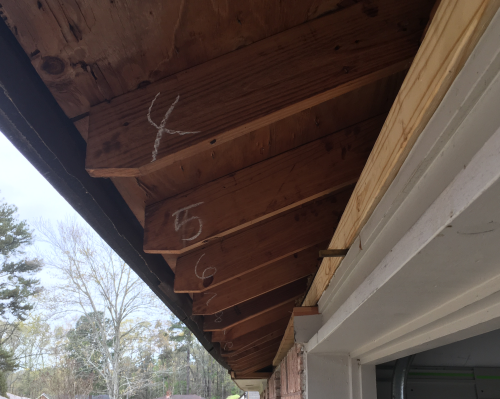
| This image shows how the
horizontal soffit joist is nailed tightly...no visible
gaps. The original soffit joists were all 20.75 inches long. This was further out than the ends of the rafters. This is above the garage door at a point where we thought the run could be salvaged. There was sag here but we thought we would live with it. By keeping this soffit run we were able to avoid having to wrap around the corner. |
 |
|
To be able to make the new
sub-fascia secure and level, we had to remove the old
sub-fascia, soffits, nailing boards, frieze, and trim.
It was all connected and when
pulling it down we basically went to the brick and black wall
board.
We assessed all of the
rafters...numbered them...and determined that we could add
modified joists that were secured to the nail boards and
extended out further and lower than the rafters...and then
they would be secured to the rafters.
|
 |
| The modified support, 20.75
inches, established new horizontal connecting points for the
soffits ... and plumb ends for sub-fascia nailing. One of these modified supports is attached to each house rafter @ 2' intervals. |
 |
| Kreg jig setup. Modified supports and soffit joist replicas were chopped and Kreg milled in the shop. |
 |
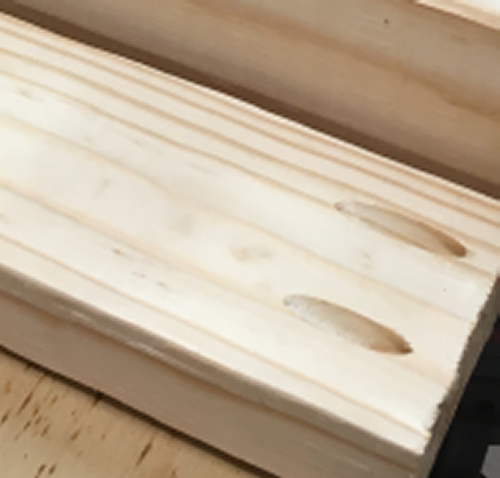
| The modified supports are 20.75
inches long. and rest on edge. I milled 2 pocket screw holes into the flat face using Kreg jig. The modified supports are T-25 screw attached into a nail board. |
|
| The modified supports are T-25
screw attached into a nail board.
|
|
|
The soffit joists are 20.75
inches long.
This length matches the
original soffit joists length.
In function, the soffit joists provide support for the soffit plywood at 8' increments where the ends of the soffit ply meet in a seam. Using Kreg pocket hole jig, I put a single pocket on both edges. These boards are screwed into
nail board.
|
 |
| The modified supports were screwed to the nail wall and then 12d nails were shot in through the sub-fascia. | 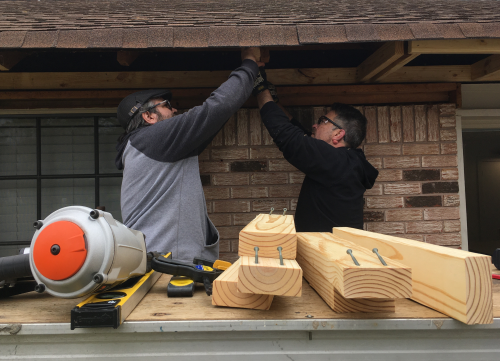 |
| Modified supports were doubled up
where the sub-fascia seams met...a modified support was attached
to both sides of house rafter. |
 |
| Day Two Plywood for the soffits was painted in the garage...ripped to correct widths using Festool track saw...holes put in with jig saw...vents screwed on. |
 |
| This is the skeletal run of new
sub-fascia and modified supports...the skeleton is about to be
skinned... |
 |
| Final prep around window frame... |  |
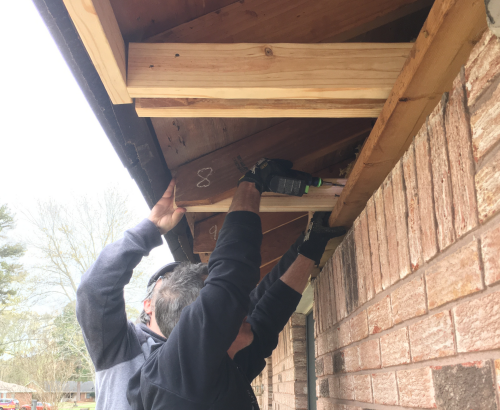
| Installed the horizontal soffit
joists at eight foot marks... screwed in at the back, thunked through the sub-fascia at the front. |
 |
|
|
|
| A soffit run. |  |
| Where the edge of the soffit was out proud, Max trimmed with router. | 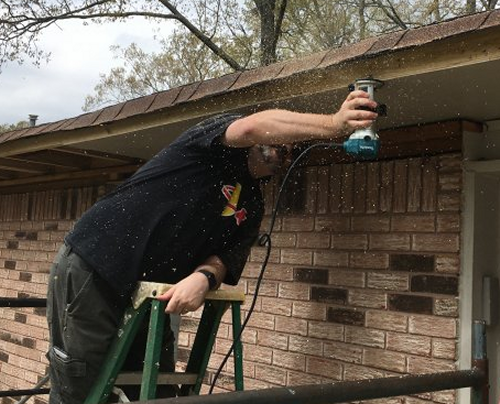 |
| Full run of four soffit panels... |
 |
| Day 3 Attached fascia and frieze boards...special issues at the corner of brick run and the garage door. |
 |
| Turned out great. |
 |
| Putting in the trim board at the
frieze board and soffit joint. Closing up the gaps. |
 |
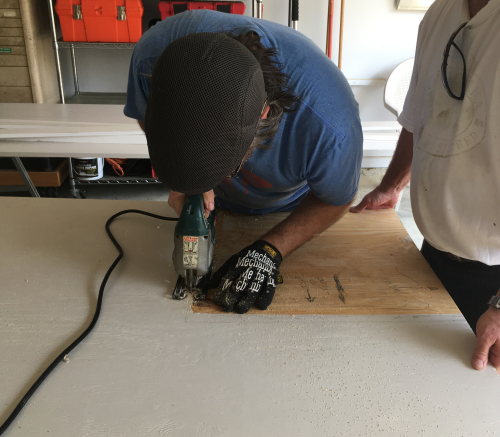
| Day 4 and 5 During the rainy day delay, I made all of the 18 modified supports and the 6 soffit joists for the remainder of the project. The dual face pocket holes were done using the Kreg jig. |
 |
| The single edge pocket holes were done at the workbench with the portable Kreg setup. | 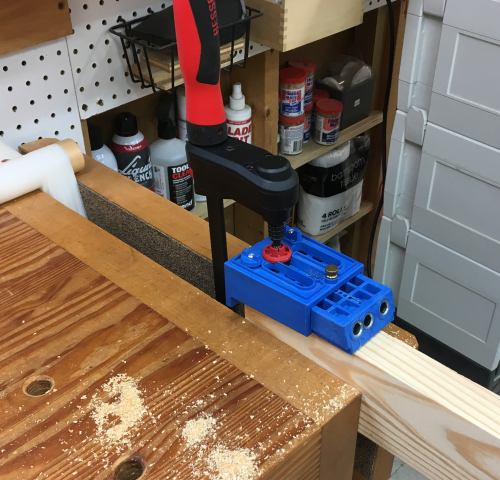 |
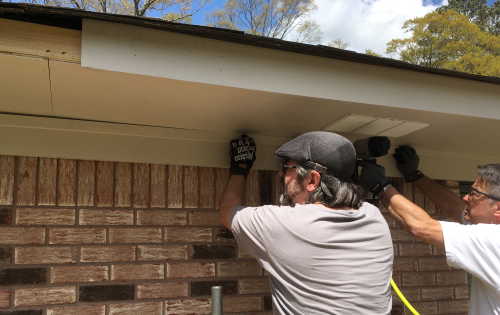
| The day started with Max and I attempting to remove the rest of the fascia and soffits, along with all of the supports. | 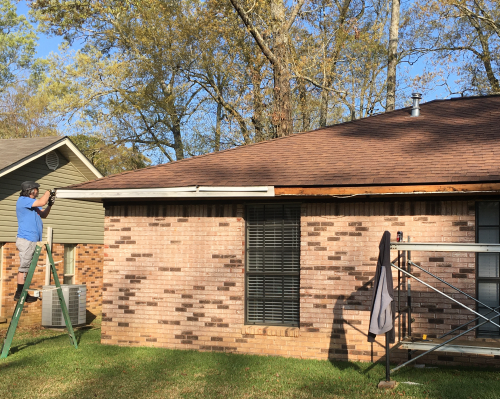 |
| All went well until we were trying to pull off a piece and suddenly a very long chunk of soffit, sub-fascia, frieze, trim, lip support and nailer board all began to fall and we struggled to hold it up...after we stabilized it, I held it up and Max grabbed a 2 x 4, nailed it to the sub-fascia and managed to temporarily support the structure. | 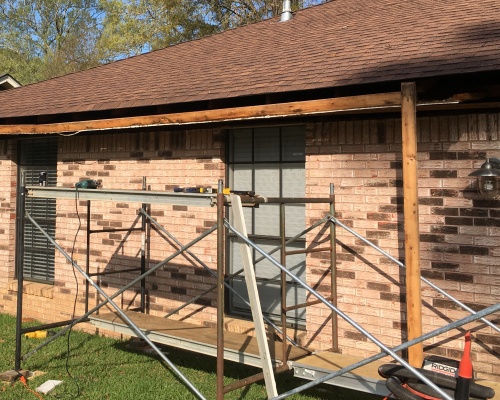 |
| Brace at the right end of the run... | 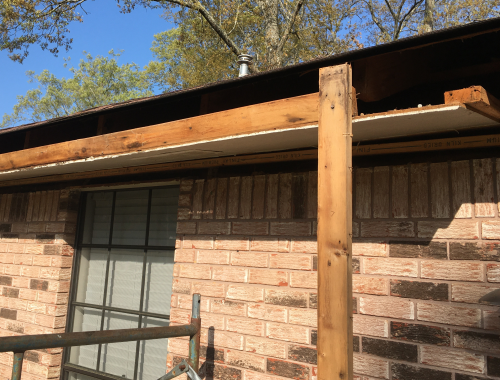 |
| There was a second brace made on the left end of the run...James arrived and the destruction phase picked up some steam...here Max is using a reciprocateing saw to reduce the size of the load we had to pull down... |  |
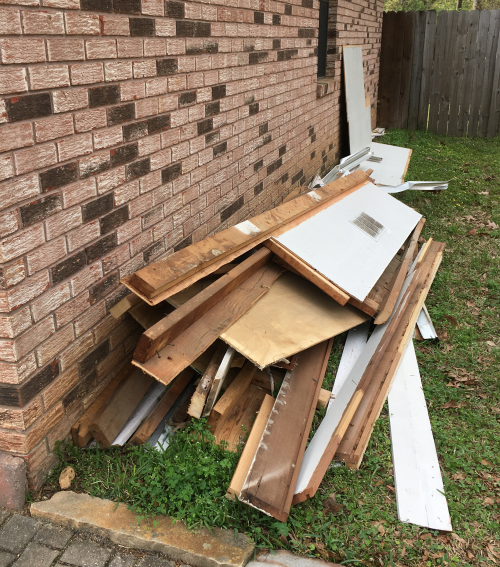
| After reducing the overall size
of the run into manageable lengths, we finally finished the
destruction phase of the project. The trash pile... |
 |
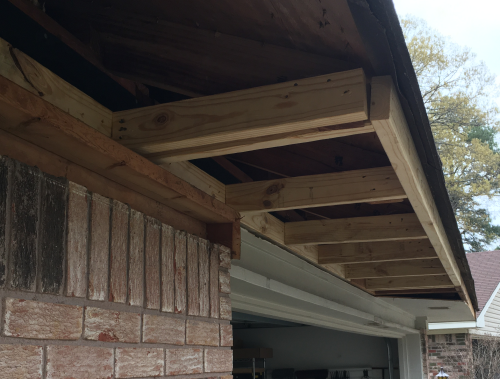
| The construction phase went really fast...we had learned from our earlier efforts...image is west end of the house looking east. | 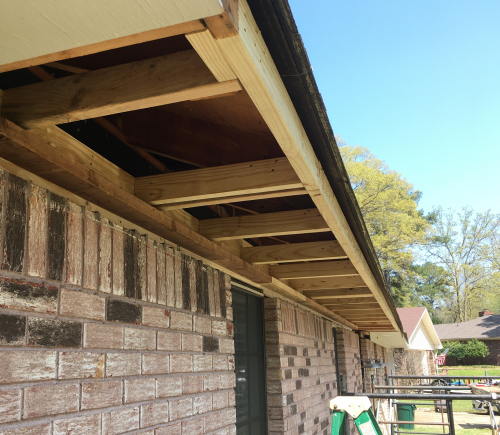 |
| From the doorway looking west. | 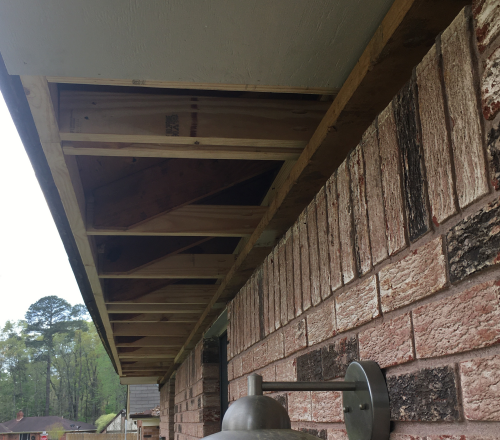 |
| The area above the front door was a unique element but after
the area was exposed, everything looks pretty straight forward.
There is a central soffit
joist that will need to be supported.
The soffit run will go from
one brick run to another around the entry way construct.
|
 |
| The layout was tricky...the
biggest problem was that the 3/8 inch sheet of ply that
resembled a flat surface when purchased, went absolutely wonkie
after being painted... after layout was confirmed, Max jig sawed the piece. |
 |
| It fit great except the wonkie end did not want to cooperate...Max and James did great work and eventually the seam was glued down...it was wedged, and clamped, and nailed off to hold it tight overnight for the glue to set. | 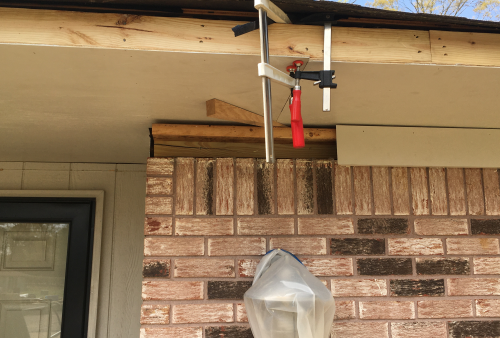 |
| After pulling the clamps and
wedge it was clear that the glue joint was great. |
 |
| In fact, it held better than the
soffit to the right...I put two screws into the glue joint and
one screw in the right soffit...made them coplanar. |
 |
| After spackling the joint looked
great. |
 |
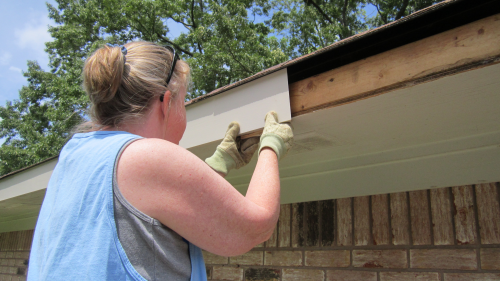
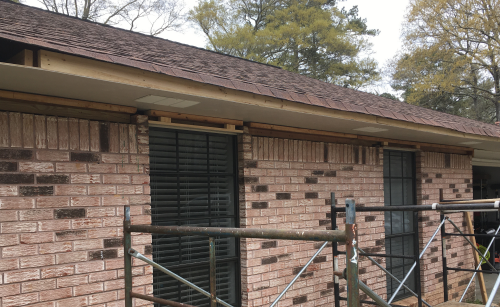
| Day 6 The Final Push on the Front A beautiful day for the final skin boards...fascia, frieze, and trim. In this pic the crew is merging the new with a short run of the original sub-fascia and soffit. |
 |
| Done except for some trim around
the door...plus caulk, spackling, paint, and drip cap for the
full run... |
 |
|
|
|
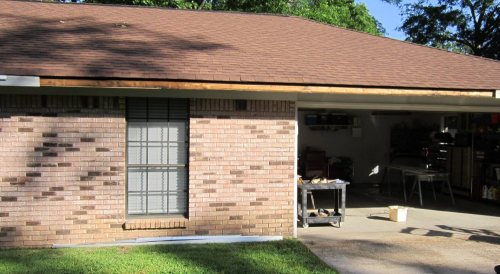
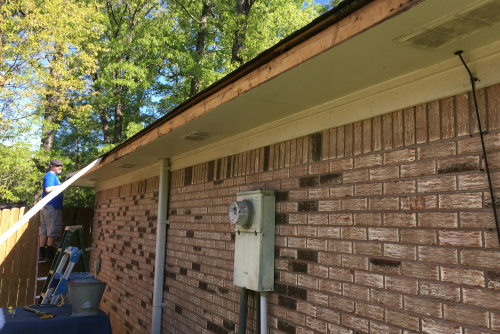
Rear Back side of house we had two problem areas...the right inside corner and the outside left corner. |
 |
| In the water runoff corner there
was water damage and subsequent varmint damage...pulled
the soffit and removed the damaged area...put in new nailer and
added a scab to the rafter... |
 |
| This required about 2 feet of new soffit...after skin and paint it looks great. | 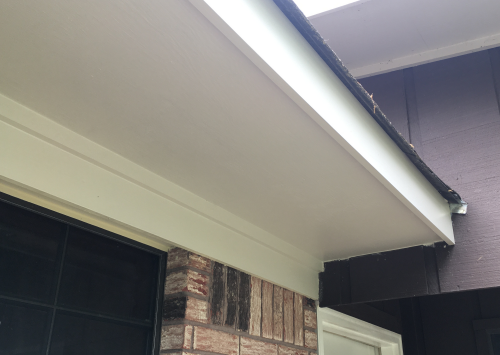 |
| At the other end of the run there
was water damage to the sub-fascia and the soffit...had to pull
the soffit and the run went around the corner. There was very little sag here, so we did not pull all of the sub-structure... Max cut out the soffit using multi-tool. |
 |
| Out at the corner there was too
much space between rafters and there was some decking sag...we
used a scab behind sub-fascia and lifted that area. |
 |
| New sub-fascia plus scabs for
more support... |
 |
| Fixed... | |
| West Side | |
| There were some fascia issues on
this west side, not of the badly sagging variety but some water
damage to the the fascia where two board met. We pulled the 35+ feet of fascia. |
 |
| Where the two bad ends of fascia
joined...the sub-fascia was redeemable but the soffit was not... rather than pull a whole sheet of soffit, we opted to make a patch. |
 |
| Max jigsawed out the patch... | 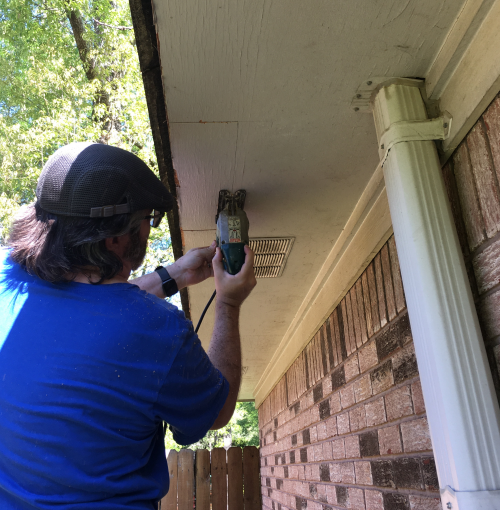 |
| We then put in a scab nailer...we will be able to secure the patch to the scab nailer and the bottom edge of sub-fascia. | 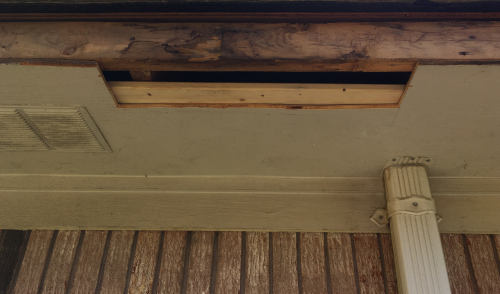 |
| Patch in place... | 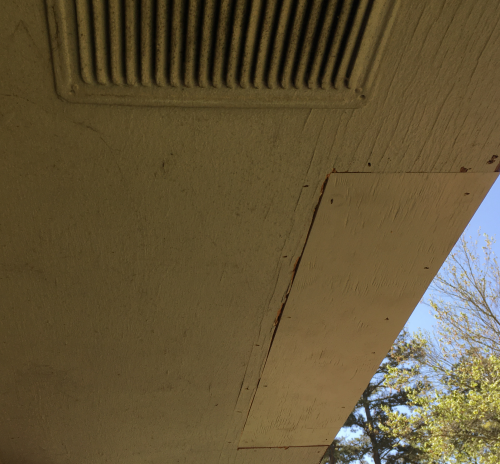 |
| West soffit taking paint... |
 |