|
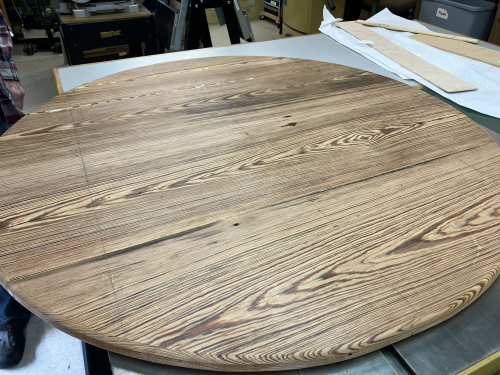
My friend Robert had a project
to make a round table top...roughly 48 inch diameter.
He wanted to re-purpose some old yellow pine. 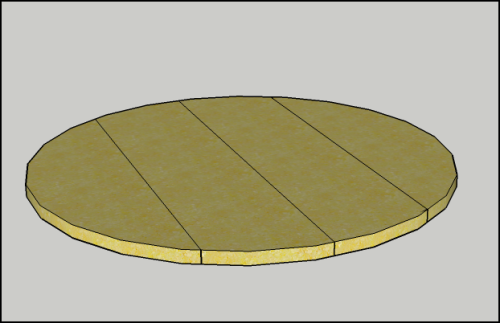
|
|
|
The wood for this project was reclaimed
from a 70 year old plus home.
It was a kitchen counter...roughly 24
inches by 12 feet.
It had been cut at 7 and 5 feet to
transport. Robert and I cut the pieces to be blanks
about 60 inches long. This was done with track
saw. Blanks were ripped along the glue lines of the
original construction.
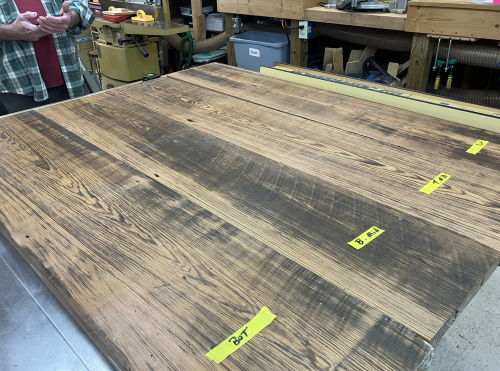
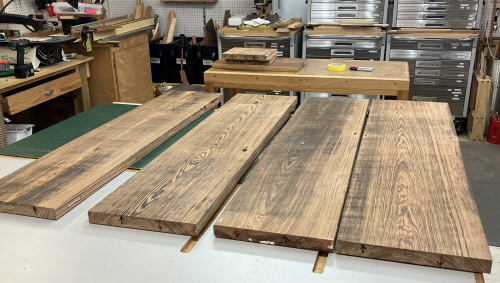
Blanks were then moved to shop and rough
assessments were made as to which board would go where,
problem shifts, etc.
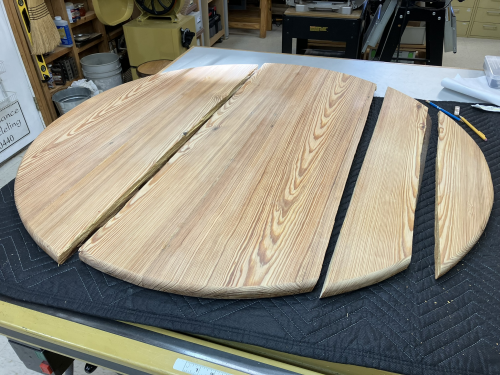
The image to the right is the bottom side
of the 4 blanks.
|
 |
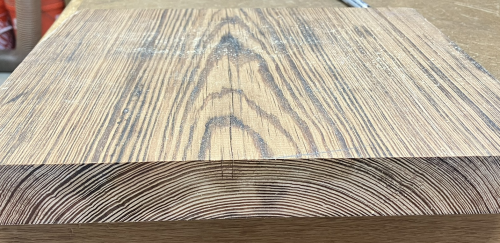
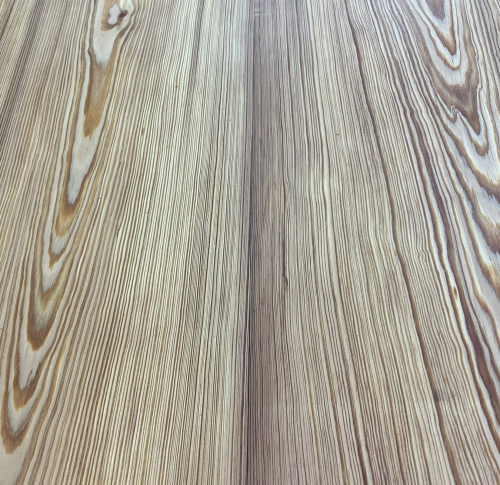
| This shows the tight grain of the
yellow pine. |
 |
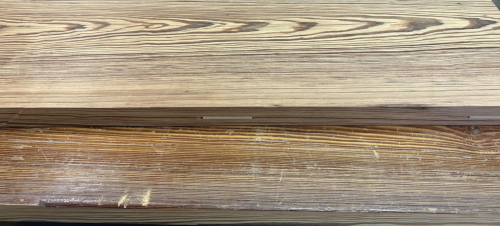
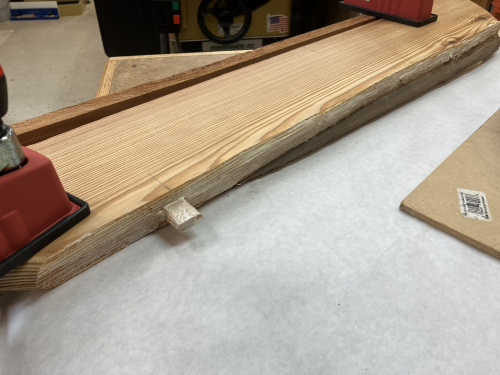
| This is the contrast between a
surfaced underside and the top side of a blank. |
 |
|
|
|
| After assessing all of the
blanks, they were crosscut to ~50 inches with track saw. |
 |
| Here are the undersides of
the four blanks. |
 |
| Using the better top sides as the
reference faces, the bottoms were surfaced a couple of runs
through the planer. Then they were flipped and the top sides were surface planed. |
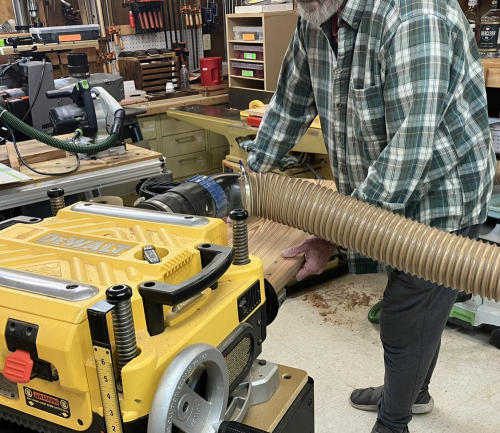 |
| Example of a couple of surfaced
blanks. |
 |
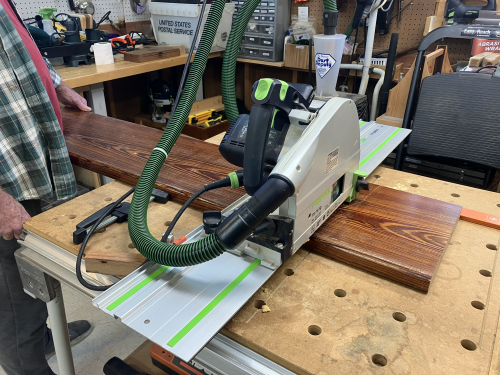
| Then the show face was put to the fence and an edge was jointed. | 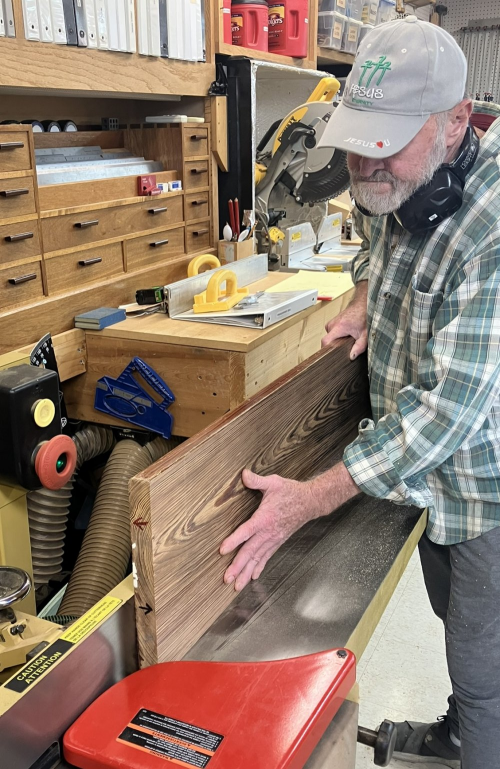 |
| Then the jointed edge was put to the table saw fence and the other edge was ripped. | 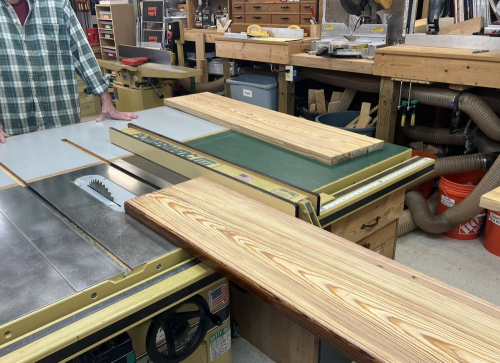 |
| Here are the milled blanks. Although they were truly milled 4 square, because they were too wide to surface on the jointer, they turned out pretty nice. This is because the pieces were quite stable...no wonky pieces. |
 |
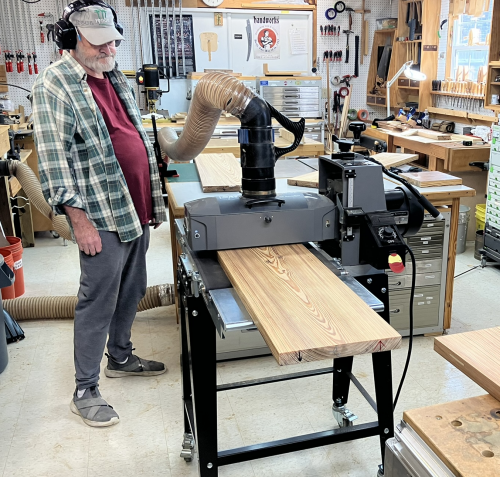
| The blanks were then run through
the drum sander a couple of times. This made the pieces look great, but we had problems because the sandpaper got clogged quickly due to the nature of the pine resin in our blanks (and the width of the blank was an issue also). We had to give that up...plus we had to mend a couple of snipes using hand sander. |
 |
|
|
|
|
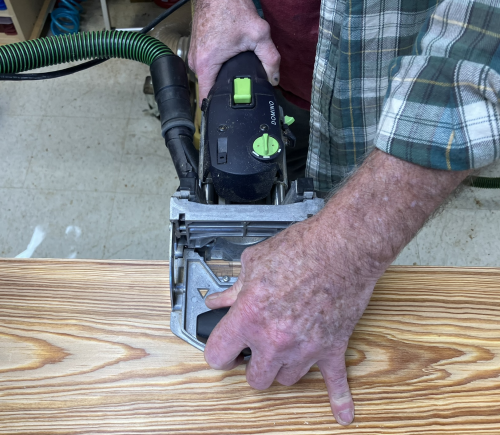
After the blanks were all surfaced, we looked for any flaws to circumvent...and then we made the layouts for the Domino floating tenons.
|
 |
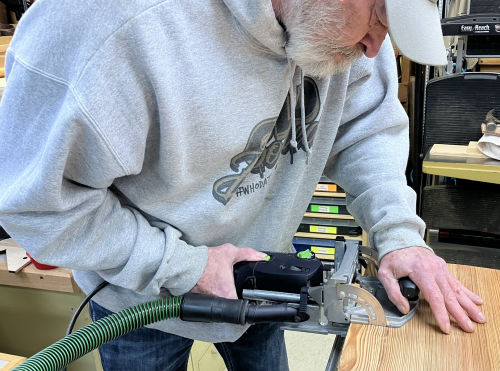
| The Domino work was done at the
MFT3 table...we used 5 x 30 mm Domino tenons...the mortises were
cut on middle loose setting...4 mortise-tenon joints per edge. Mortises were cut slightly above center line to be closer to show surface. |
 |
|
|
|
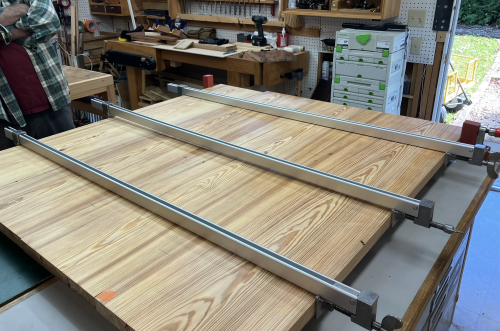
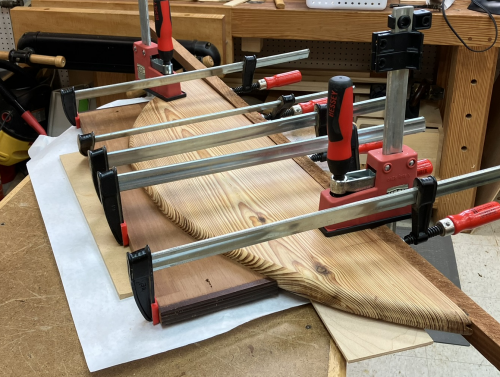
| The mortise-tenons were dry
fit...and we did a walk through on clamp location. |
 |
|
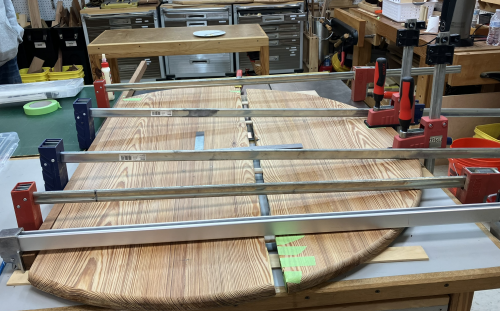
We glued the two outer pairs
first and then joined those two pairs...had decent squeeze.
|
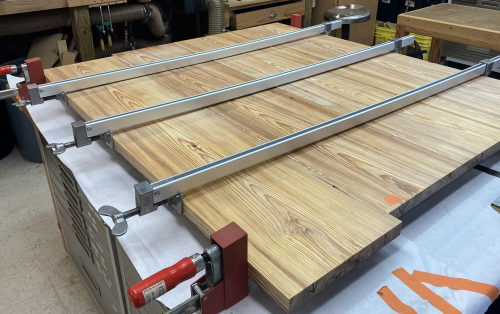 |
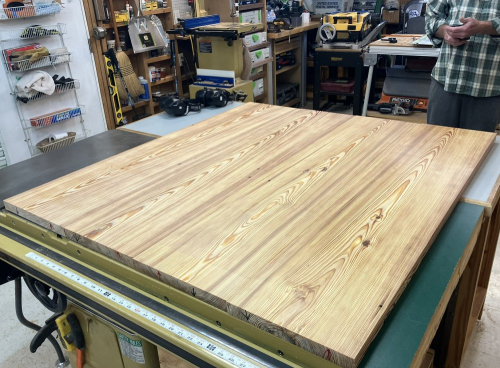
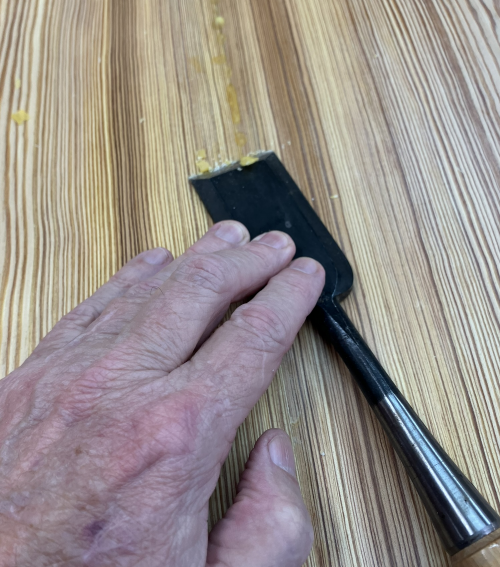
| Glue lines looked pretty
good...cleaned up with Nishiki kinari paring chisels. |
 |
| Finish sanding 150mm sander...grits... | |
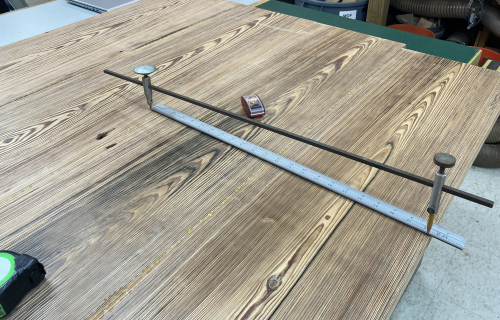
| Assessing the blank...used
straight edges to test flatness of the big slab...looked really
good Also checked with winding sticks...all boards looked really flat and square. |
 |
|
|
|
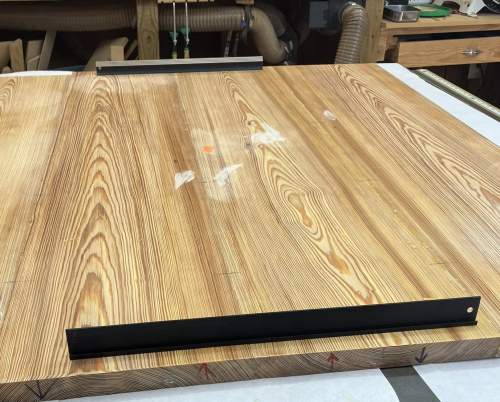
| Flipped the blank over and
cleaned up the underside. With the exceptions of some wood
flaws, the underneath appearance was great. The trammel system will be secured and the layout and cutting will all be referenced from the bottom face. |
 |
| We laid out the circle with a trammel. | 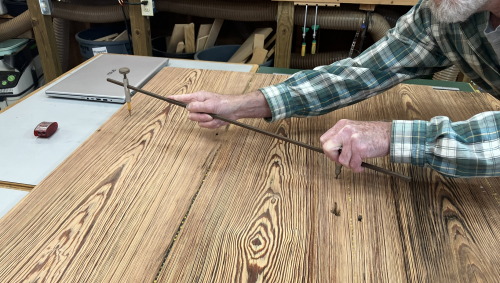 |
| Then we set up the trammel accessory for the Carvex jig saw. | 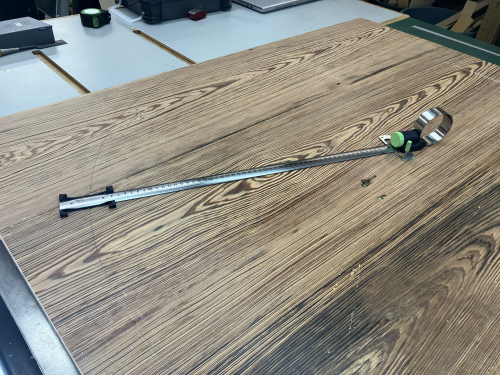 |
| Drilled the 11/64 trammel point hole deep enough for the point to really be tapped in and secure. | 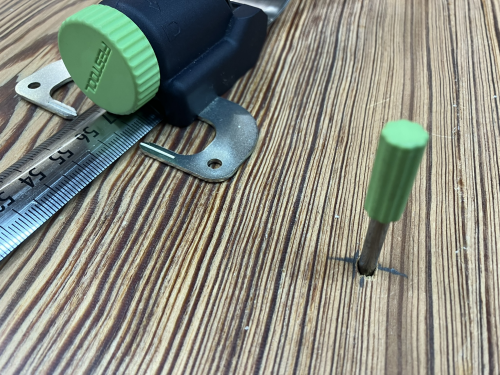 |
| Set the guide so blade would cut our circle on inside edge. | 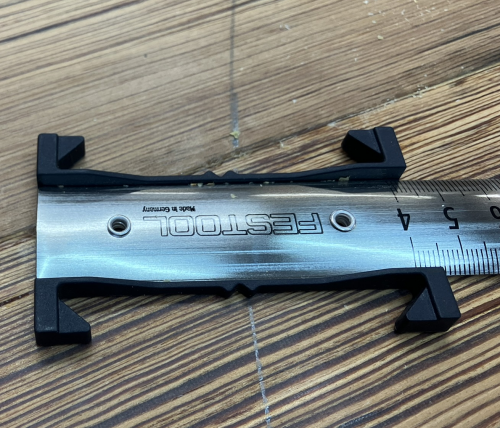 |
| Using the Festool trammel
accessory became a horrific process...the base shoe of the jig
saw was precarious and when pitch build up became an issue there
was a torque twist that cut wonky. We stopped that tool setup.We redrew the circle. |
 |
| Decided to use the Bosch to free cut the circle. | 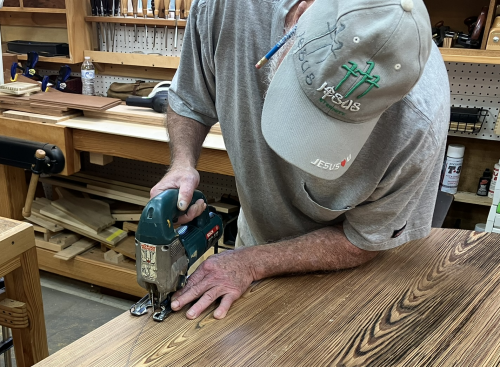 |
| Cut was really slow...had to clean the blade every ~20 inches...major resin build up...cleaned and doused in acetone helped ...overheating was an issue, went through three blades...but I was pleased at the performance of the Freud Diablo Top & Bottom Cut blades. For such hard wood, these "fine finish" blades did a great job. | 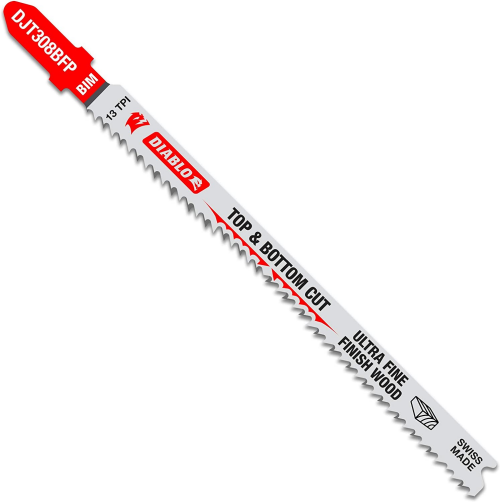 |
| In every aspect of this project, the resin build up was difficult as soon as the tool warmed up... | 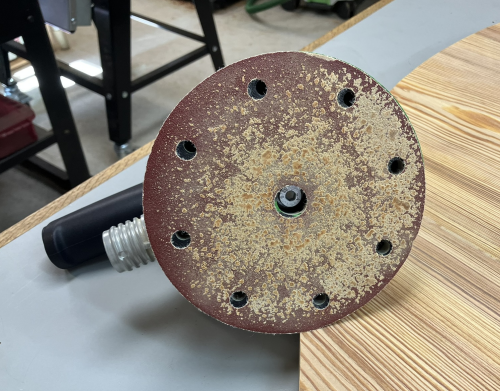 |
|
Final
Milling
|
|
|
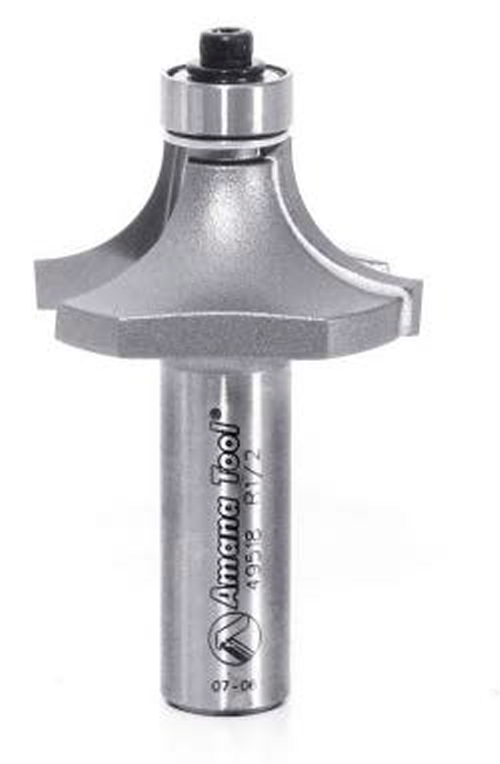
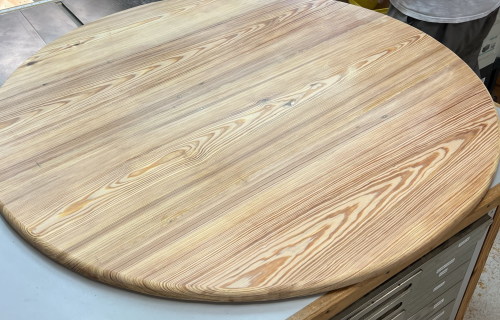
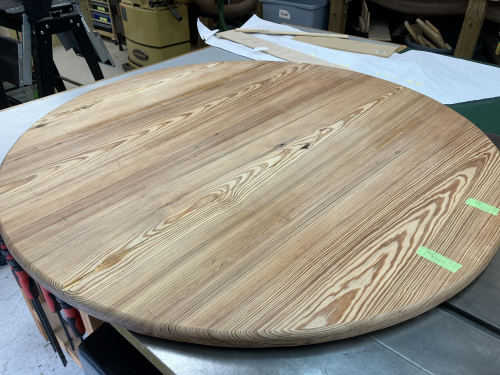
After the blank was round...used heavy duty
1/2 inch shank Amana round over bit to break the
edge on up and down sides...had to clean often.
|
 |
| Top and bottom edges routed... Robert started looking for a pedestal...did not find one he liked. We considered making legs out of cutoffs from the pine. They were just too short. |
 |
|
Legs
and Apron
|
|
| We brought down some pine from
the attic. We ripped 1.5 x1.5 strips off the
edges...working for best grain. At jointer and planer we
reduced them to about 1.25 inch square. End grain was not pure diagonal...not all faces will look the same. |
 |
| At the P66 with the tapering jig...we tapered the legs at about 3/8 inch total...leaving around 6 inches squared at the top. | 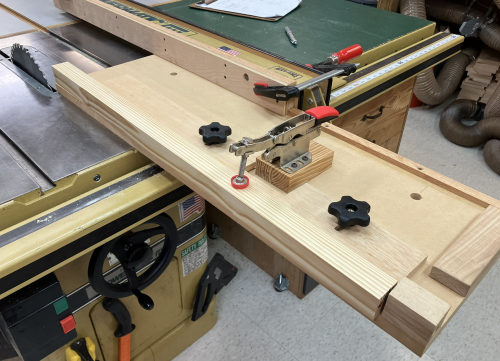 |
| Robert bought radiata pine from the Orange BORG for the aprons...here he is putting Domino mortises on the ends of the apron...4 x 30. | 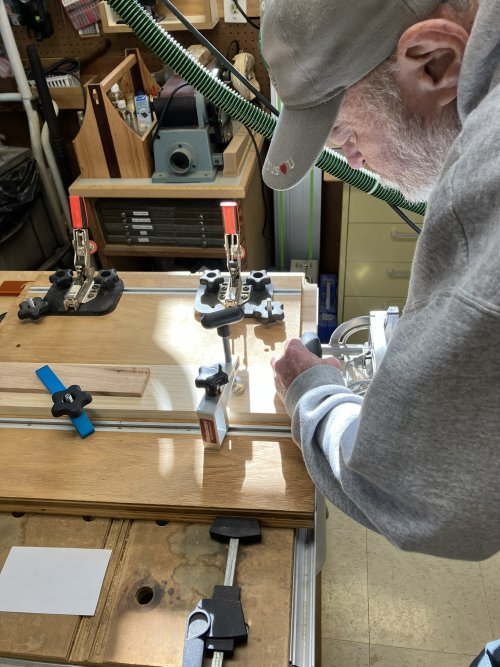 |
| Legs and aprons joined... | 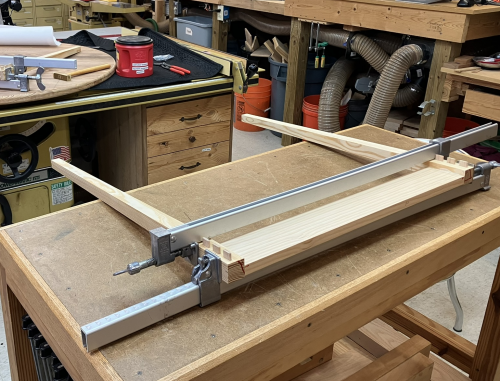 |
| Full apron/leg assembly...a dry fit. | 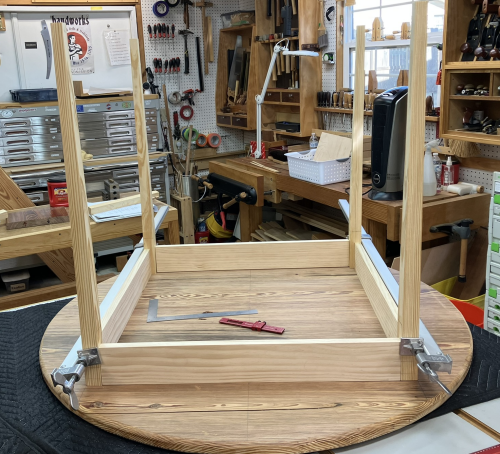 |
| Apron to table top fasteners...we opted for figure 8 connectors. Drilled holes the depth of the washer...at drill press for some...hand held drill as needed. | 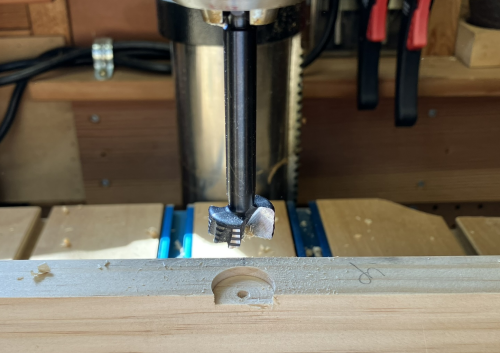 |
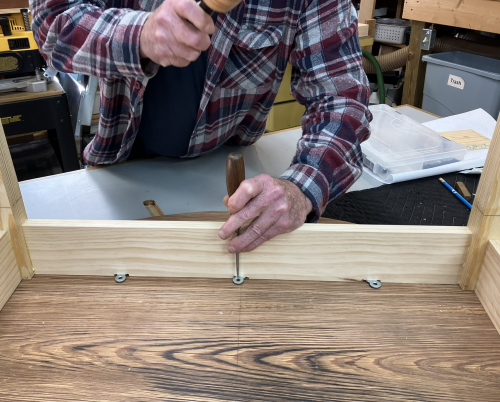
| Screwing in the figure
8s...allowing for some movement...chiseled out edges as needed. |
 |
| Apron and leg glue up. | 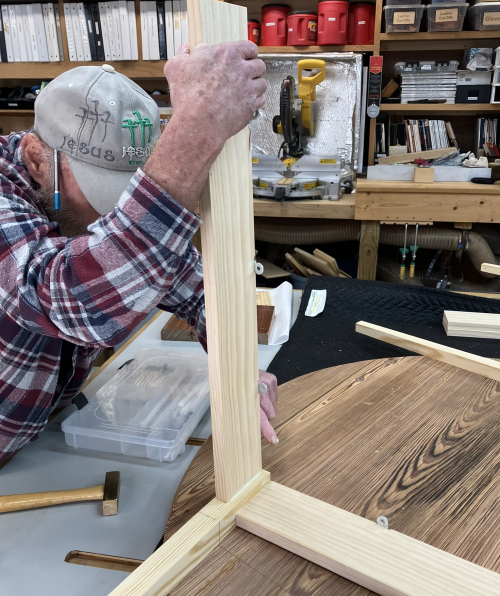 |
| Marking for holes to drill for
screws. Used 1 inch #6 square head screws. |
 |
|
Recovery
|
|
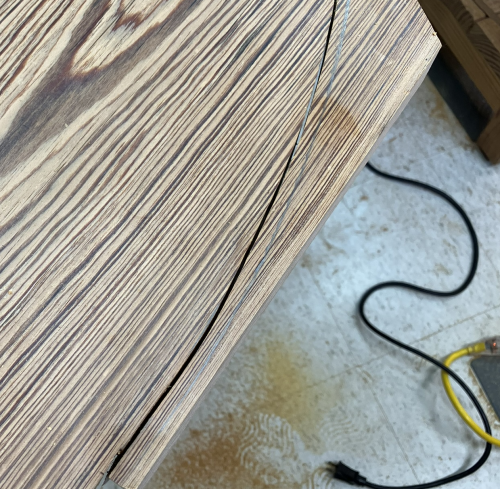
| Robert took the apron and legs to
the house...then moved the table top...there was an accident...a
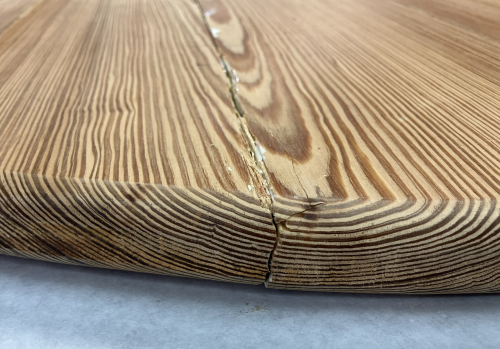
disaster. The hardest pine I thought I had ever seen was suddenly broken into four pieces. We assessed the cracks...nothing broke along our Domino-glue joints. Failure had occurred along a resin seam and in some of the wider cathedrals. Wood breaks before glue... |
 |
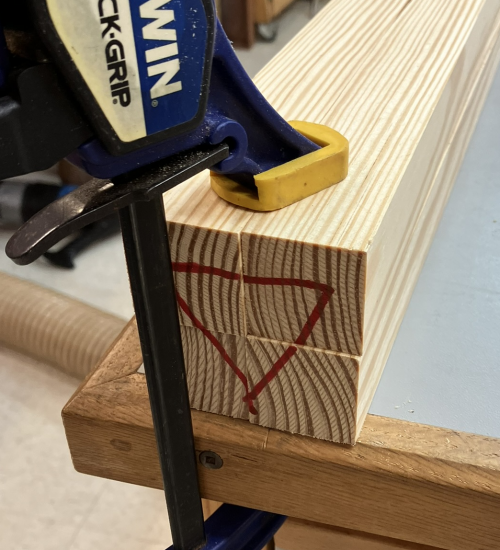
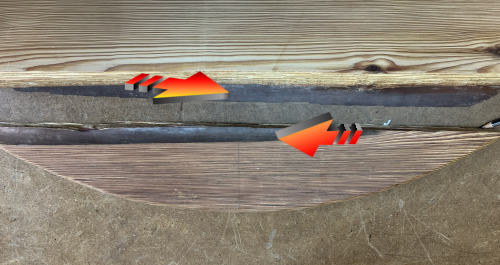
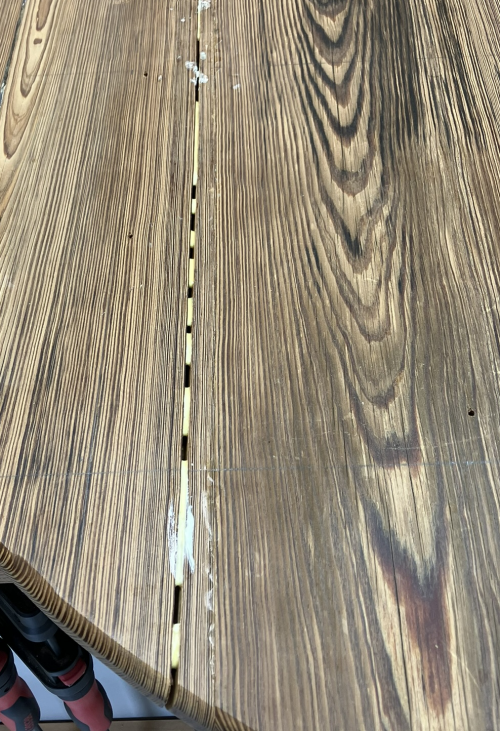
| There were some odd faults in the
pine slab. For example there was spot that I can only
assume was some kind of resin. The slab broke right down this line. The arrows point out the resin runs. |
 |
| We decided to try and glue up the
3 cracks. First would be the two largest pieces...the two
edges were the worst cracks in the bunch. We put in 8mm x 50mm Dominoes indexed 16mm down from the top show face.... |
 |
| ...mortises were tight in the outer plate...loose in the inner plate...we later changed it to full loose. | 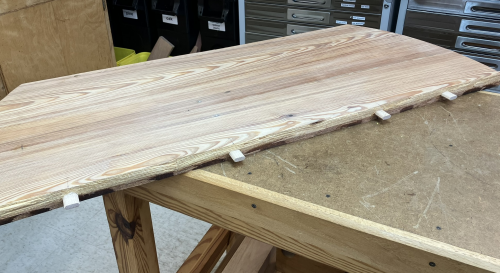 |
| We took couple of dry runs to
make sure we could line it up properly...and that we could clamp
it properly...it is virtually impossible to get good clamping
with a round object. So we used a sacrificial board on the left here...on the right we clamped the circular piece to the top of the P66 / outfeed. Then we used the outer edge of the of the outfeed table for the right side clamp. |
 |
| We glued up the pieces...super wide Domino slots show here... | 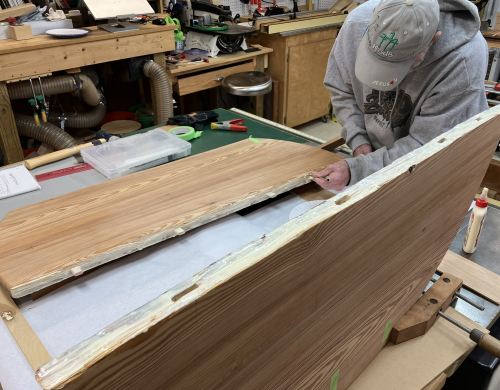 |
| We used a single clamp to close the cracks... | 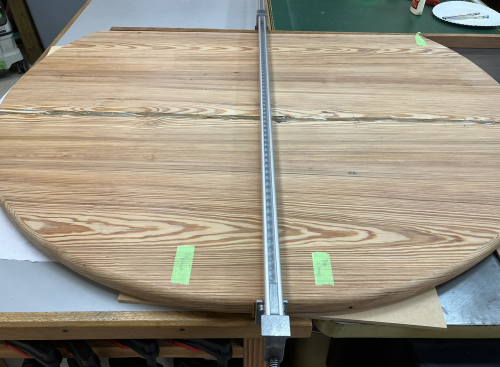 |
| We moved the pad slightly to adjust left-right as needed... | 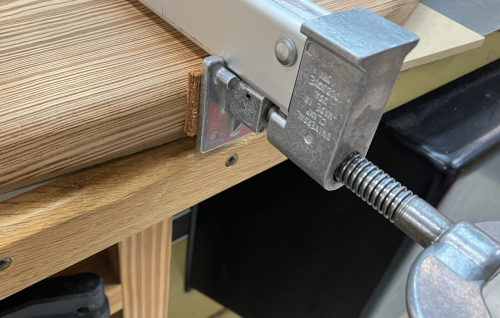 |
| ...and we used Estwing 24 oz
mallet as needed to adjust the side cracks... |
 |
| Opposite edge... | 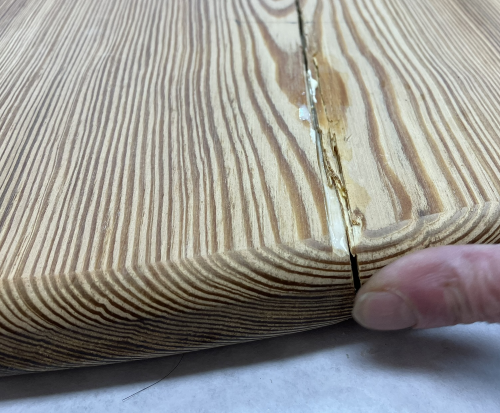 |
| We then secured the slab to the outfeed table and P66 with 2 Bessey clamps... | 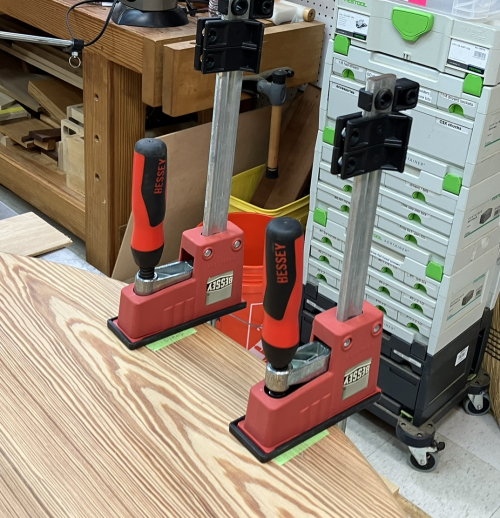 |
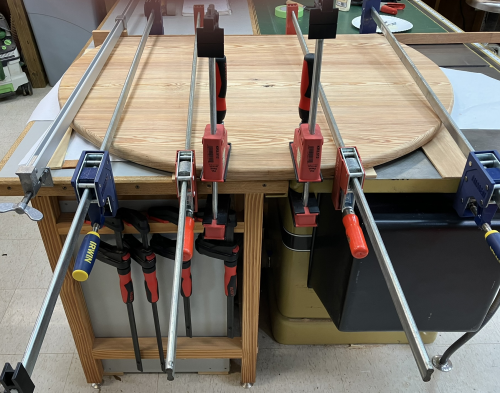
| And finished off with five long
clamps...first glue up is complete...this is the big slab. |
 |
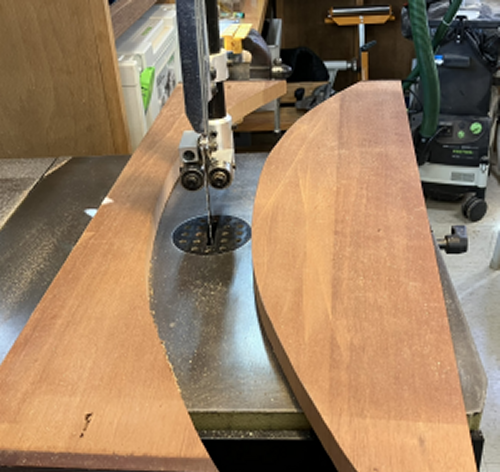
| To put the two smaller pieces
together to form the small slab...we needed a easy way to clamp
the circular side. Marked off the arc onto a board and cut it out on the band saw... |
 |
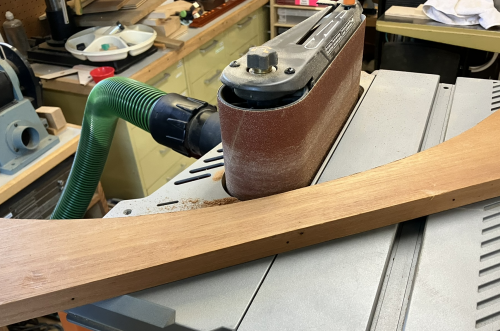
| Milled it to fit with Ridgid
oscillating sander. |
 |
| Pressed against the circular piece, it provides a clamping surface. | 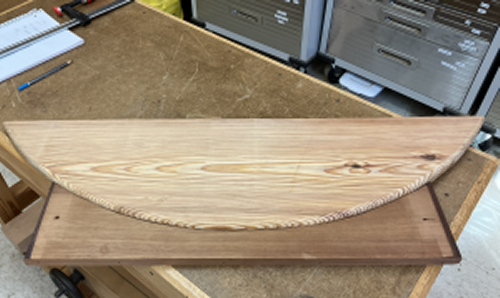 |
| The larger piece was clamped to
the assembly table... |
 |
| On the resin sides we only used one 8mm x 50mm Domino...we were concerned about how the resin seam would hold...you can see the seam in this image. |  |
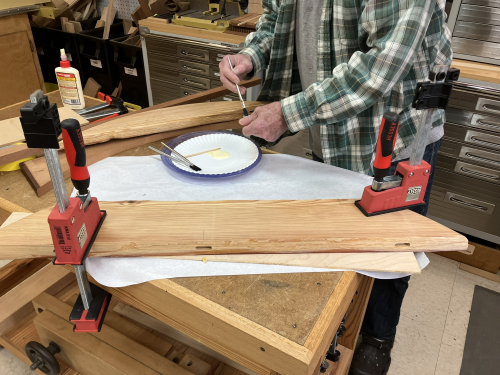
| Then we test fit the arc
stop piece, used a sacrificial clamping board on the raw
edge, and then dry fit the clamps. We had plenty of
clamping power available... |
 |
| We sanded the resin seams in preparation for epoxy. | 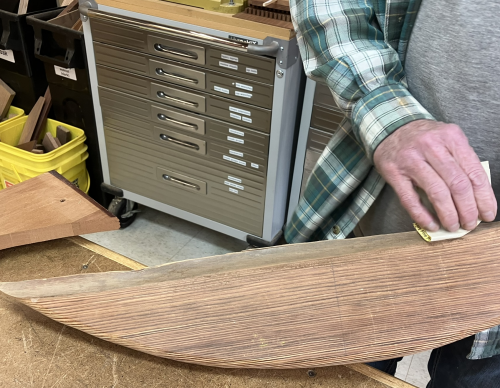 |
| For the glue up...we used wood
glue on the regular grain and epoxy on the resin seams. |
 |
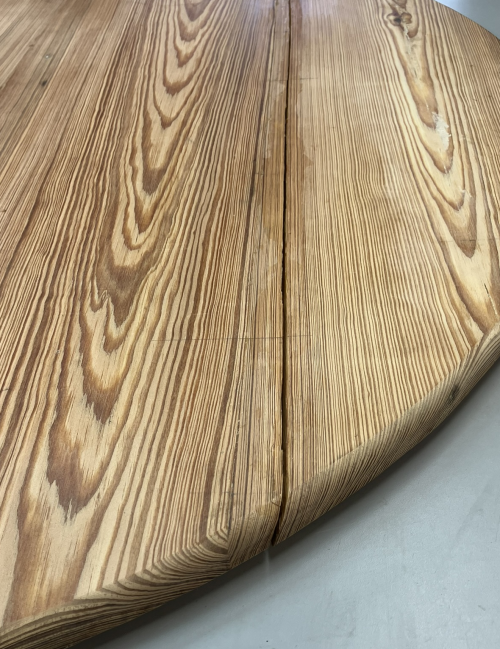
| The final glue was the large and
the small slab...there were weird angles in the crack...we had
to be very careful when indexing the Domino off the top face...try fit looked good...one Domino was really tight... when we were gluing up one edge did great but we simply could not close the crack at the other side...something was binding up...we ended up with an not closed crack...it will have to be epoxied. Top side |
 |
| Contributing factors...long clamp
reach onto round edges...crack surfaces were angled...there was
a tiny domino remnant from the original glue up...we might
should have removed that hump...working around it caused us some
grief. Our lock down hold on the slab was not near as effective as it had been on the clue up of crack #1. All of these things were factors... Bottom side |
 |
| Poor joint...bottom side |
 |
| Poor joint...top side Hoping the cracks do well with epoxy fills... |
 |