|
We designed and built a
safety ramp for Cheri.
Decking, Posts,
Rails, and Balusters 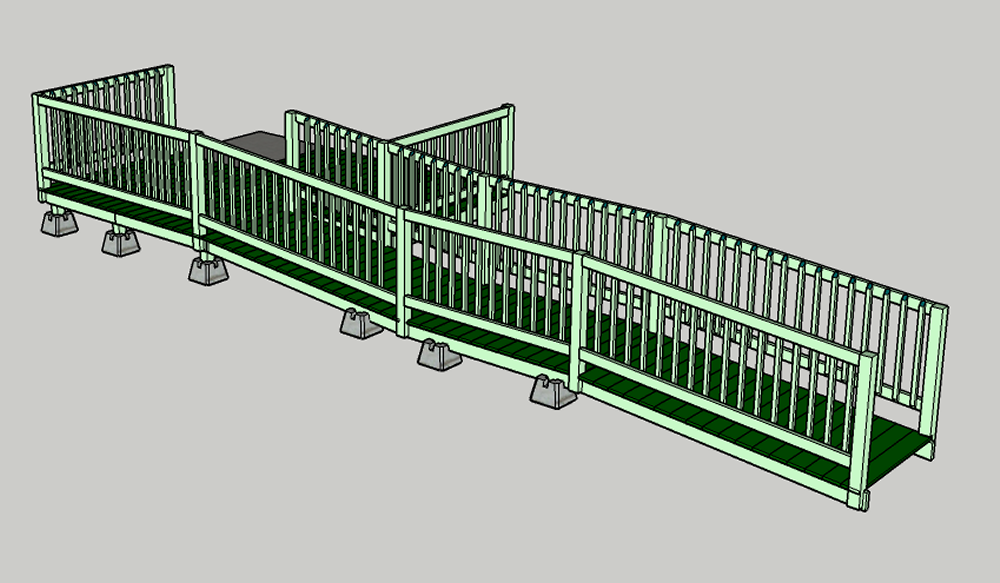 |
|
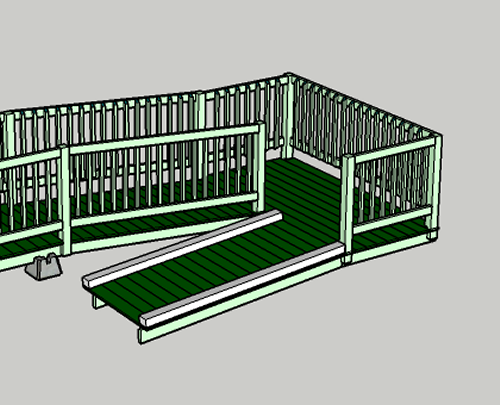
The safety ramp must be usable for a person walking, walking with a walker, being pushed in a wheelchair, or riding in a power chair. All basic design features must meet ADA specifications. Most importantly, the ramps must safely drop the elevation to ground level. This means a level deck at entry point...then a sloped ramp...then a level rest deck...then a sloped ramp. |
|
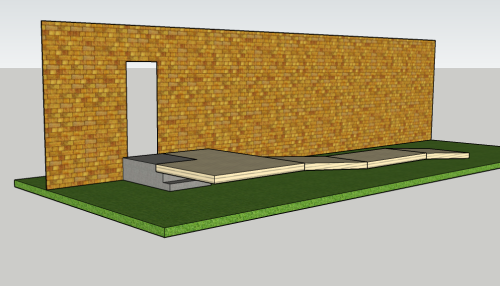
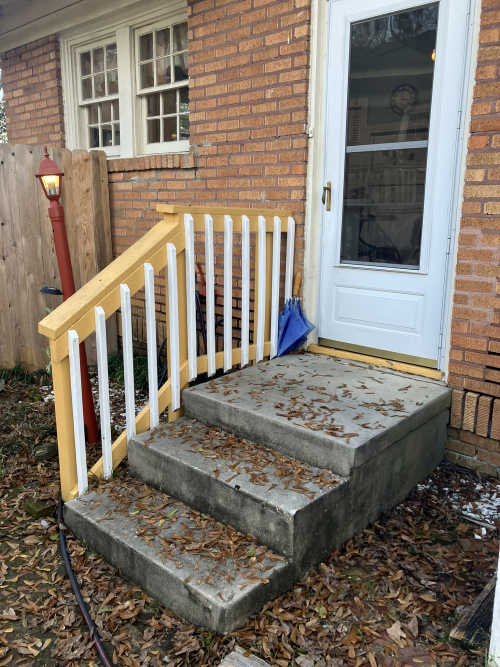
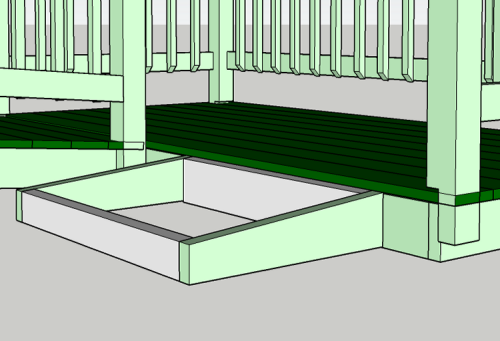
| The house is up on a conventional
foundation...the entry point will be the back door...it has a
concrete pad outside the door... decking will be built to
cover this slab. The slab is not a consistent height, nor are the sides perpendicular to the bricks. This top step is over 18 inches above grade. |
 |
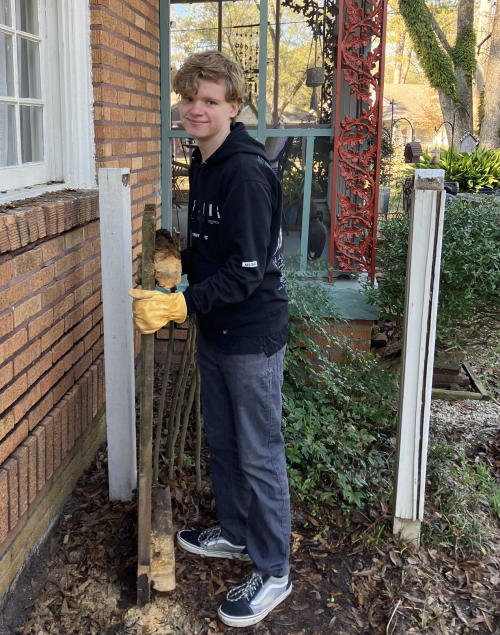
| The garbage can trellis and
decking will be removed and posts will be removed. |
 |
| The deck was removed...Silas and
I cut it into sections with reciprocating saw. |
 |
| Silas removed the posts. |
 |
| This shows the decking covering top of the slab...and the decking would extend to the door. | 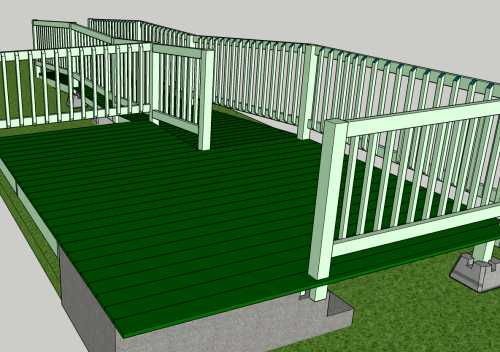 |
|
|
|
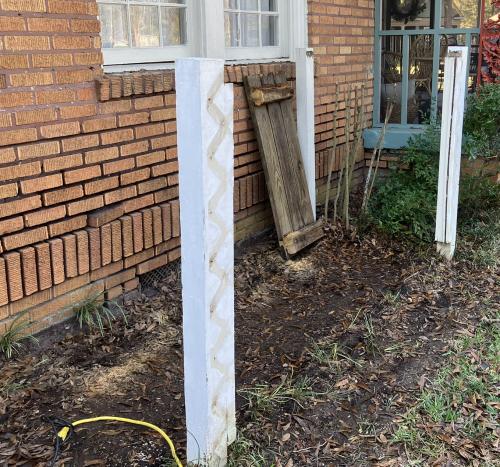
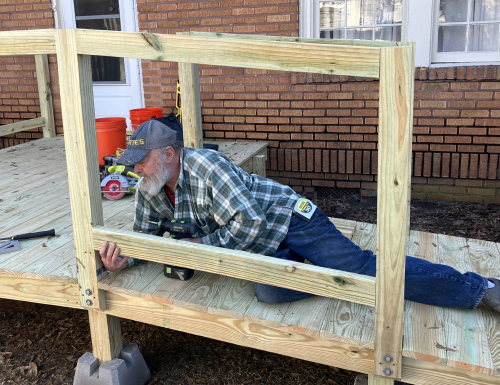
| The original handrail had to be removed...Silas and I cut the balusters and removed all material except the posts. |  |
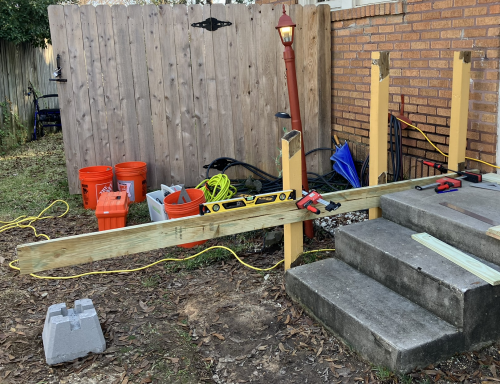
| These posts were stout...they will be retained and used to support the alpha joist. | 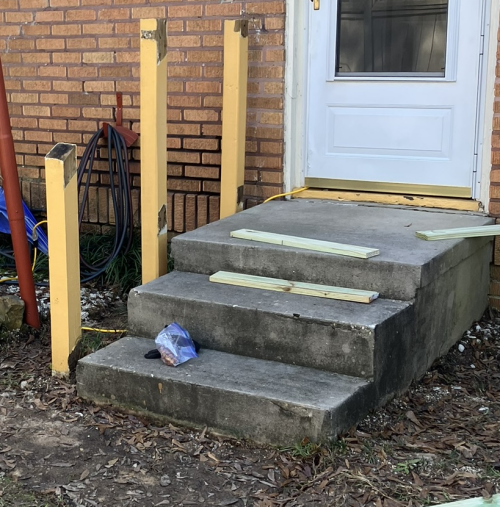 |
|
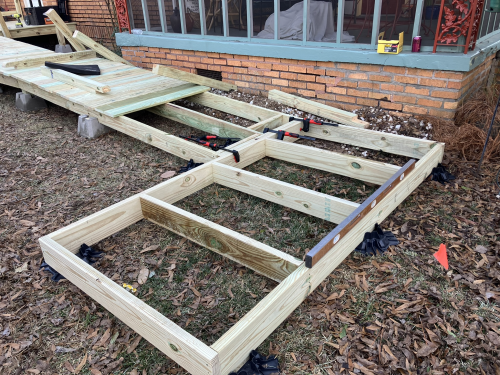
The alpha joist was clamped to
the posts to establish the elevation of the decking.
|
 |
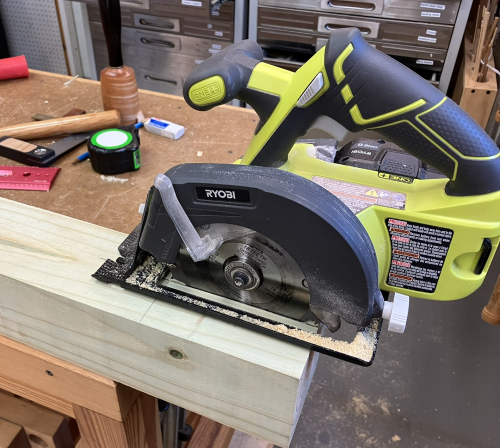
| The tops of the post were cut at
1/2 inch below the rim joist height. There was very little room here...first cuts were made with circular saw. |
 |
| Finished with a reciprocating saw | 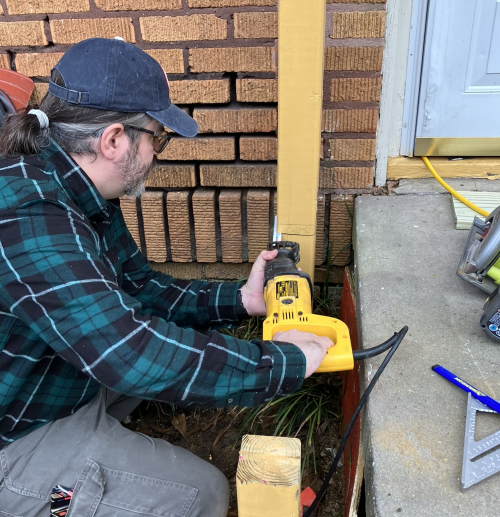 |
| The joist will be placed between posts and steps... | 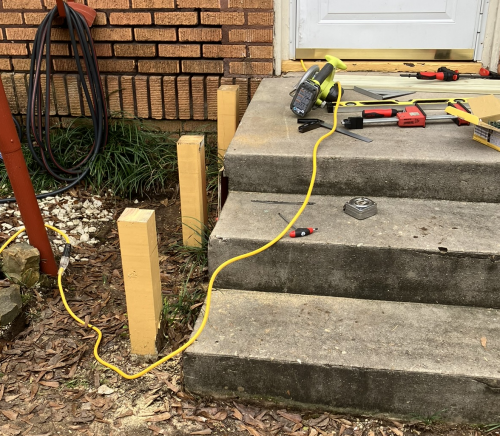 |
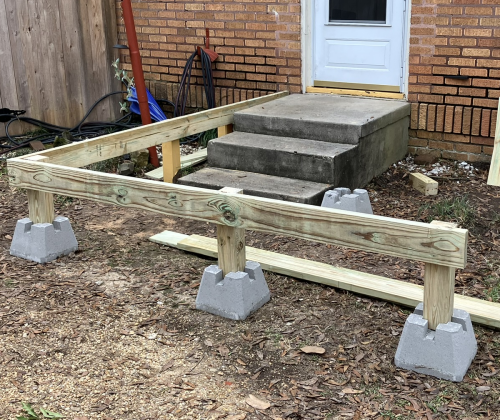
| Alpha joist installed...gamma rim
joist made level... concrete pier deck block...wood platform height on the concrete block is 6 inches |
 |
| Looking down from the door frame...the alpha nailer board, a 1 x 6, was secured from outside of the alpha rim joist |  |
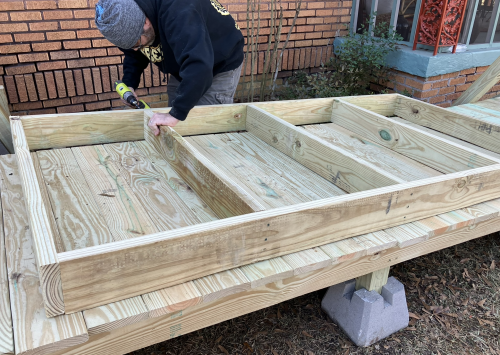
| beta joist installed...laying
decking |
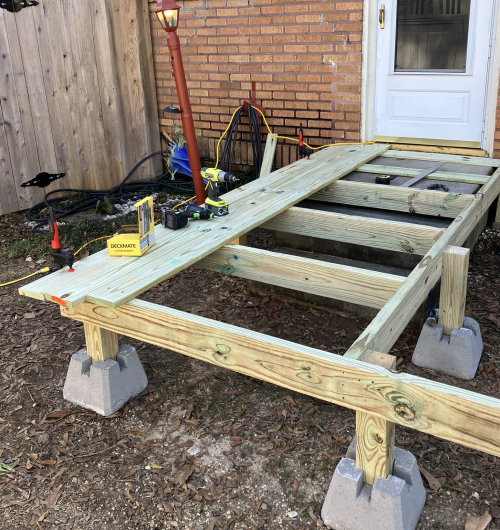 |
| view from inside the house... | 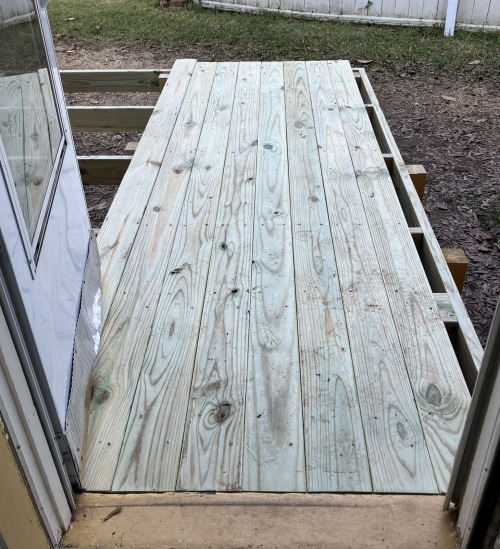 |
| A second section of joist... | 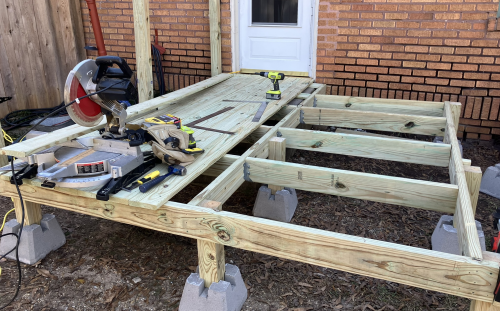 |
| Main upper deck done...Aimee came by | 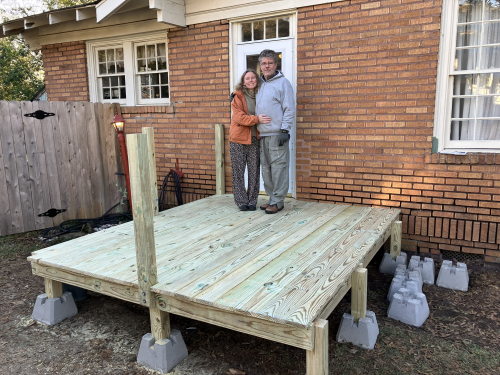 |
| Nee dropped by... |  |
| Max and George | 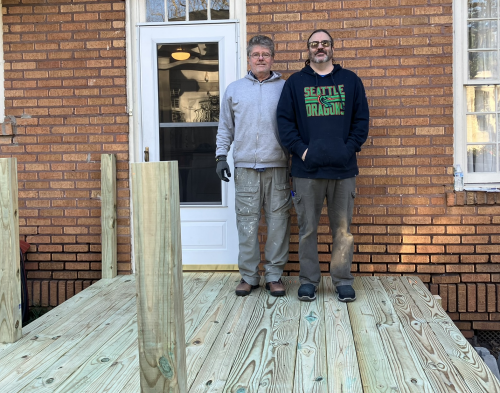 |
| laying out the 5° angled joists for the first angled ramps |  |
| Elevation drop of 8 inches...in 8
feet |
 |
| Decked...after examination we found that the ground elevation drop was more that we thought...our elevation drop on the ramp was dramatically altered because the ground was running away down hill. | 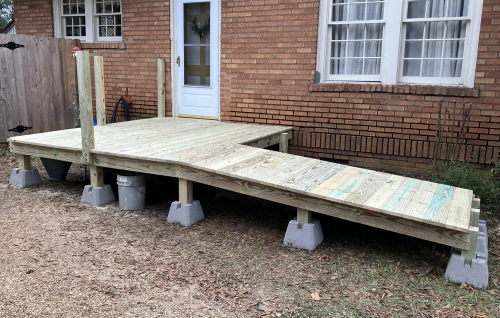 |
| We will probably have to build
one more ~8 ft. down ramp...and there must be a horizontal rest
ramp...the most effective finish will be a u-turn and a final
ramp that loses elevation while the ground gains elevation. |
 |
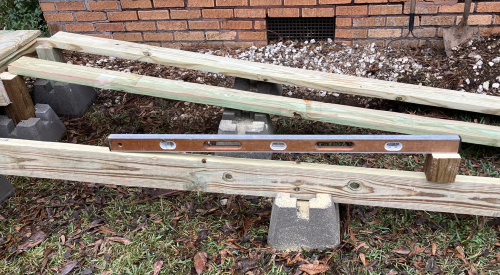
| On site, we made some changes to
try to accommodate the length of the ramp... first we shortened the rest area by two feet...to 4 feet...and lengthened the final down ramp by two feet...to 10 feet. Here we are measuring the angle of the down ramp...Max made a clever assist...5° and 4 inches...used with the 4 foot Sands level this shows our 5° angle as level |
 |
| In this upper section the joists
had to ride in the 2 x slot...the wood platform of that block is
6 inches off ground At the bottom the joists rode in the plastic block...2 inches off the ground |
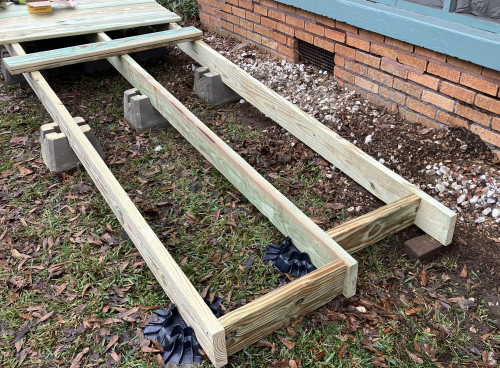 |
| BuildTuff TuffBlock polyolefin
plastic deck block block platform is 2 inches off ground |
 |
|
Adding decking
|
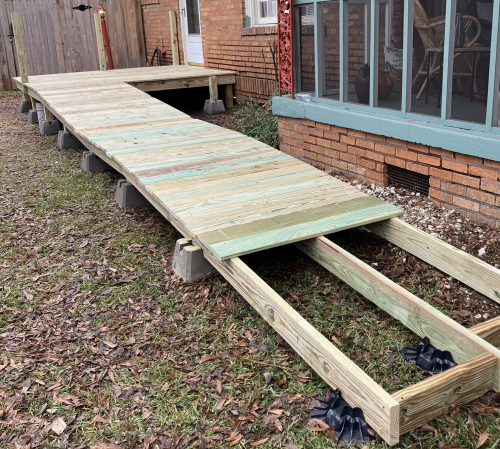 |
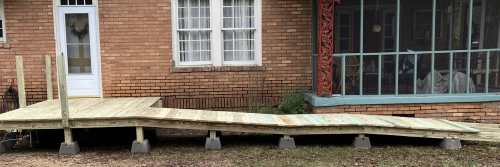
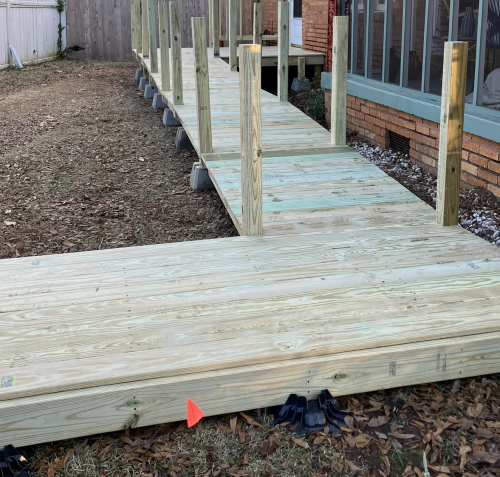
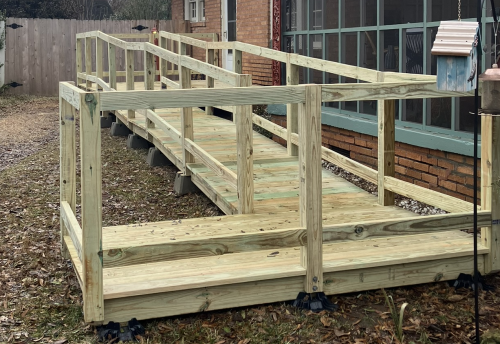
| Side view...8' x 10' upper deck
> 4' x 8' down ramp > 4' x 4' rest area >
4' x 10' down ramp... |
 |
| At the bottom will be a 4' x
8' turn area...the ramp should be low enough that it could
be used without hand rails...4 x 4 bumpers would be used. |
 |
| Built the lower section as a
unit... |
|
| Installed lower section and laid
joists on TuffBloks. |
|
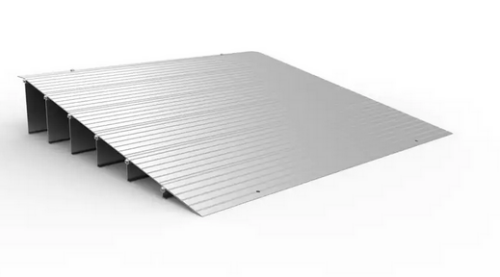
| The selected option uses an aluminum threshold ramp... 34 inch wide, 6.25 inch high, 32.75 inch out | 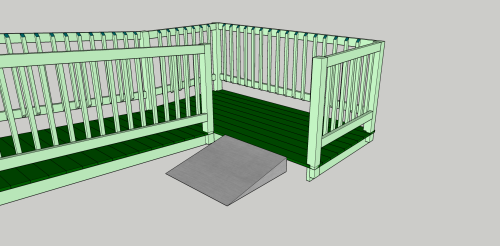 |
| Image of the aluminum ramp. |
 |
|
|
|
|
The posts |
 |
| The rails...upper and lower...2 x
4 stock |
 |
| Balusters added |  |
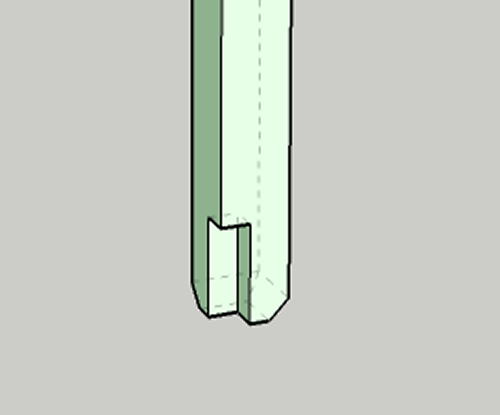
| The post will be milled with a rebate that has a 5 inch cheek up from the bottom and 1.5 inch shoulder...there is a 45° chamfer on the bottom outer edge. | 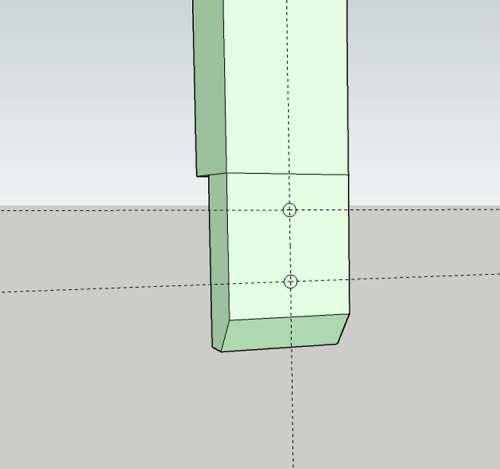 |
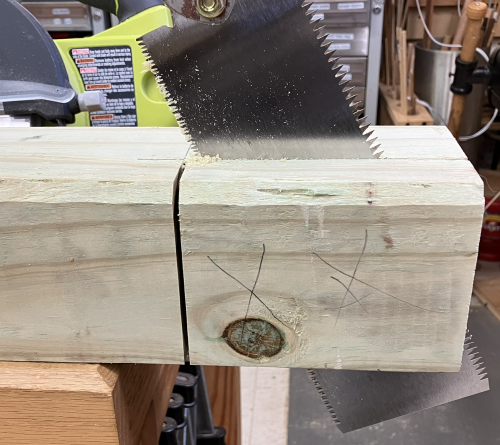
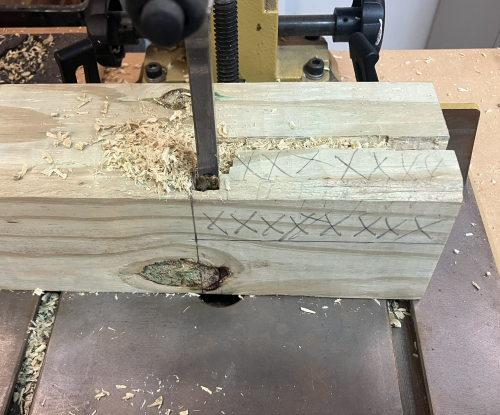
| Started milling the posts...gang
sawed the shoulders at 1.5 inch deep, 5 inches from the
bottom... |
 |
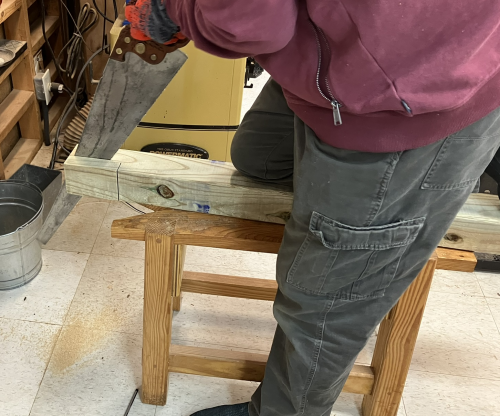
While prepping the bandsaw to cut the cheeks, there was a catastrophic failure on the tensioning device...no longer serviceable... replacement part ordered. Looking for solutions...hand sawed the cheeks |
 |
| Tried jig saw with a long post cutting blade...too aggressive...followed grain too easily...not an option. | 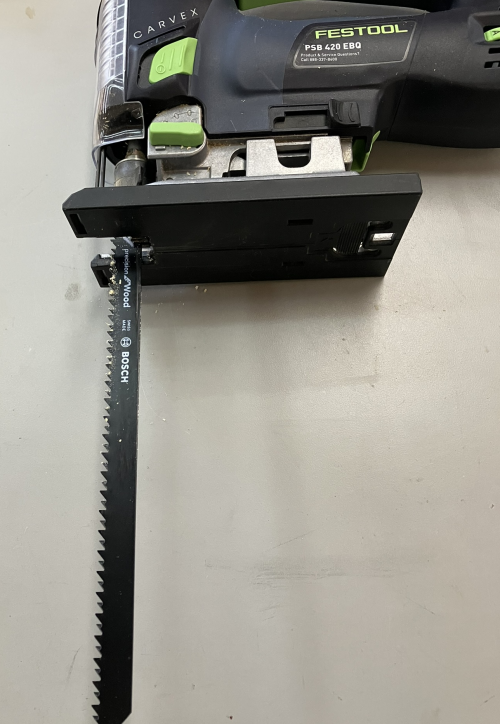 |
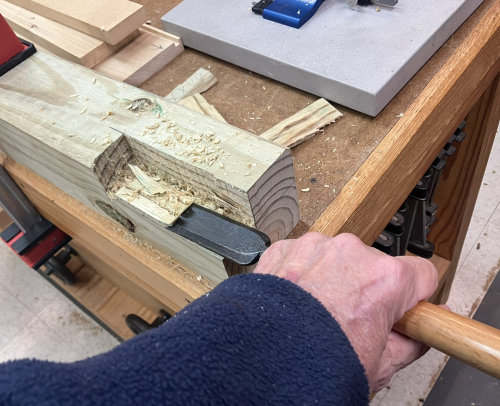
| ...later opted to cut cheeks with circular saw and finish
with hand saw.... |
|
| this left wood in the
center...sawed that with Ikidame Ryoba handsaw...and then
cleaned the rebate with Nishiki kinari. |
 |
| Put the 45° chamfer at the chop saw... | 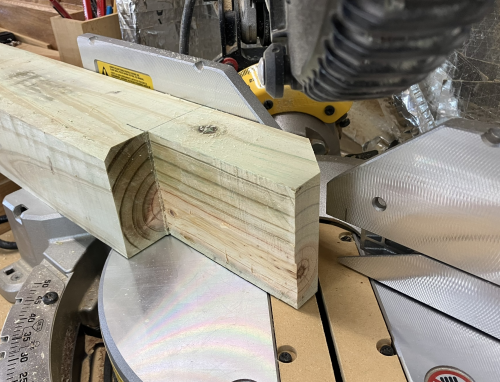 |
| The corner post is unique...the
unicorn... |
 |
| Removed the cheek lines and the
shoulder line with mortiser...depth of 1.5 inches |
 |
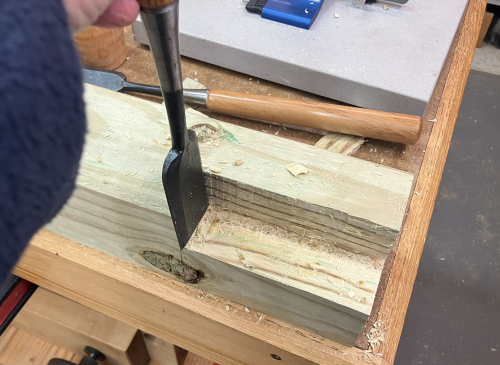
| Then knocked out the center block
and cleaned up the rebate with 35mm Nishiki kinari and a mallet. |
 |
| Pared shoulder and cheeks with
42mm Nishiki |
 |
The rails were pocketed with the Kreg jig. The rails were screwed in with the outside face coplanar with the outside faces of the posts. |
 |
| The first rail... | 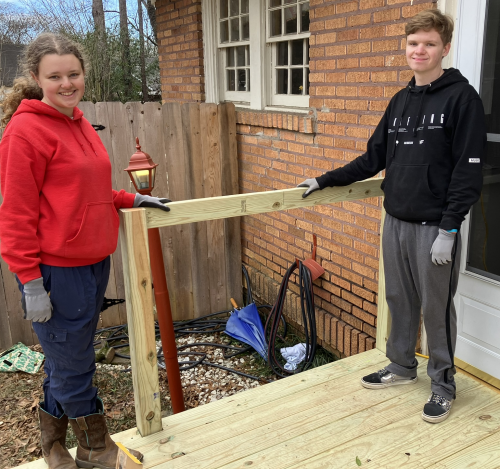 |
| Baluster install screwed in with 2 inch...Silas holds the CTD 4 inch spacer... | 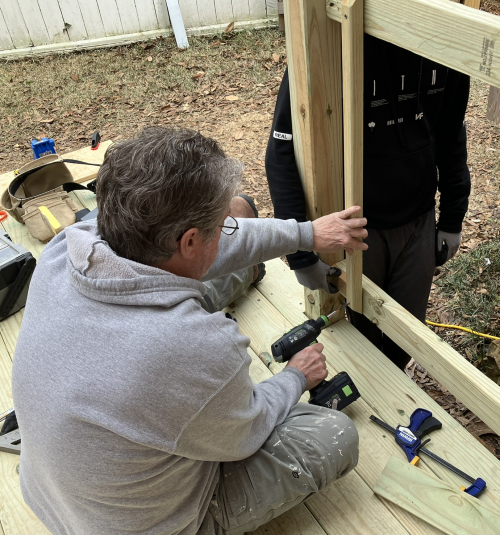 |
| Balusters run from the top of the upper rail...to the bottom of the lower rail | 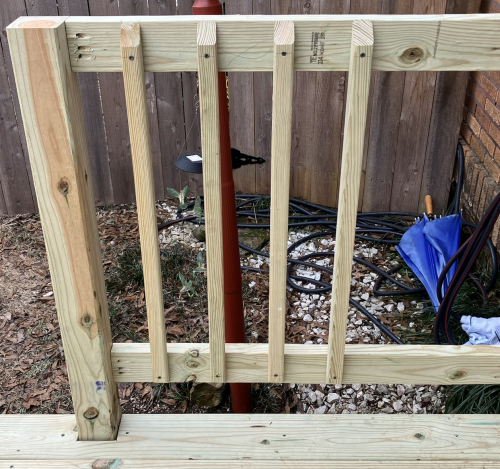 |
| Made the BORG balusters shorter...two 45° cuts to make ends look good. | 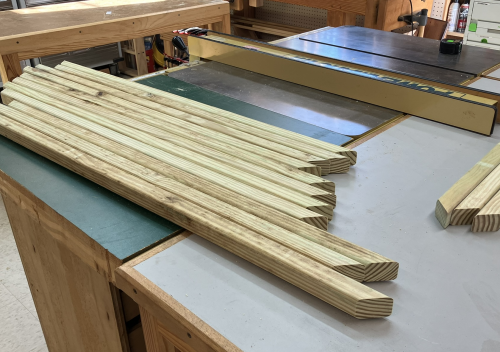 |
| Angled stop block set up... | 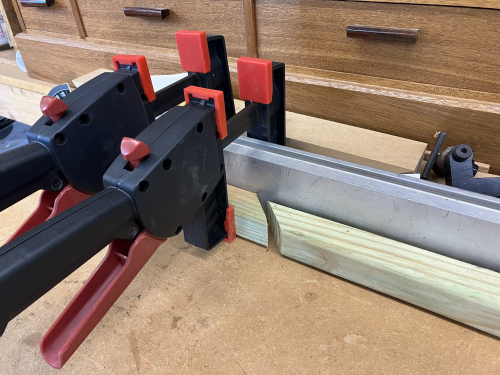 |
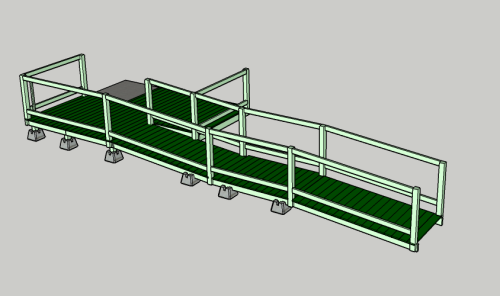
| With the decking almost done...the addition of posts (3 unicorns and 12 regular posts) rails (30 plus) and balusters (120+ more) begins. |  |
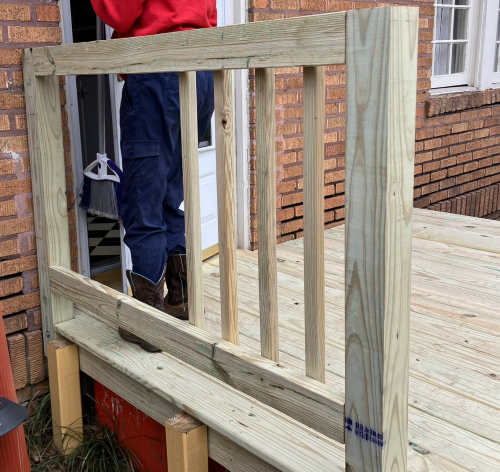
| Posts installed...looking down ramp | 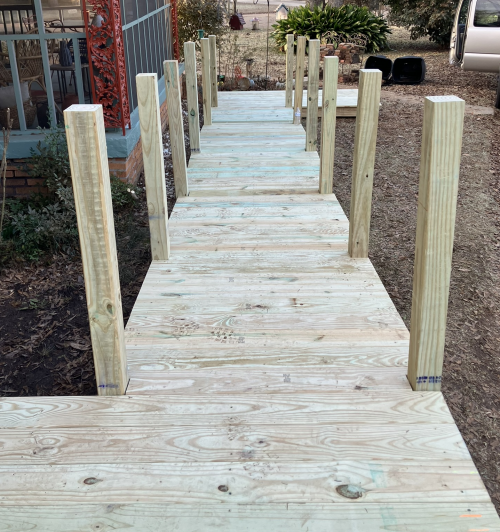 |
| Posts...looking up ramp |
 |
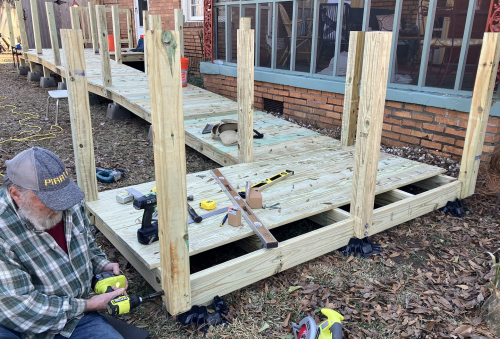
| Max and I got up almost all of
the posts...Robert and I finished them up. |
|
| Robert is installing the lower
rail on a down ramp... |
|
| End of a wonderful
day...temperature was much improved... Almost done...have nine more rails and two re-milled deck boards. |
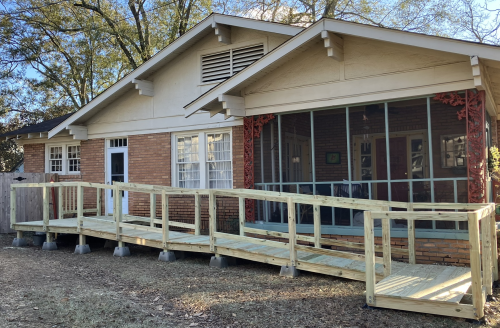 |
| Done with decking and horizontal
rails...all looks good. |
 |
| Phase One Complete...decking is
all in and stable, all upper and lower rails are in. Ramp is safe and can be used at this time...with caution. 140 feet run...will go to 142.5 feet when done. |
 |
|
Phase Two balusters will be finished, garbage can area designed and installed, aluminum threshold ramp transition to be
installed, top hand rails installed.
|
|
| We decided that an aluminum
threshold ramp would be easier to configure that a wood
disappearing ramp...so we ordered one. The EZ-Access threshold ramp was decently made and horrifically packaged...clearly zero quality control. We received no manual, no hardware, and an incorrect part. Truly unacceptable. |
Here is the
manual. |
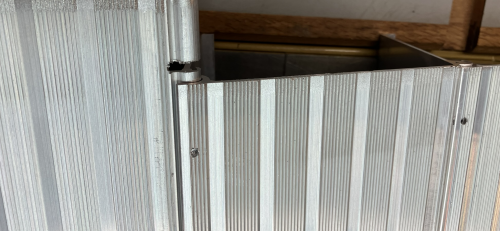
| There are six pieces of threshold that slide together at their roller joint | 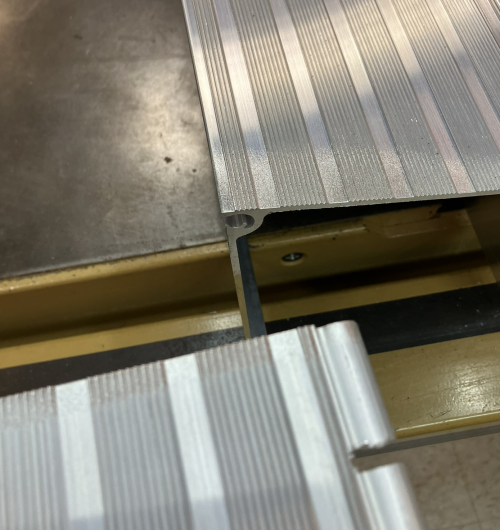 |
| The panels then slide across the unit. | 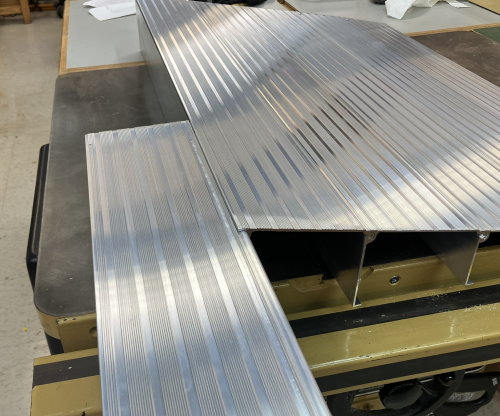 |
|
The far side has a slot that
is milled to be below a pre-drilled hole...for the hardware
that we do not have...
|
 |
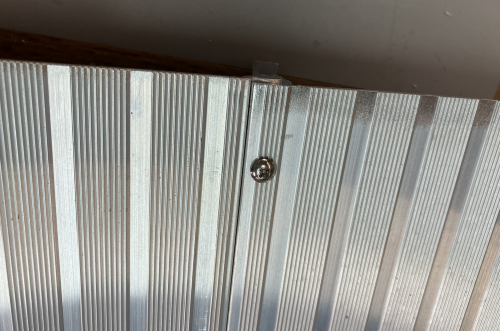
| Here is a screwed down
seam...three of the panels had these screws already installed. My guess is someone sent this one back and it was never checked. |
 |
| Here is the greatest issue...the flaps start at one inch and progress upward to six inches...this unit however, came with no number 6 flap...it had two number five flaps. | 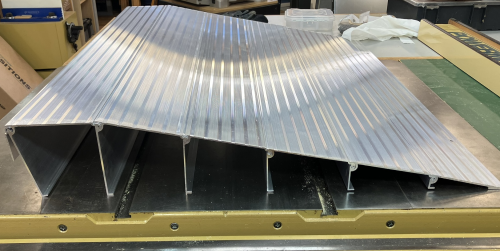 |
| Sending this unit back will be a huge time killer...so analyzing, it seems we will make do with this set and make up the difference in height... | 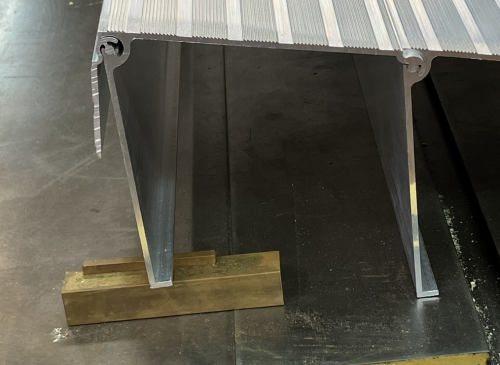 |
| We will extend the flap plate to lie on our decking...and will work out a plan to secure it to the face of header joist. | 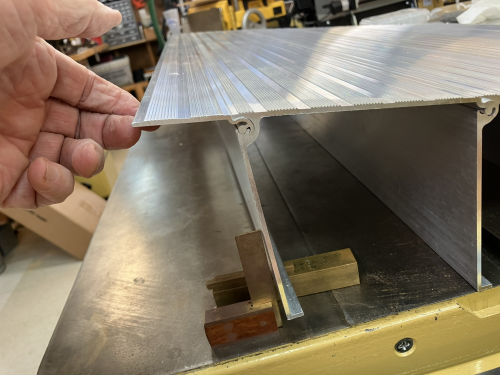 |
| The height of the decking at the
rest area at the bottom of the ramp is ~8.5 inches. The 2 x 6 joists are resting in a TufBlok, the lowest joist rest is two inches off the ground, plus 5.5 inches of joist, plus 1 inch of deck. |
 |
| The connection of the threshold ramp to the wooden ramp....this will occur with transitional two foot ramp added to the lower level rest area...there is a 1.5 inch lip on the decking material. |  |
| There will be a 2 x 6 hanger
joist, attached to the rim joist...5° bevel along front edge. |
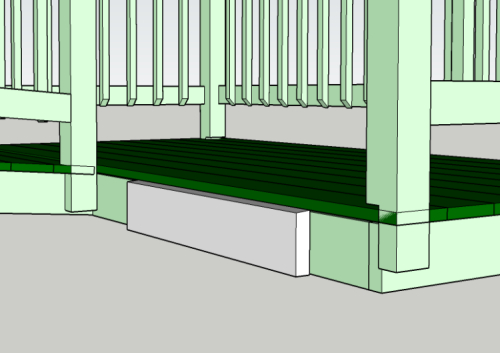 |
| The two side joists will be cut
with 5° down slope...two feet+ will gain an elevation drop of 2
inches + The underside of the side joist will be ripped so that they end only with 3.5 inches of wood...the 2 x 4 head joist will be beveled at 5° |
 |
| The planking-threshold connection will made to ease the transition. | 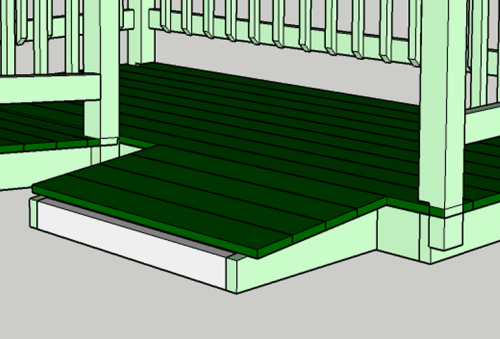 |
| Milling the side joists for the 2
foot extension... |
 |
| Unit installed onto lip of
extension...have to rip the last plank of decking. |
 |
| Wanted to get a screw through the
plate into the joist...moved flaps to do this... |
 |
| After install of transition ramp
we had our first test with the wheelchair. All went
well...the U-turn deck is a bit tight...decided to add small
"bumpers" on the wooden extension. |
 |
| Completed extension and
transition ramp...lower deck complete. The aluminum deck makes a total of 42.5 feet of ramp and deck. |
 |
| James and I put horizontal top
rails on the upper deck and the lower deck. We had to use CTDs to determine where to cut 45 angles. |
 |
| James used handy object to mark a
curvature to saw off with jigsaw...to ease a corner. |
 |
| Final step is to complete
balusters...100+ milled and ready for on site milling and
install... |

|
| James installing balusters... |  |
| Silas and Asa...he is drilling holes |  |
| Asa and Silas mounting balusters. |
 |
| Aimee, a great supervisor. |
 |
| Upper deck area... |
 |
| Full upper deck view... |
 |