Daddy has a plane problem...
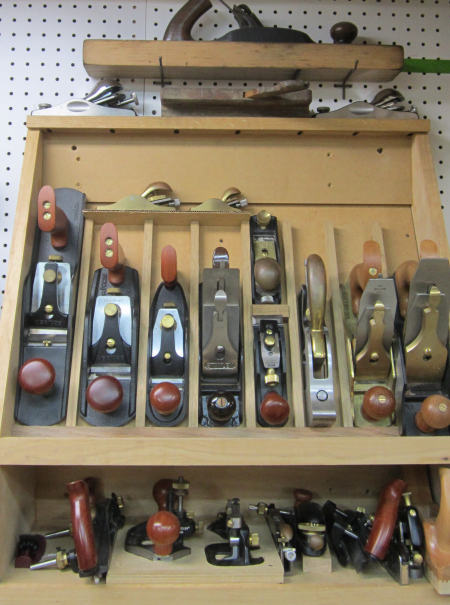
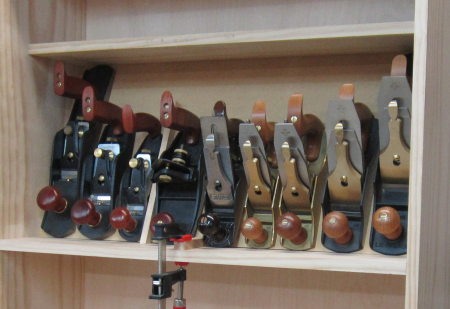
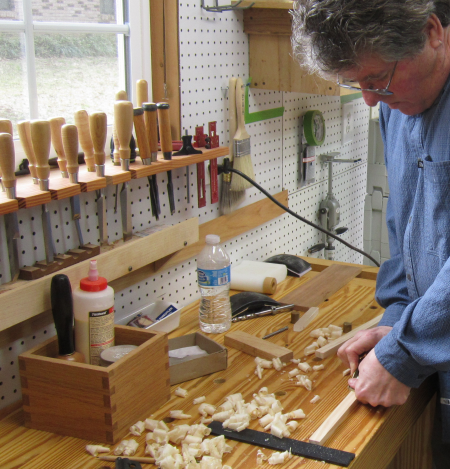
As shown in the image above ...the plane till that I built has filled up. I started the design and built this unit soon after purchasing my first quality bench plane.
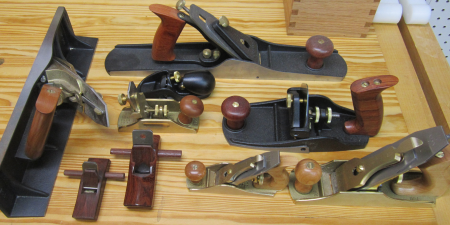
A new till would need to hold all of the planes in the original till plus the planes in the picture above...except for the LN51. It will probably remain stored under the bench due to the extreme weight. Based on the need to properly store this plane population...the PTR is born...Plane Till Redux. Work on plane till 2 will occur at the same time as saw till 2.
|
|
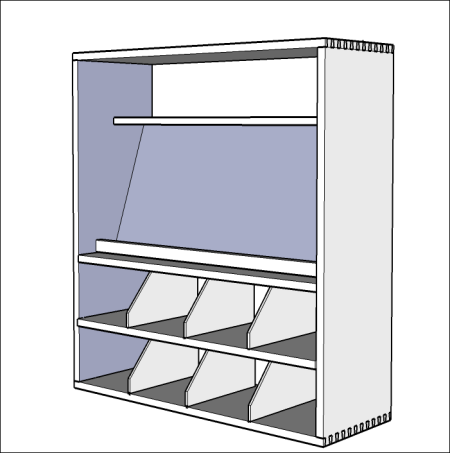
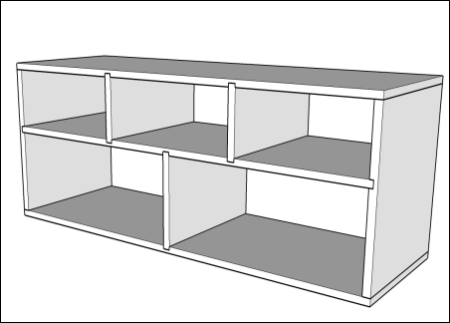
After deciding to migrate to a larger plane till I mocked up my ideas in SketchUp. The carcase will be 32 inches wide and 35.5 inches tall. Depth will be 11 inches. Wood will be pine. Lower two shelf sections will house specialty planes. The middle slant section is for bench planes. The horizontal shelf and top will hold the large #6 bench plane and some older vintage planes. |
 |
The primary carcase wood selected for the project was radiata pine. Pinus radiata is a natural product of California and is called Monterey pine. In its natural growth range the tree faces serious threats put it is cultivated extensively in many areas of the world. |
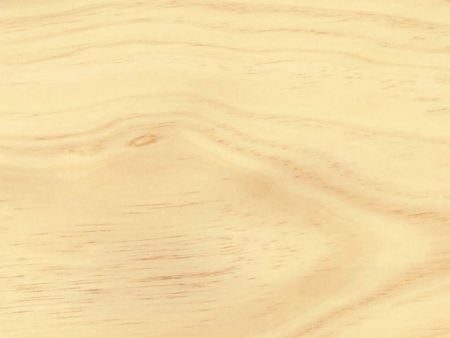 |
These premium grade boards, imported from New Zealand, were purchased at the local BORG. The nominal 1x12 board will provide 11 1/8 width. |
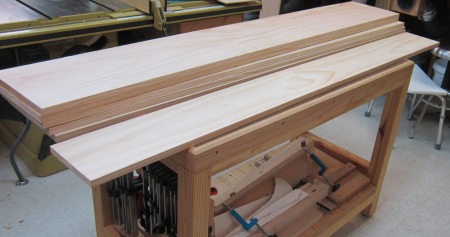 |
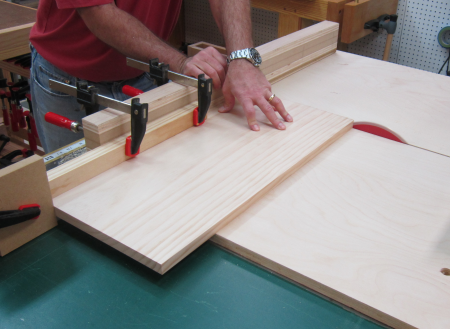
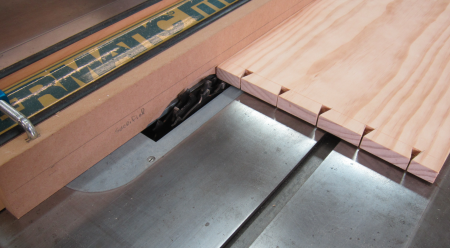
Because the boards were already dimensioned and surfaced they only had to be crosscut to have them ready for joinery processes. The boards were crosscut to rough lengths on the MFT table. |
 |
Then the boards were crosscut with the sled on the P66. A stop block clamp was put in place to make repetitive cuts easily. Playing cards were placed under the block at setup to provide spacing so that the block did not bind when the sled was pushed. |
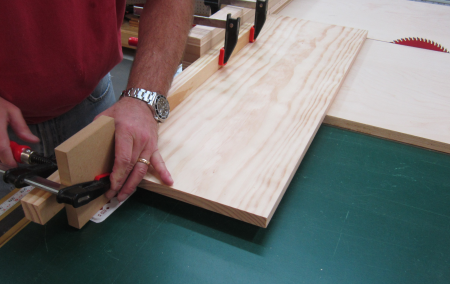 |
The stop block arm was also clamped to the fence to provide a secure hold down during cutoff. |
 |
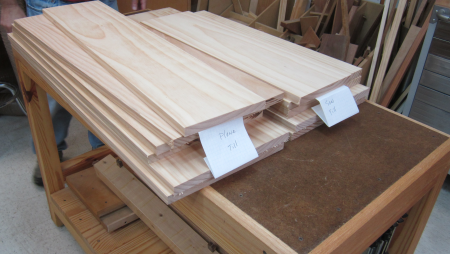
All of the wood for the plane till, as well as a new saw till, was processed. |
 |
After all pieces were cut to length, the dado grooves were routed. These 3/4 grooves will all be stopped at the front edges of the cabinets. The mirror pieces were cut at the same time to make layout simpler. |
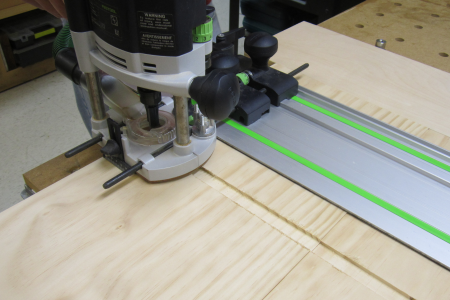 |
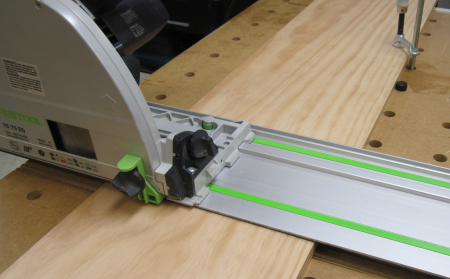
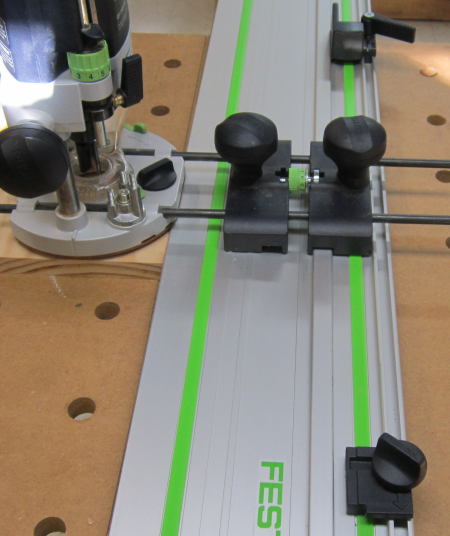
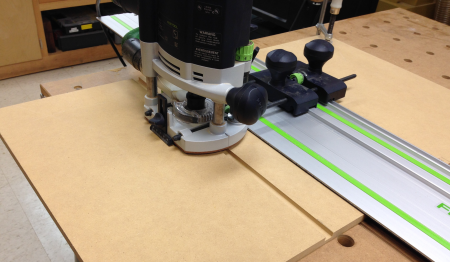
The Festool router was plunged to start the cut and lifted to finish the cut.
|
 |
The start and stop points of the routed groove were determined by two stops on the Festool guide. |
 |
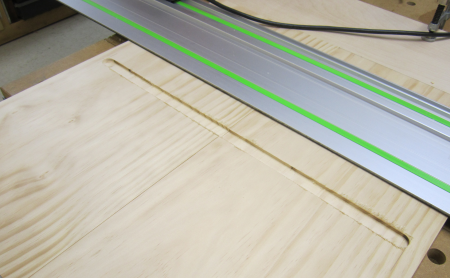
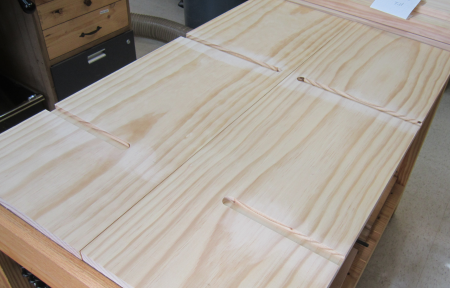
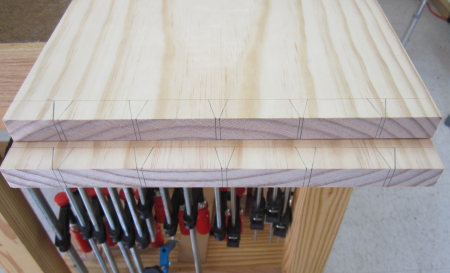
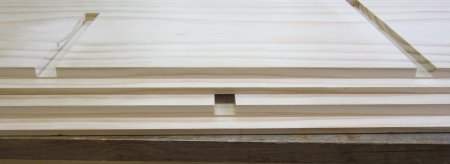
This image shows sides with both grooves milled. The longer groove is the dividing shelf. The shorter groove is for the top shelf.
|
 |
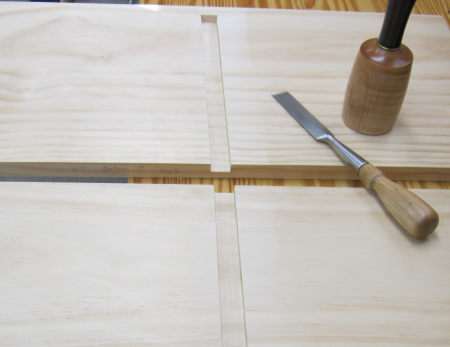
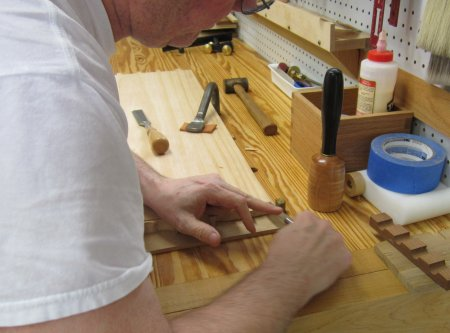
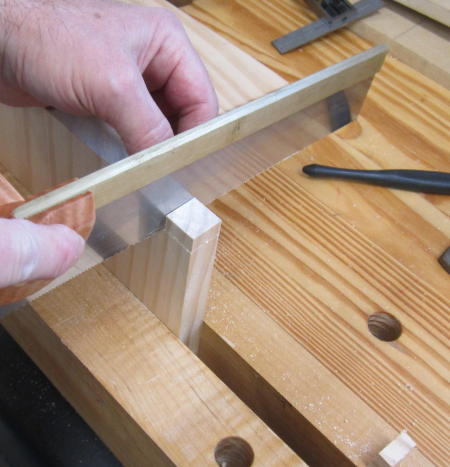
The stopped dadoes were squared off with chisels. |
 |
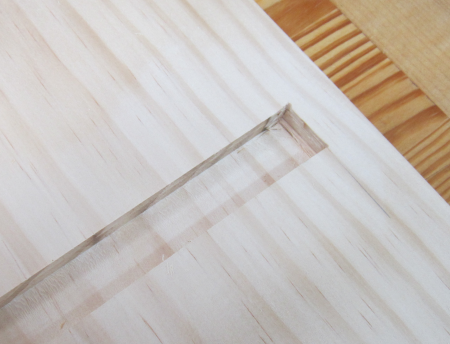
The dado was stopped 3/4 from the front edge so that it will not show. The side of the shelf will have a shoulder that permits the shelf to be coplanar with the front edges of the sides. |
 |
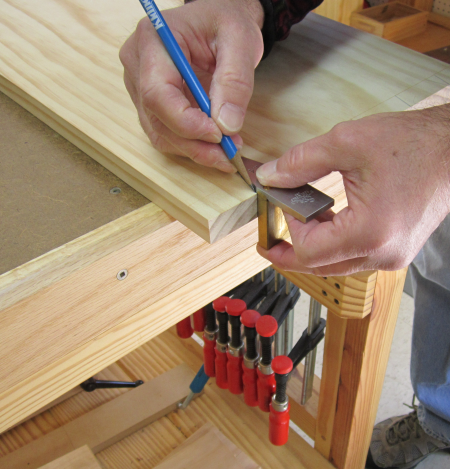
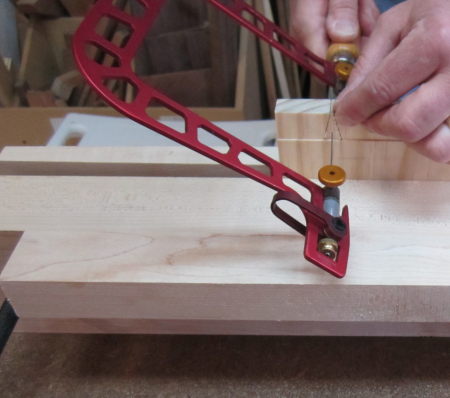
The dovetails were laid out to have the same size and pattern as the previously built saw till. The base line was cut in with a Tite-Mark. |
 |
Dovetail angle was 1:4; set with Sterling marker.
|
 |
The tails... |
 |
For the previous project, the saw till, we made a nice clean 1/16 inch "rebate ledge" to help with dovetail pin layouts. This involved a kerf cut with the regular blade and then a hogging out with a dado stack.
|
 |
Because setup on the machine tooks so long we decided to try a different tactic...making both cuts with the standard blade. We hated the results. |
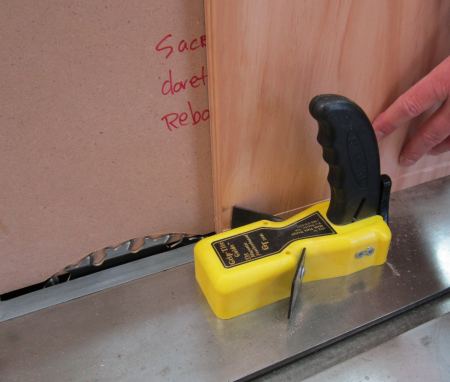 |
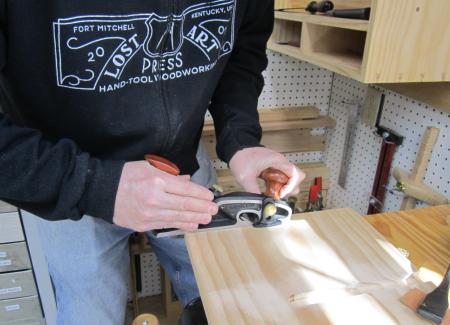
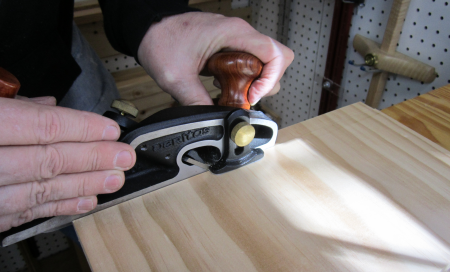
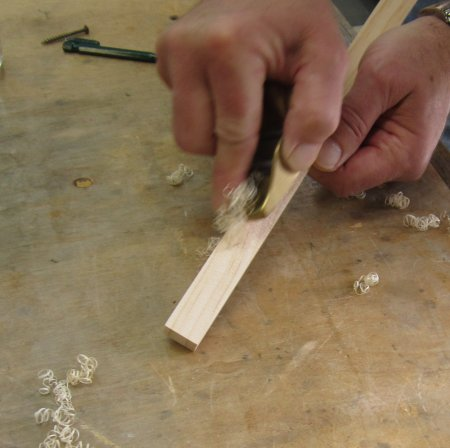
So we went back to creating the rebate with a hand plane. We had previously had some poor results using the LV moving filister plane. It was a struggle to keep the shoulder level. Additionally, the metal depth stop seemed to burnish the wood surface a bit. Using a technique learned from the Schwarz we changed the grip to an open hand that simply pushed the plane, the left hand working hard to keep the fence against the work piece.
|
 |
The altered grip really seemed to help. The rebate was a nice clean cut. |
 |
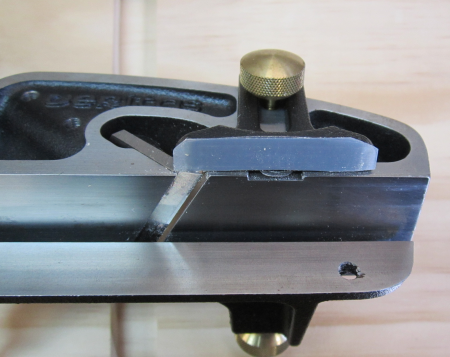
We put a UHMW polyethylene strip on the foot of the depth gauge...this greatly reduced the wood burnishing. |
 |
With the layout done and the rebates ready, the end panels were put into the Moxon. |
 |
The dovetails were cut with a new saw...a Bad Axe 12 inch dovetail saw called the Stiletto. James and I both really loved this saw.
|
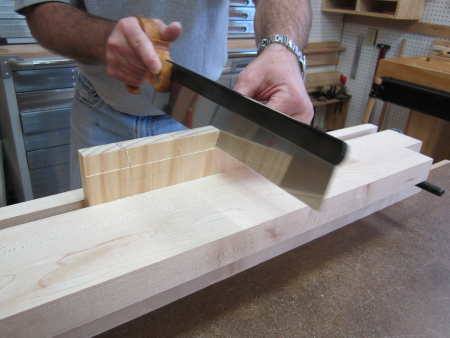 |
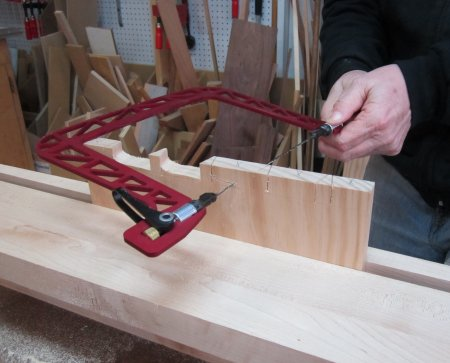
Sawing out the waste in the tight spaces was done with a KC fret saw. |
 |
Sawing out waste in the broader spacing of the pin boards was done with KC coping saw. |
 |
Then comes chisel work... |
 |
The first set of pins. |
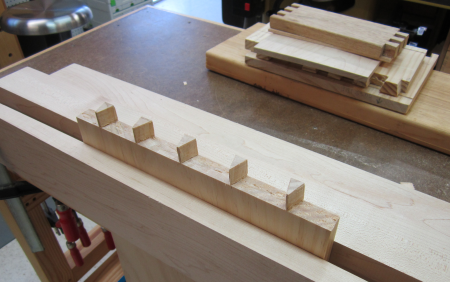 |
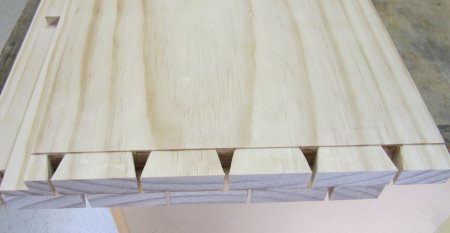
Image shows the dovetails with the "rebate ledge"... |
 |
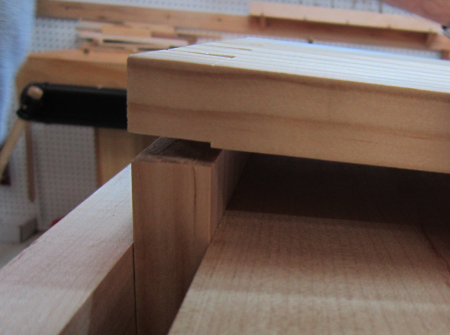
A close up, from the side, of the "rebate ledge".
|
 |
Dry fit. |
 |
The sides had to have a 3/4 inch x 1/2 rebate to accept the back panel. This was done with a dado stack and a sacrificial fence. |
 |
Here are the sides with the stopped dados squared off...and the side rebates. |
 |
The shelves had to be notched to extend beyond the stopped dados. |
 |
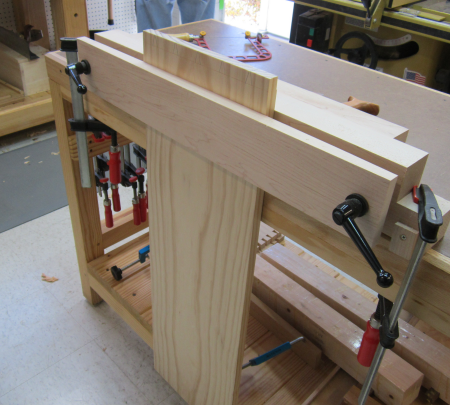
Everything was now ready for a dry fit. It all went together well. After planning for all of the clamping angles it will be time for glue up... |
 |
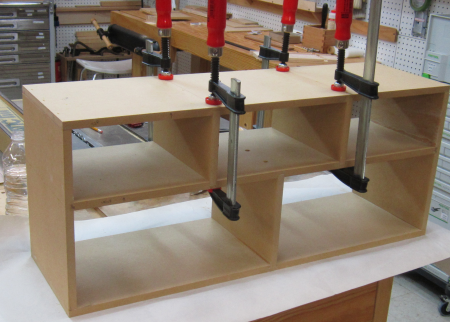
Glue up performed on assembly table... |
 |
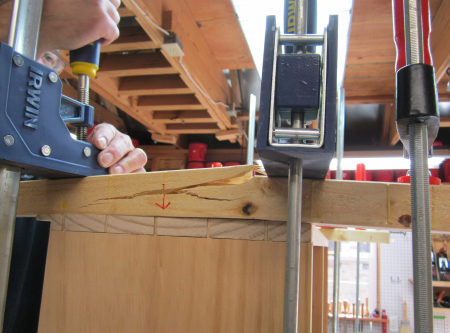
Cauls were used on the end sections and a tremendous amount of clamping pressure was applied. |
 |
So much pressure, in fact, that we blew out a caul. Sounded like a gun blast. Fortunately, no injuries...just had to replace caul and reclamp.
|
 |
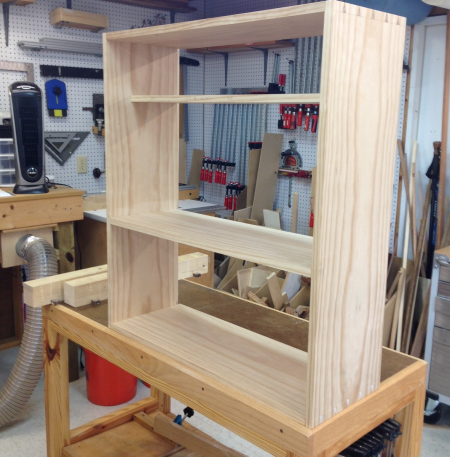
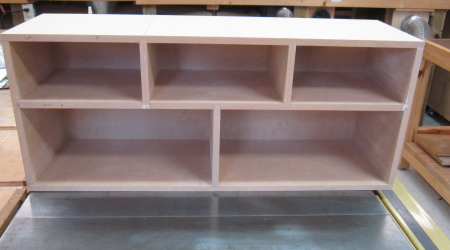
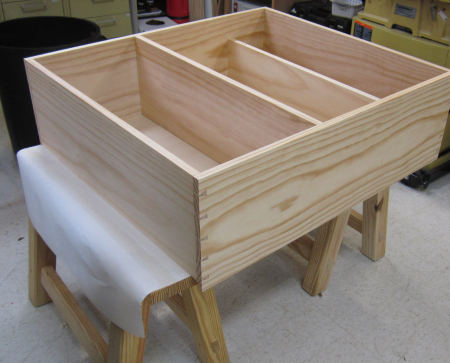
The carcase pulled from the clamps. |
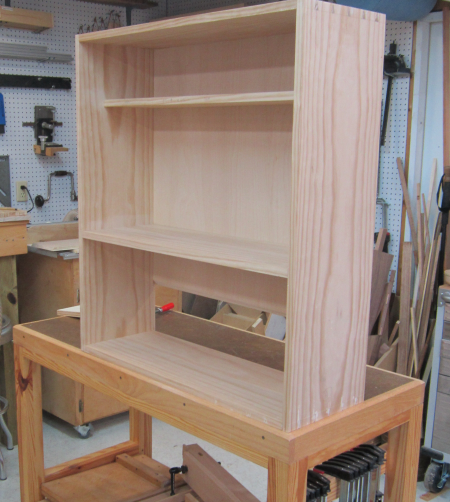 |
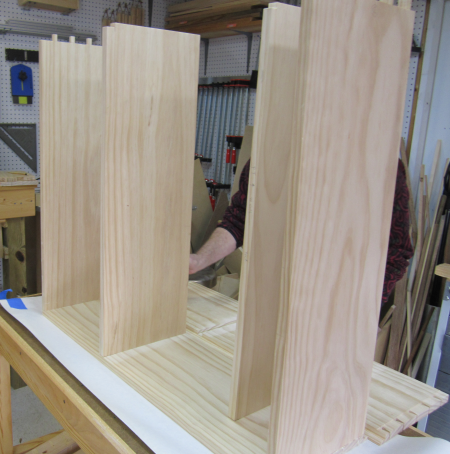
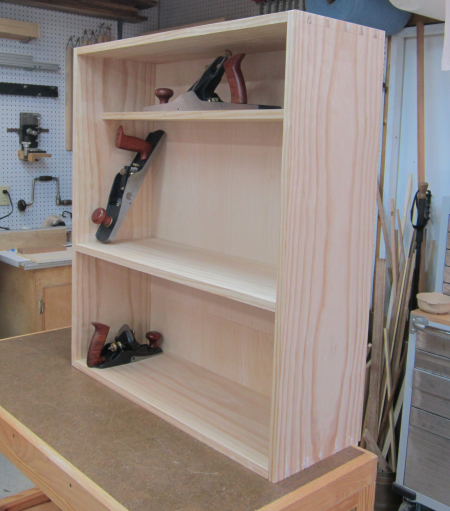
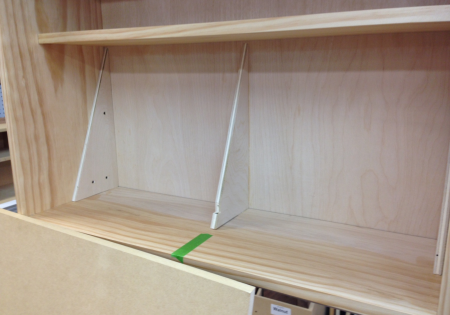
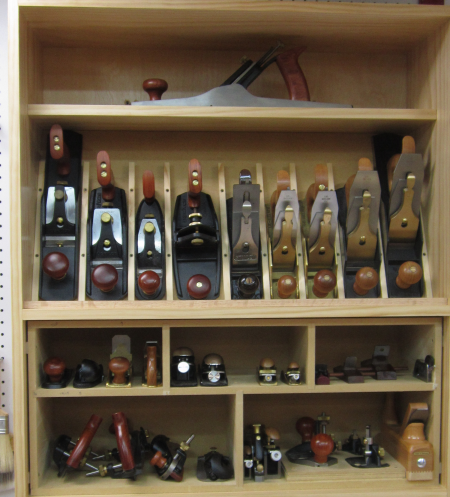
A quick look at how various planes fit into the spaces...next task to complete the design and build and install the center tilting section and the lower divided cases. |
 |
The middle section is intended to have a slanting board with dividers to hold most of the bench planes. The board is 1/2 inch MDF with a 22.5° slant. This is the dry test for the angled board. |
 |
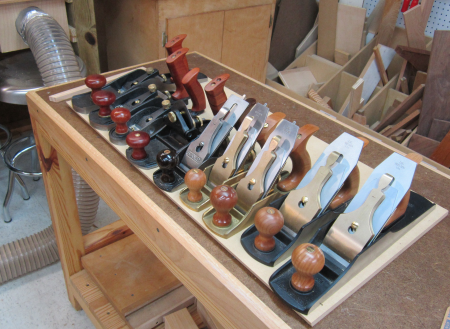
A rough fit of the nine planes that will live here shows good balance. |
 |
The dry run showed that with 1/2 inch dividers the nine planes will fit nicely. |
 |
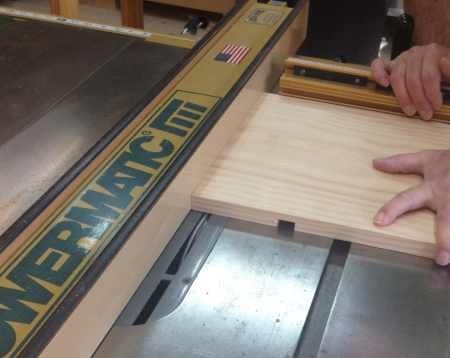
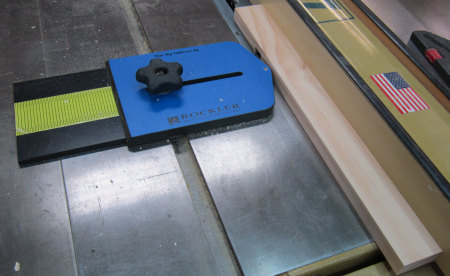
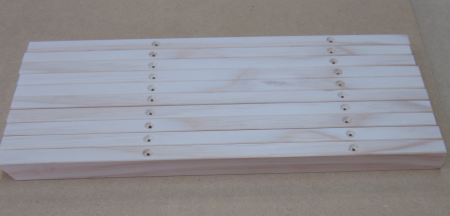
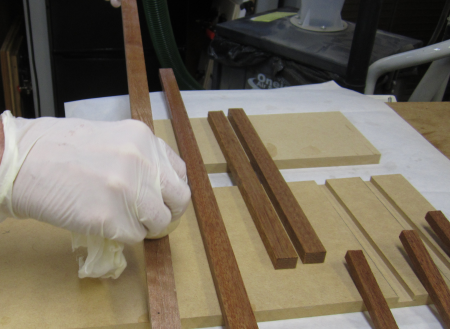
The dividers are 1/2 x 3/4 cutoffs of the radiata pine. They were ripped on the tablesaw using cut off jig that allows the thin piece to be to the left of the saw and thus not get caught between the blade and the fence. |
 |
The machine marks were removed by planing the dividers with the LN 102. |
 |
The edges were broken with a small chamfer using the LN 101. |
 |
Holes for the #6 x 1 1/4 screws were pre-drilled... |
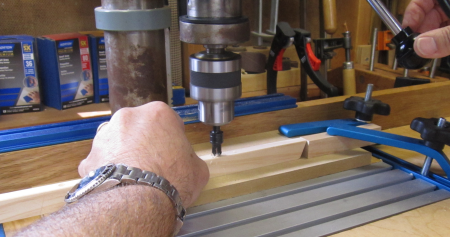 |
and countersunk... |
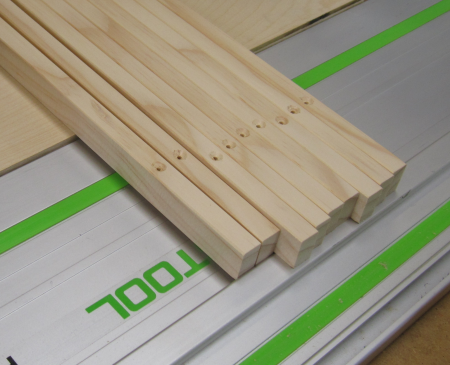 |
The dividers were about a foot long and had a 22.5° bevel the bottom end. |
 |
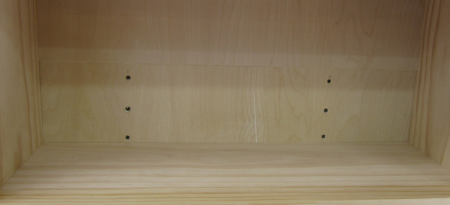
The lower plane gallery section is approximately 30 inches wide, 13.5 high and 10 deep. The plan is to build a MDF cabinet that will slide into this opening and create small compartments for block planes and specialty planes. |
 |
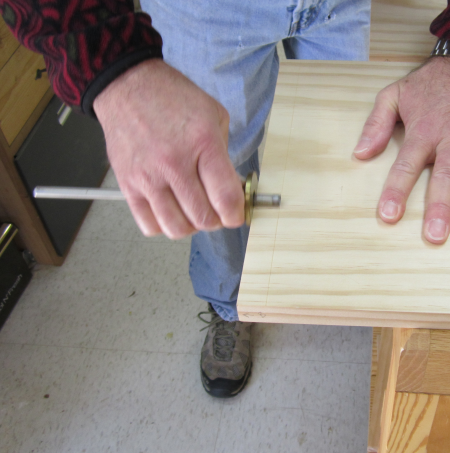
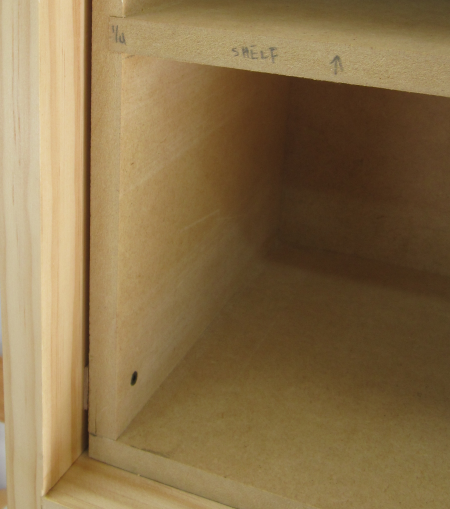
In order to build this section with tight tolerances but still allow easy installation the inside measurements were all confirmed with bar gauge measuring rods.
|
 |
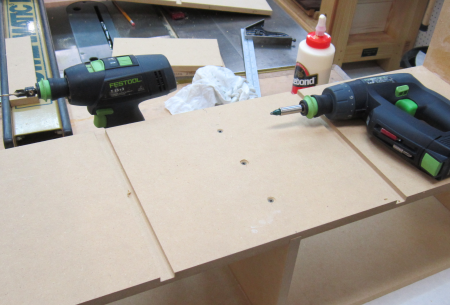
The 1/4 inch deep by 1/2 wide dados were made with the Festool router...the top and the shelf dados were routed into a larger panel and then ripped so that the grooves aligned properly. |
 |
The shelf and the bottom were taped together to facilitiate the line up of the dado on the bottom side of the shelf and the centered dado in the bottom. |
 |
Supports for the slant till were cut on the 22.5°slant. Glued and screwed. |
 |
Slant till installed. Screwed. |
 |
Divider installed...screwed only. |
 |
After the dados were all completed and all the panels cut it was time for a quick dry fit and then glue. |
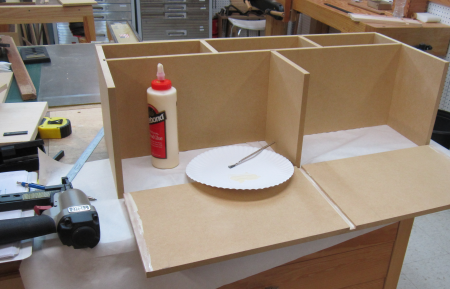 |
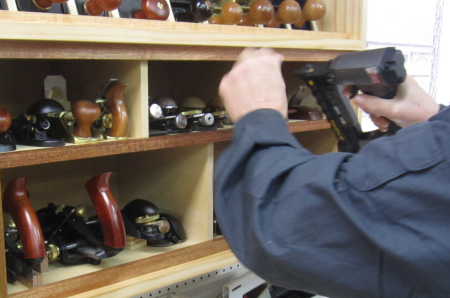
All of the joints were secured with glue and 7/8 inch crown staples. The only joint that was not stapled was the center of the middle shelf was screwed onto the lower shelf divider. Counter sunk #6 x 1 inch screws will secure well and it made sure that no metal will be exposed. |
 |
The gallery unit glue up and clamping...a 1/4 back will be added. |
 |
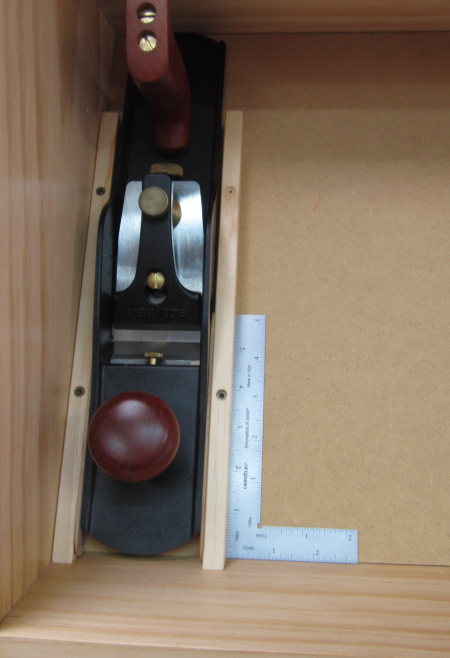
Test fit...slid the gallery into the lower section...checked out the fit for all the planes that will be stored there. |
 |
The back of the gallery is a 1/4 sheet of MDF...marked out the shelves to make it easier to hit the 1/2 dividers...shot it off with 18d brads. |
 |
The finished MDF gallery... |
 |
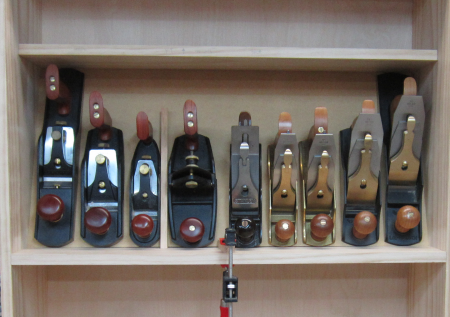
The last dry fit. Confirmation that all the planes will fit nicely. The slant till has all of the dividers, spacers and planes in place. The nine chosen planes will fit very well. |
 |
Had to finish off some of the outer edges with a block plane...after two days of snow and ice the weather turned beautiful and we went outside for a bit... |
 |
Any flaws in the dovetail joints were closed off with Timber Mate, an Australian water-based wood filler ...just bought this product...really liked it. I used their white oak filler...it worked very well with the radiata pine. See brochure here. |
 |
Prep work on the finish started with some repairs to dings that occurred during construcition. Put water and a damp cloth over the wounds... |
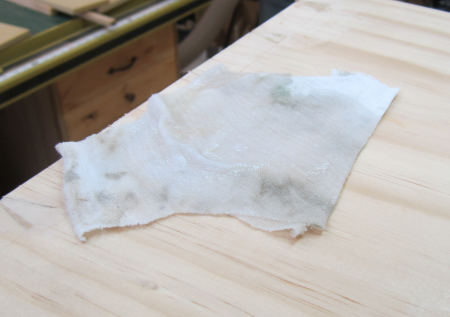 |
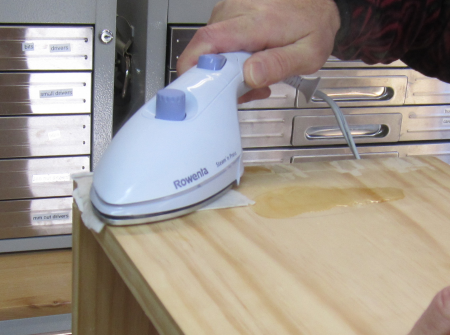
Used an iron to steam out the fibers...the fibers were still in place because none of the dings were super deep...after the steam job they popped back out...subsequent sanding made them simply disappear. |
 |
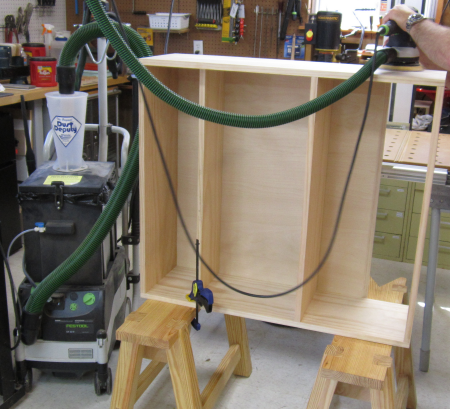
The carcase was secured to the saw benches... |
 |
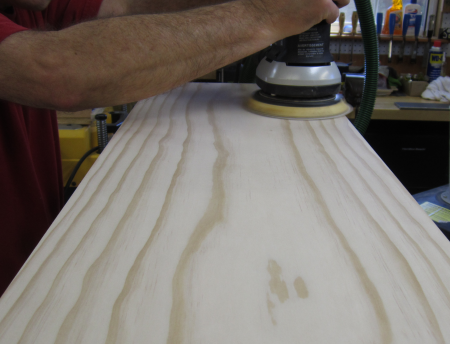
The Festool 6 inch sander was used through grits of 80, 120 and 220. |
 |
A first coat of shellac was rubbed on... 1 lb. cut. |
 |
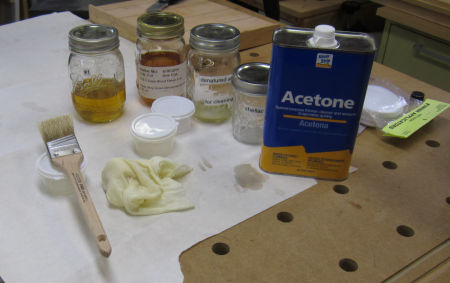
Fresh shellac batches were recently mixed...1 lb and 2 lb. cuts of Super Blonde, no wax. The finish pattern was acetone, clean, 1 lb. coat, remove hairs with 000 steel wool, acetone, 2 lb. coat, ... |
 |
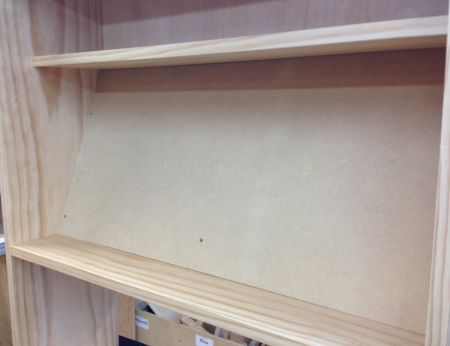
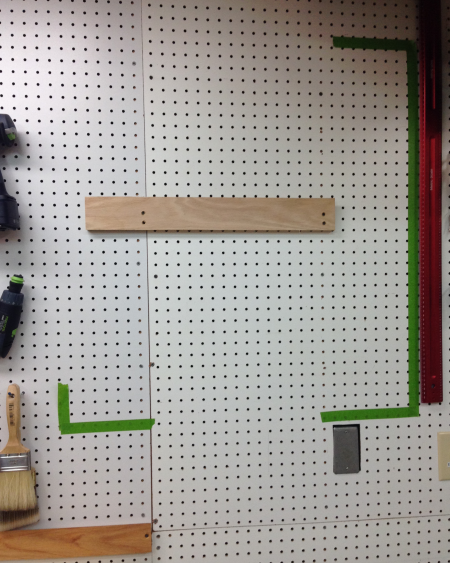
Pulled down the old saw till. Image shows the old French cleat. The green painter's tape marks the general location that I had been planning to locate the new till. We actually decided to lower it a bit. I moved an electrical outlet and covered the old box with plate. The new unit will cover some of that box.
|
 |
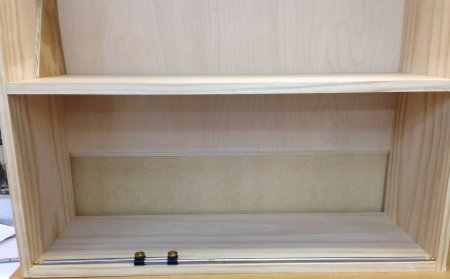
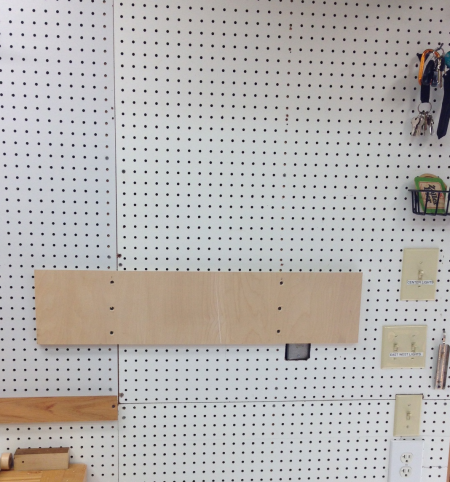
Here is the new French cleat. This is an integral part of the back panel of the new till. The whole unit will drop onto this cleat. |
 |
The French cleat as seen through the lower gallery section of the till. |
 |
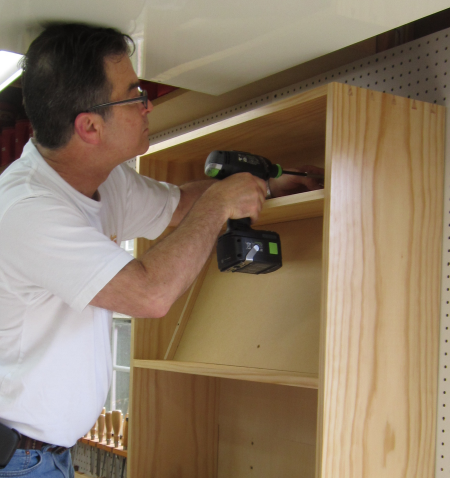
Two screws were put into studs at the top of the till. |
 |
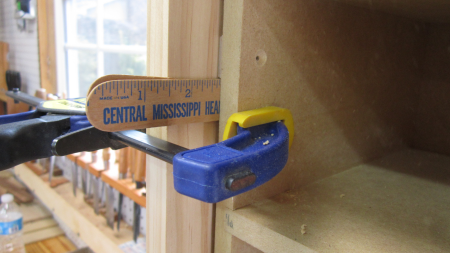
Then the MDF gallery unit was installed, centered and shimmed on either side. |
 |
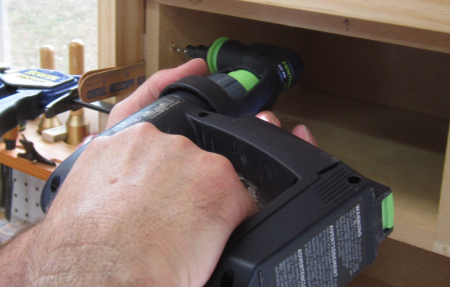
Screws were then put through the side and shims into the side of the carcase. Small Festool CSX driver with a 90° head made the install much easier. |
 |
The gap will disappear when the trim is added to the front of the gallery. |
 |
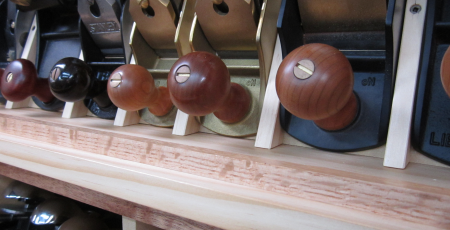
The rest of the slant till dividers were installed with tongue depressor spacers to make the perfect space for each individual plane.
|
 |
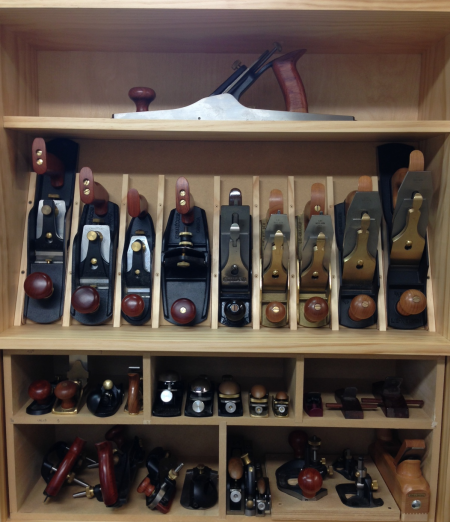
Till with all of the planes located. Only remaining task is to trim out the gallery. |
 |
The gallery trim will be some Honduran mahogany. These strips will be finished with shellac. |
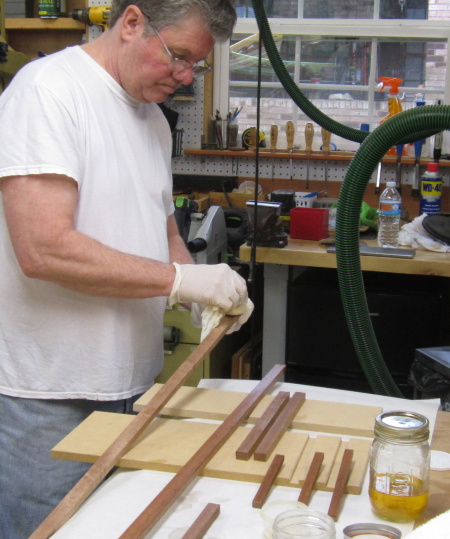 |
The shellac really makes the mahogany pop... |
 |
The mahogany trim was attached with 23 gauge pin nails. |
 |
A small piece of oak was pinned onto the shelf of the slant till...this is to prevent a slip out by a plane. |
 |
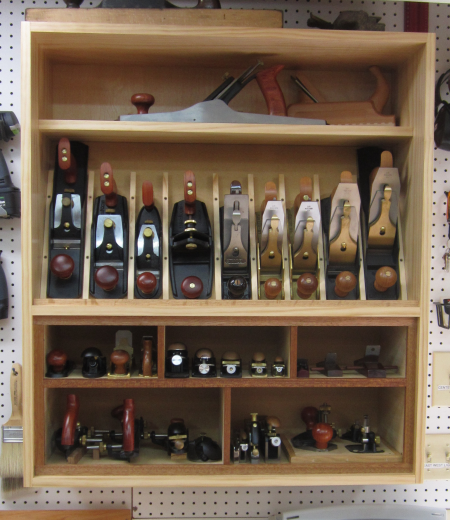
The finished plane till. |
 |
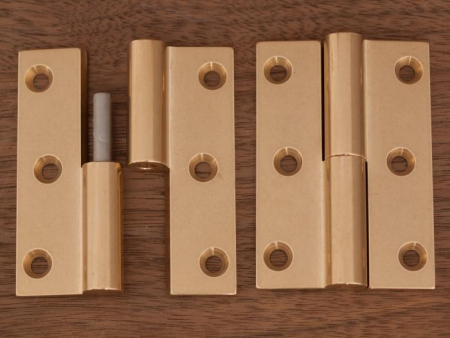
The original plan was to have doors. I have decided to live with the till a bit and make a final decision about adding doors. If I install them, the hardware for the doors will be lift-off butt hinges. Brusso LH-201 PDF here. |
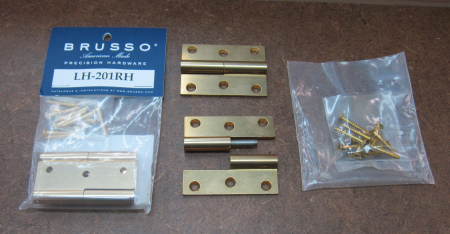 |
These high quality Brusso hinges were secured from TFWW. |
 |
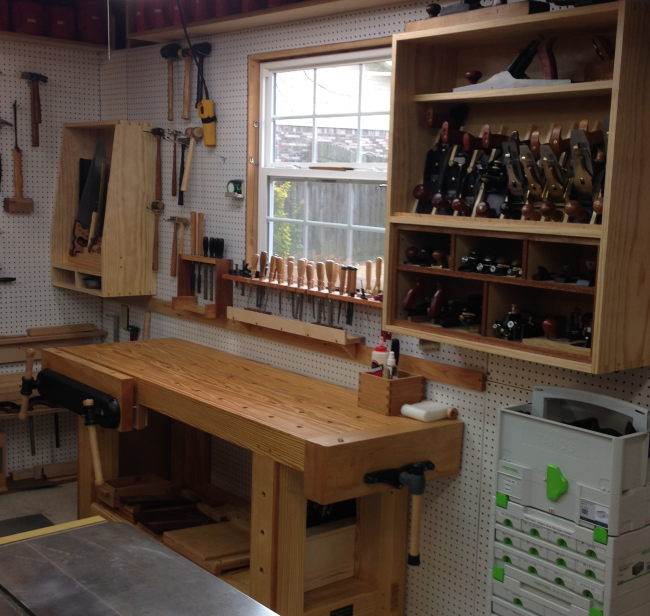
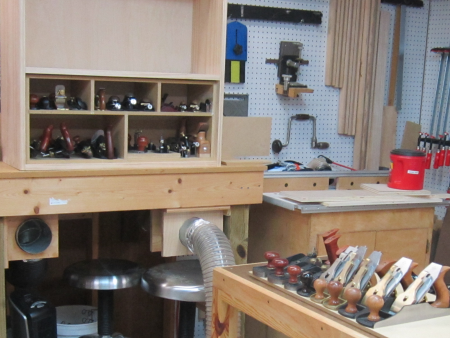
The two new tills on either side of the workbench...
|
|
Storage provided for...l
|
|
the top shelf...4 inch drawer-slip cramps Lee Valley Veritas Fore Plane (#6) Lee Valley Veritas Bevel Up Jointer Plane (#7) 6 inch drawer-slip cramps |
|
|
|
Gallery top shelf Left Group |
Lee Valley Veritas Trimming Plane |
Gallery top shelf Center Group |
Clifton Bull Nose #400 ShoulderPlane |
Gallery top shelf Right Group |
Hong Kong Style 120mm Trim Plane |
Gallery lower shelf Left Group |
Lee Valley Veritas Small Plough Plane |
Gallery lower shelf Right Group |
E.C. Emerich Scrub Plane |