The office project involved pulling out the carpet, removing
all base trim, cleaning and preparing the floor for new Bruce manufactured,
hardwood floor.
|
|
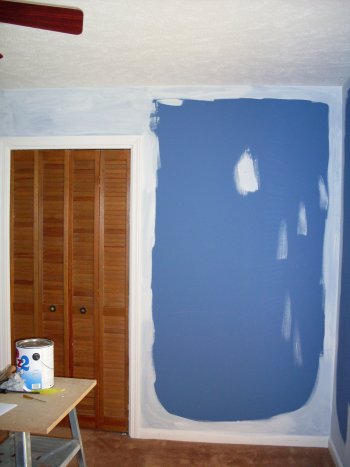
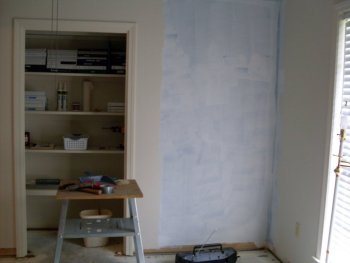
The walls were extremely dark, flat Navy blue. Two coats of primer was the starting point. |
 |
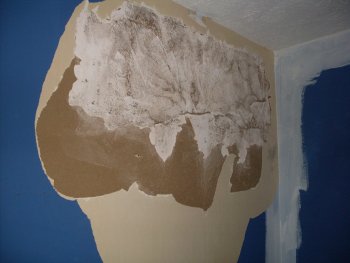 |
One corner had sustained some water damage at some point and had insect damage. A major patch was made using dry wall compound and a lot of sanding. |
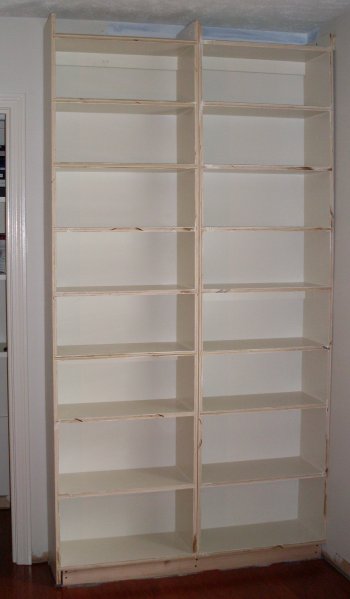
A couple of coats of flat wall paint made a huge difference. Shown here is the corner where the bookcase will go. The closet was reworked so as to have shelves top to bottom for office record storage. |
 |
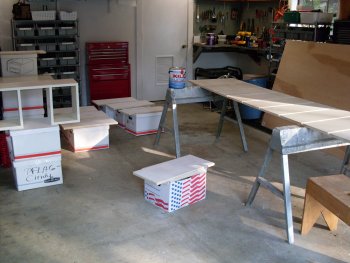 |
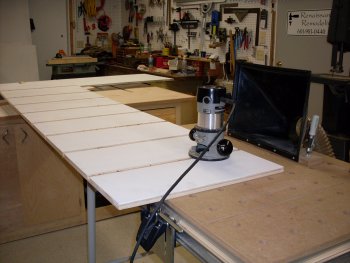
The bookcase was made up of two carcases appoximately 24 inches wide each. The units are 11 1/4 inch deep which will make them 12 inches after trim is added to the front. The shelves for the units were cut from 3/4 inch Baltic birch cabinet grade plywood. Here they are being primed and painted on all sides in the garage. |
The sides were routed with 3/8
inch deep x 3/4 inch wide through dados to accomodate the shelves. After
being routed, primed, and painted the units were then ripped to two
11 1/4 inch sides. |
 |
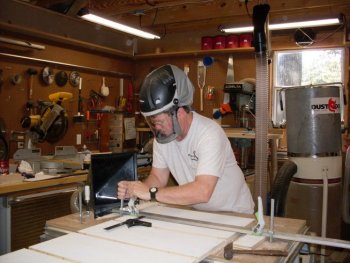 |
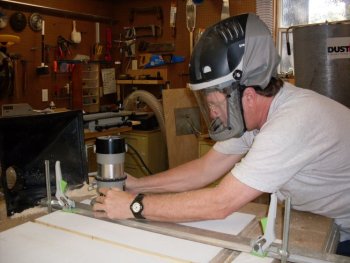
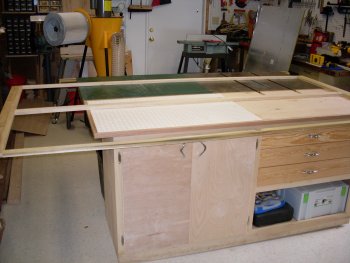
Routing was done using a custom
shop-built jig until failure of the jig plexiglass component. I then went to an alternate setup with a clamped down fence on the MFT3 table with dust collection. |
Here I am routing the last dado. With the dust collection at the location, the 2 Jet Air Filtration Deives overhead and the Airshield Pro protecting me, the dust collection nightmares of routing have been greatly reduced. |
 |
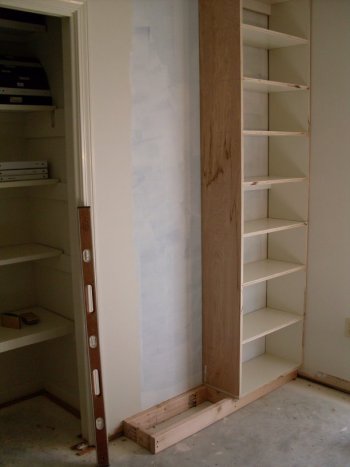 |
After having a 1/4 Luan back
added, the right bookcase unit was installed onto the base. The unit
was then squared, plumbed, levelled and secured to the walls. |
Second set of shelves was installed and squared.
|
 |
The front face frame was glued
up in the shop. |
 |
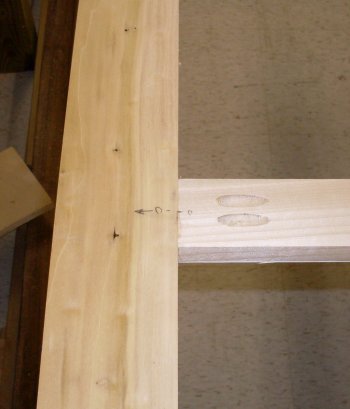 |
Pocket screws were used on the backside. |
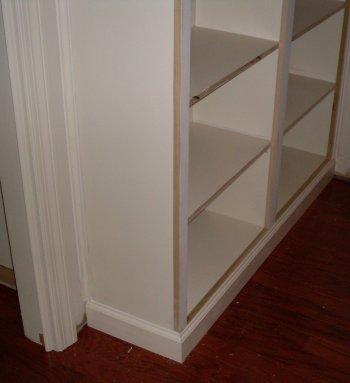
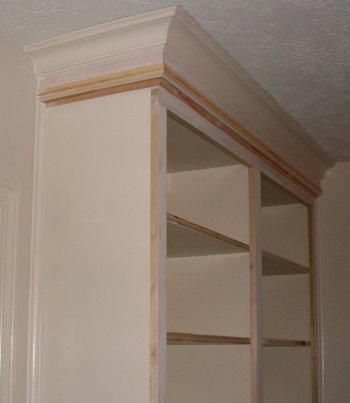
Base moulding was ripped down
and brad nailed to the lower section of the bookcase. |
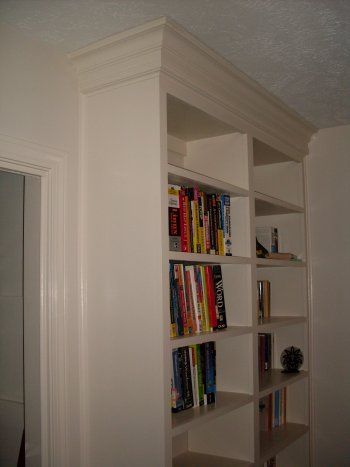
 |
Crown moulding, a decorative
band, and cove finished out the top. |
 |
 |
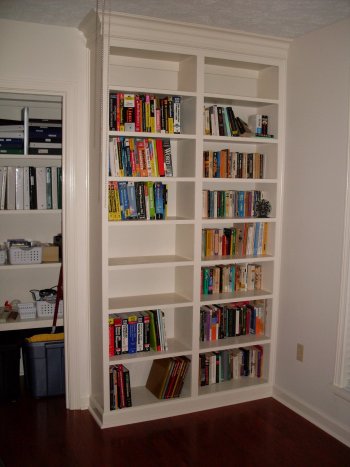
Bookcase after shelf face trim
is nailed and spackled. Unpainted trim was finished off with a coat
at of primer and the entire unit received a couple coats of semi-gloss. |
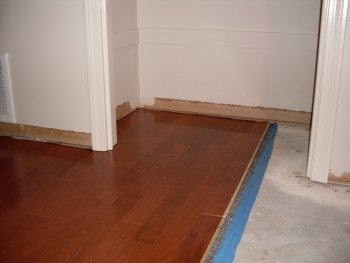
After pulling the carpet and removing the tack strips, the concrete slab had spalted where the nails had been pulled. I put concrete patch in the craters. I screwed in 3 inch wide Luan strips, 1/4 thick, to provide the spacing for the floor. After installation, these spacer strips will be removed. The specs called for 1/2 inch expansion space on all sides. There will 3/4 inch on the two sides where these strips were installed and approximately 1/2 on the other walls. |
|
 |
Underlayment was put in place.
This pad has an attached vapor barrier on the lower side and tape strips
to adhere at the butted seams. |
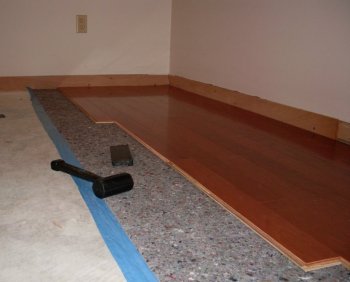
The interlocking, floating floor is installed on top of the underlayment. It is not glued nor nailed, it is meant to float. I started laying the floor in the northwest corner and moved to the right with the boards against and parallel to the spacers on the north wall. A dead blow hammer and a non-marring whacking block allow the boards to be snugged up after they are locked into place. |
 |
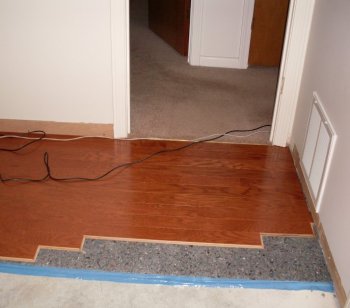 |
Each run terminated with a cut
to make the spacing correct at the right end along the east wall shown
here. |
The most difficult layout was at the closet. The jambs had been sawed off to allow the flooring to run under the jamb. But the need to put the board in at an angle so that the "click lock" could occur was difficult at the north jamb to the closet. After several cuts and much consternation, the board went in, locked, and was snugged up to my satisfaction. |
 |
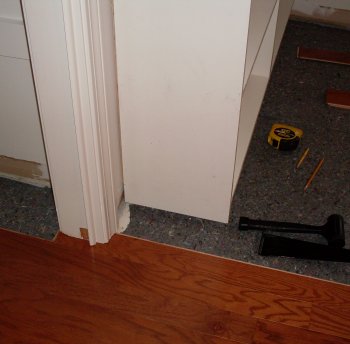 |
The south jamb was also a difficult
piece to install due to the lack of the required angle to insert and
snap the interlocking boards. Both jambs were problems but eventually
looked good. |
The south jamb after install. |
 |
 |
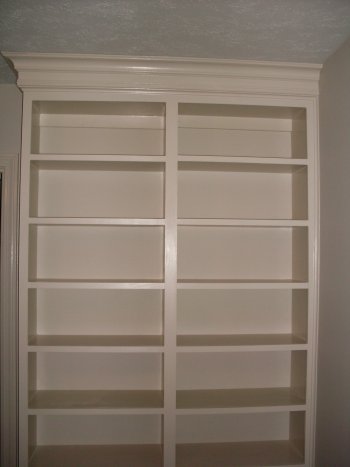
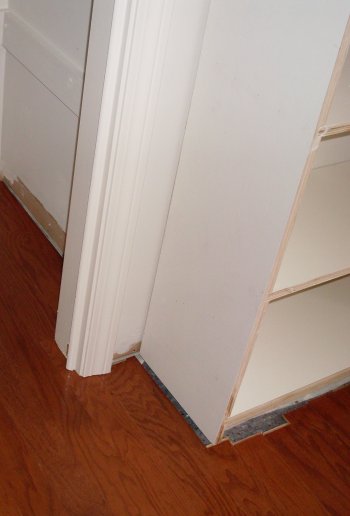
After base trim and 1/4 round
the room remodel was completed. Books were placed into the new bookcase
and the move in started. |
Upper bookcase moulding.
|
 |
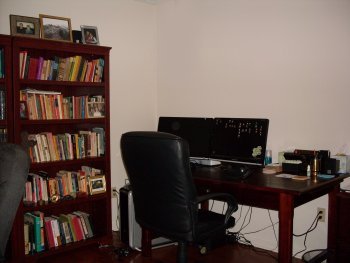 |
This is the view of the corner where I have
my computer. |
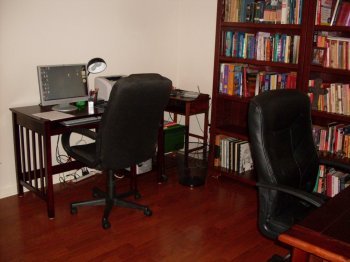
| This is Cindy's side.
|
 |