Machinist Chest
|
|
The concept for this chest is a tool box design
of the machinist chest style. Phase 1: Phase 2:
|
|
Phase 1: |
|
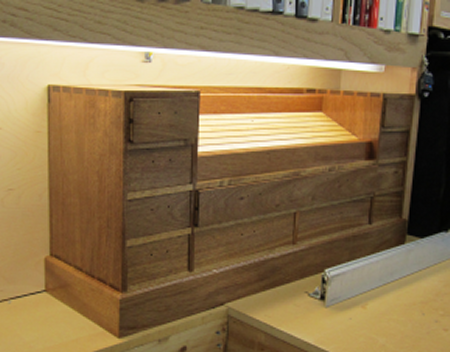
The chest will live on the bench top in the space shown to the right. The shop cabinet project was designed and built to allow for ample room for this chest with excellent lighting just above it. |
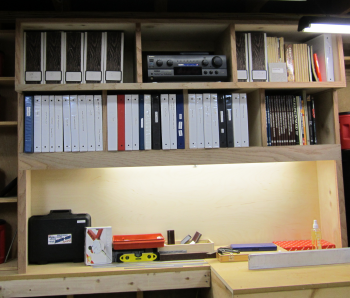 |
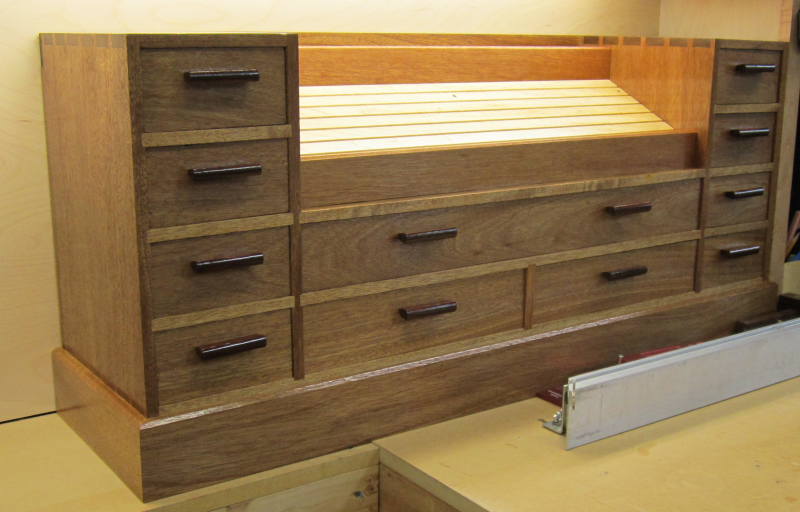
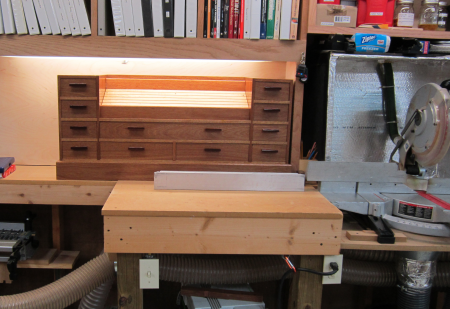
This is what the finished product looks like in that space. |
 |
This is an early Sketchup. There are two "towers" on each end that are a "stack" of small drawers. The bottom will be a skirt to provide enough height for the bottom drawers to open over the chop saw fence extension. Changes from this original concept include...tower stack reduced to four drawers instead of five; center section has one long drawer of ~24 inches and two side by side drawers of ~12 inches; a bay will be at the top center in the back. Wooden drawer pulls will actually be dark...
|
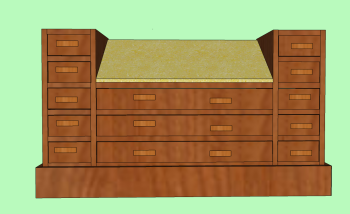 |
Comparison with finished product... |
 |
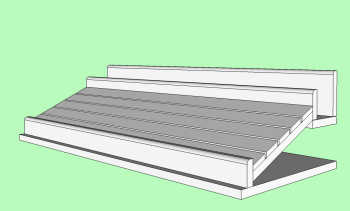
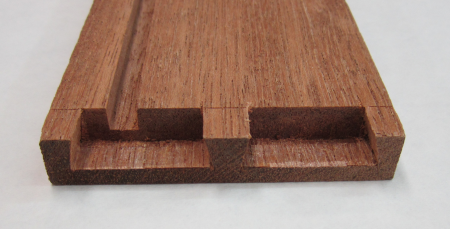
The center section will be a slanted "ramp" with dadoes cut into surface that will allow various rules to be dislpayed. The center section will also have a bay at the back for various tape measure units. The gray ramp area in the drawing will be curly cherry. |
 |
The side "towers" and the central lower unit will be framed out to hold the drawer units. These frames will be created and then placed in dado slots in the side panels. The front of the frame will be mahogany and the sides and rear will be oak. |
 |
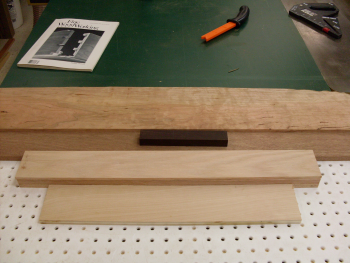
The materials originally selected for this chest were all on hand and recycled from previous projects. From the top: Curly maple that I inherited from Tom when he moved...this will be resawn thinly and will be the surface for the center rule display. The chest will be made from Honduras mahogany recycled from paneling pulled off the den wall of Cindy's aunt's home when they remodeled. Thanks to Esther and Mike for the wood. The dark bubinga wood is also inherited from Tom. We will make drawer pulls from this stock. Oak will be used for all of the interior frame work. Baltic birch 1/2 inch plywood will be the back of the cabinet.
|
 |
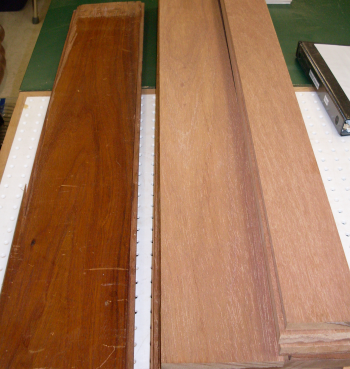
Here is an example of the Honduras
mahogany as it came off the wall and after it has been milled. |
|
The milled mahogany will be the primary wood with the oak as the secondary wood. |
 |
As we developed plans for this chest, there were several l side projects that became necessary to solve some issues. Number one...we becamed disatisfied with our ability to make dovetail joints consistently with the Rockler jig. I decided to replace the unit. |
 |
I purchased a Leigh D4R Pro. This was a major step up in quality performance.
|
 |
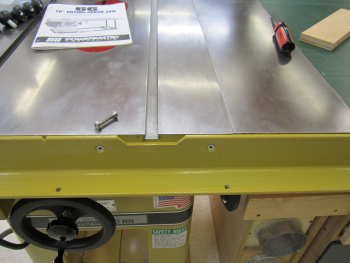
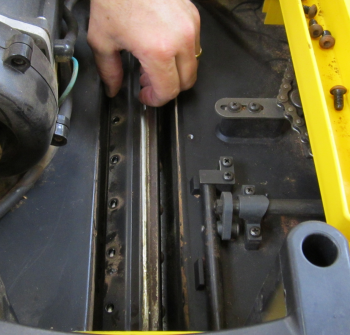
Number two: After some concerns with the table saw performance and precision
we perform some lubrication and realignment. |
 |
Number three: While planing down some oak we had problems with the DW735 blades and had to change the planer blades out.
|
 |
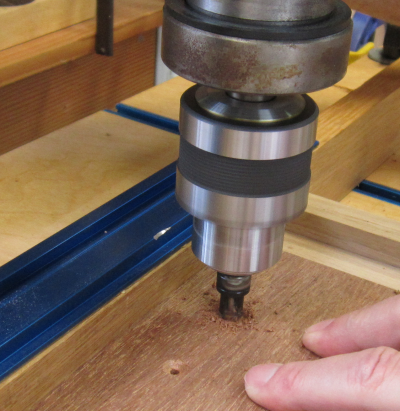
Number four: I was unhappy with the dado routing that I was using. The was not as clean and precise as I wanted. I bought a couple of Freud "down spiral bits" and
really liked the cuts.
|
 |
Number five: Because we could cut a truly precise and clean 1/4 dado for the drawer bottoms, we became very unhappy with the fact that modern plywood sheets truly suck in that they are never 1/4 thick. After considering buying expensive plywood over the Internet, we settled on MDF which is a true 1/4 inch.
|
 |
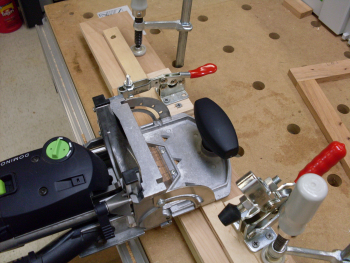
Number six: To simplify the Domino jointing on the inside frame pieces I made a jig to hold the slender frame pieces and keep the platform of the Domino in the right plane. |
 |
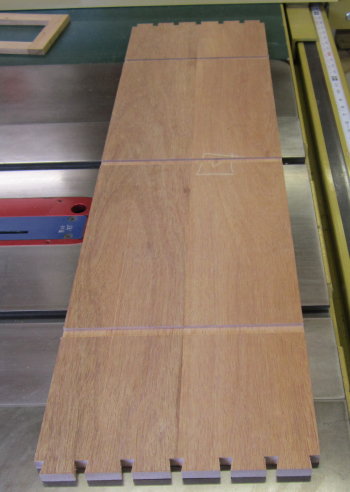
After settling the production process issues, we began the mahogany panel glue ups for the bottom, sides and top panels. We milled the pieces to .6 inch, matched up our grain patterns. We carefully laid out all dadoes and dovetails so that our Domino placements would not be an issue. |
 |
This panel would become the left outer side, left inner side, and the left top. It was laid out so that the grain would have a wrap around look.
|
 |
The center Domino was a tight fit, all others were the loose fit option. Here is the Festool Domino in action.
|
 |
The Domino pattern on the left in the photo is for the bottom panel. The slots had to positioned so that they did not interfere with the two dovetail joints on the end of the panel or the three dadoes that will accomodate the two interior side panels or the center support panel. The two patterns on the right are for the two tower sections...an outer side, an inner side and the top. The placement had to avoid conflicts with the two dovetail joints and three dado slots in the sides. The top piece only had the two dovetail joints to deal with.
|
 |
Here the panels edges are glued
and have the Domino tenons installed. |
 |
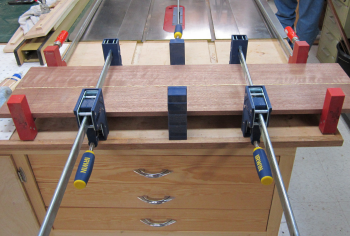
All three panels were clamped
and allowed to dry overnight. |
 |
Panels were then squared and
cut to size. |
 |
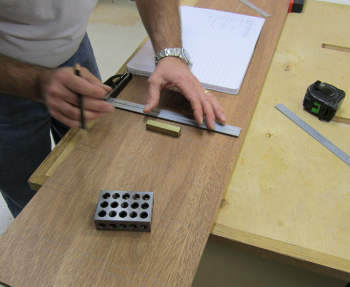
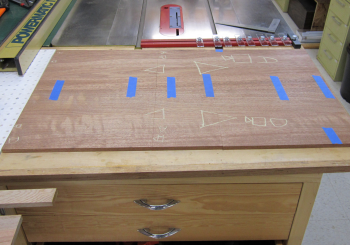
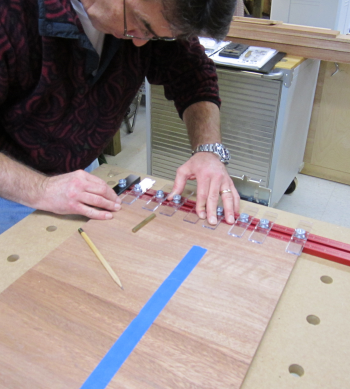
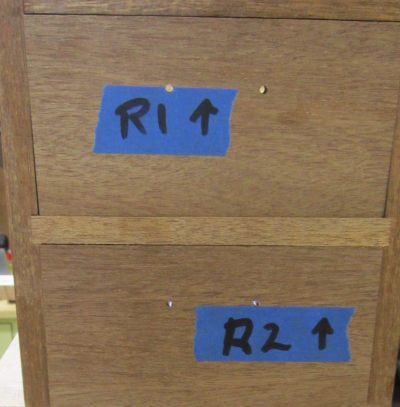
The Story Stick was then used
to lay out all of the dado location. |
 |
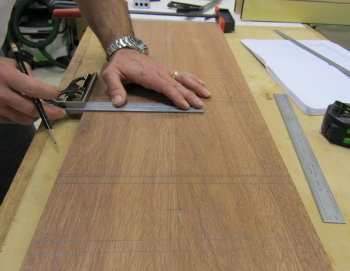
The layout was done in a manner
that would allow the grain to go up one side of a tower, then across
the top of the tower and then down the other side. |
 |
Here the Woodpecker Story Stick
Pro is used to mark the center of each dado. |
 |
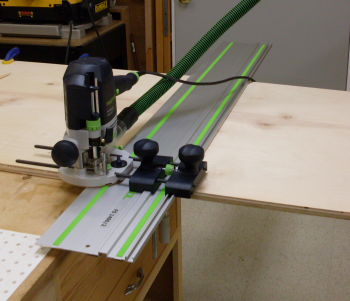
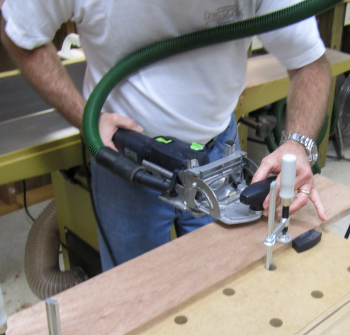
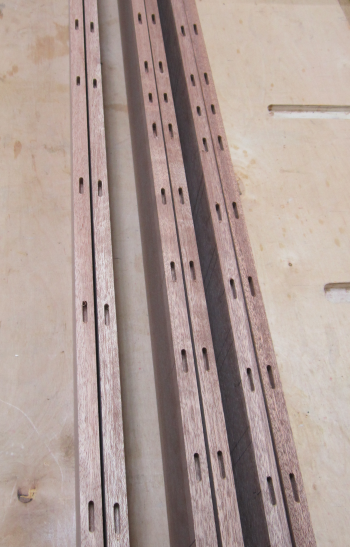
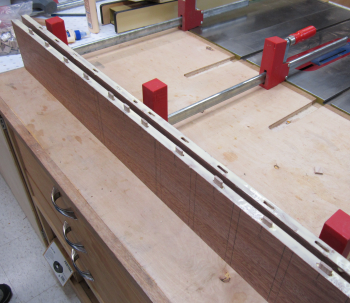
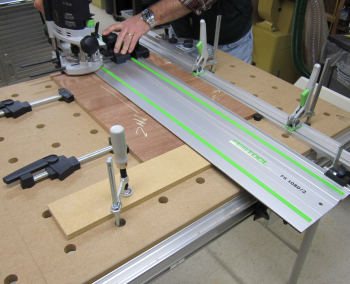
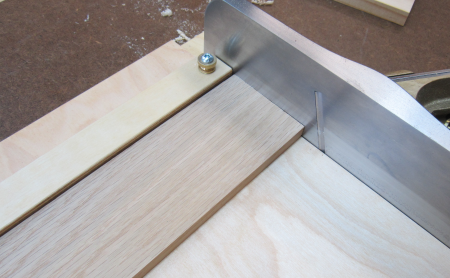
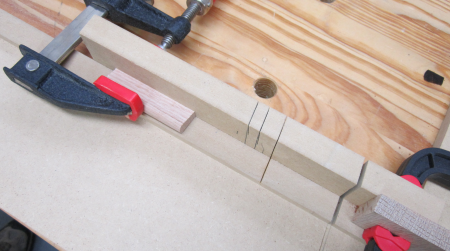
| Dado groves were then cut at 1/8 inch deep. Side drawer towers had to have 3 mirror dadoes. The central section had to have two mirror dadoes. We used the Festool OF 1400 router and Guide
Rail Stop with a Freud down spiral 1/2 inch bit. Here is the setup on
the MFT3 table with a clamped extruded fence providing a squaring point
on the long run. Qwas dogs provided the end squaring jig. The panel was dadoed and then rotated 180 degress and dadoed again. This made the top and bottom grooves. The tower sides for the center drawer section also had to be flipped and dadoed.
|
 |
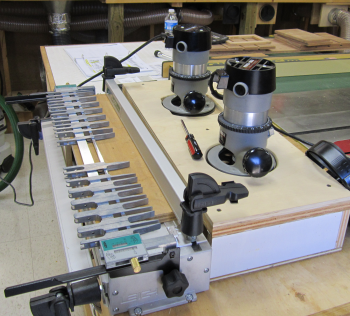
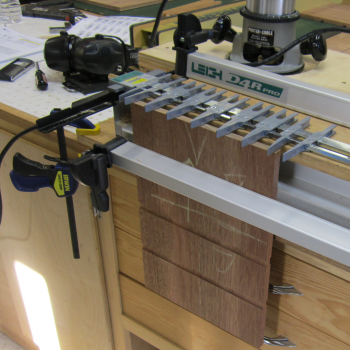
The dovetail pin and tail setup was created and laid out
in the Leigh jig. Each router was set up with a Leigh bit...one dovetail and one straight...we built a box to hold these routers in place so that the bits could protrude through a hole.
|
 |
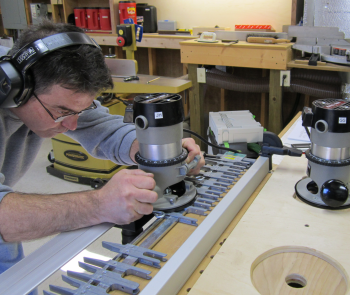
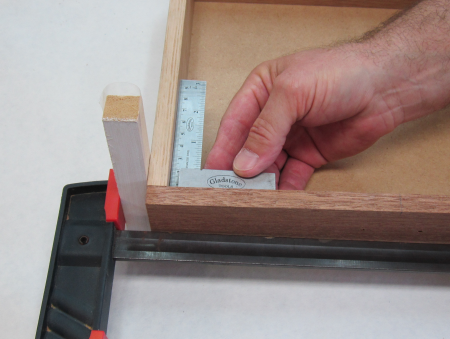
The jig setup was tested and
after some tweaking the fit was exactly as we wished...slightly proud
so that we could plane the dovetail joint. |
 |
The tops of each tower needed tails routed into each end. The outside panels had to have pins cut in the top and bottom. The inside panels of each tower needed pins on the top but not on the bottom. The bottom will sit into a dado groove. This is one of the inside panels. |
 |
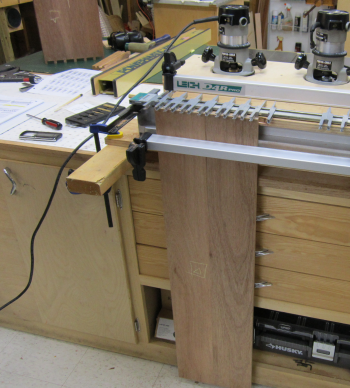
The bottom of the chest is 39+ inches long. In order to fit the bottom into the jig, we had to elevate the unit a couple of inches. The bottom had to have tails routed in each end. |
 |
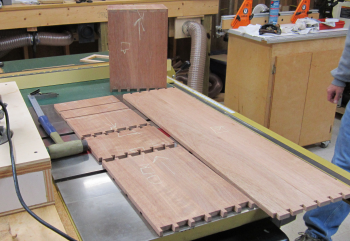
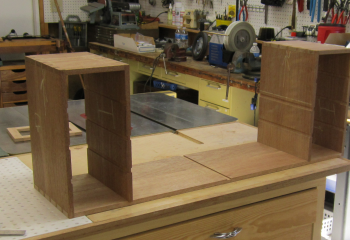
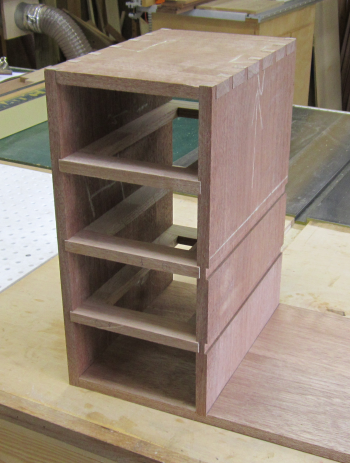
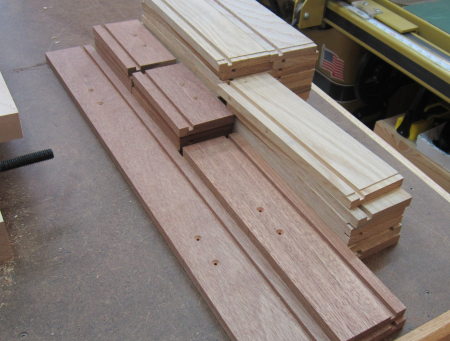
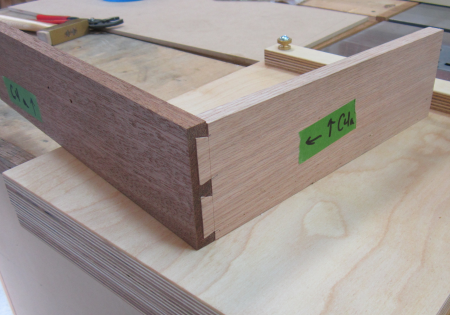
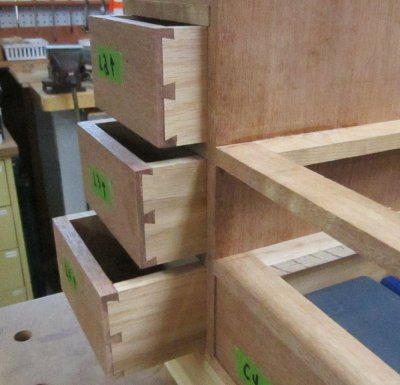
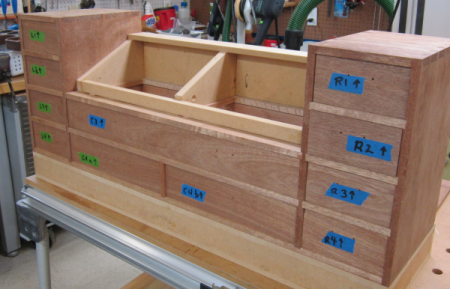
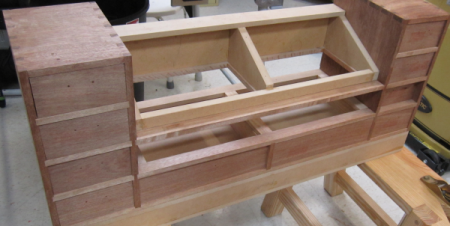
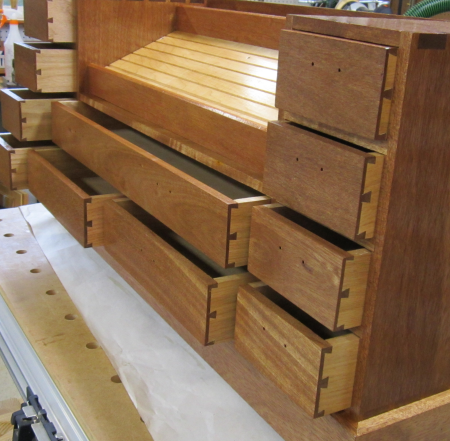
After all of the dovetails have been cut... the left boards show a tower in three sections, the right is the bottom, and at the top is a dry-fit tower. |
 |
This is a close up of the dry-fit
tower. |
 |
After dry fitting the end towers
we were able to lay out the remainder of the dado grooves in the bottom
piece. |
 |
Another view of the bottom of
the unit. |
 |
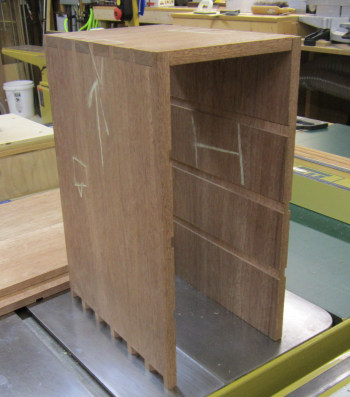
Here are the dry-fit towers
with outer dovetails and inner dado joints. |
 |
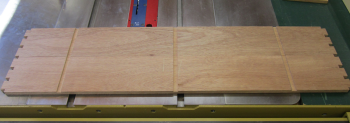
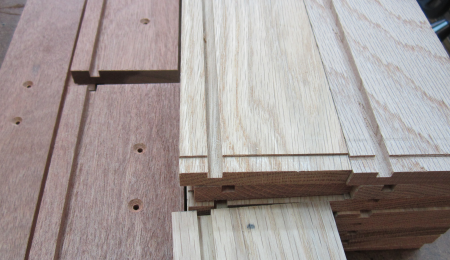
After all of the dadoes were routed we then did a final milling of all the remaining pieces so that they perfectly fit in the grooves. This was done in the Dewalt planer. Here are the mahogany drawer front pieces. We examined them for grain runs so that an attractive grain will run horizontally across all drawer fronts. |
 |
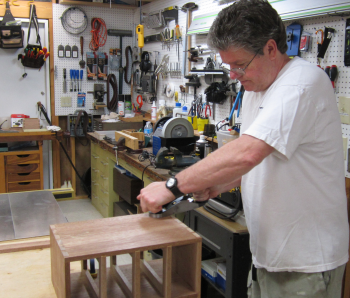
After making all of the drawer frames the next step was to dry fit the left tower. It fit together well and squared easily enough.
|
 |
Then it was disassembled for
glue up. |
 |
First the drawer frames were
glued into the dadoes on the inside panel of the outer edge of the tower. |
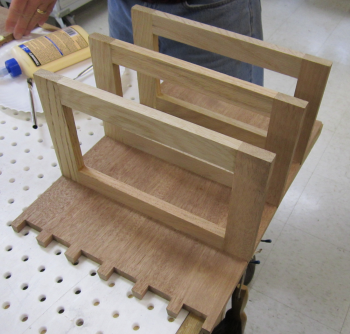 |
Then the inner side of the tower
was glued onto the frames. |
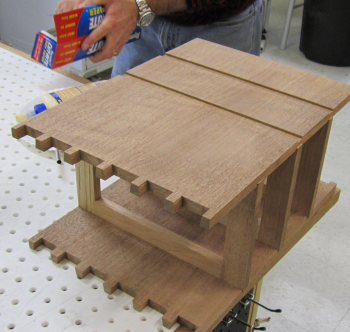 |
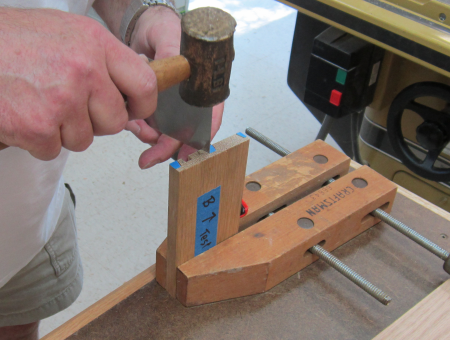
Then the tower unit was turned upright. The dovetails were glued and the top was tapped into position. |
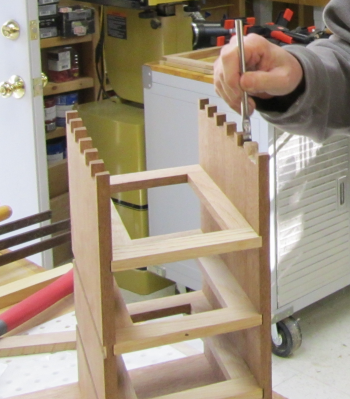 |
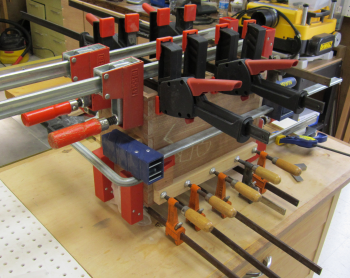
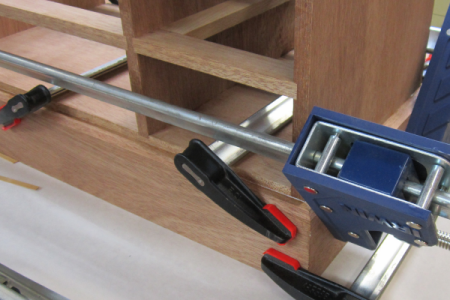
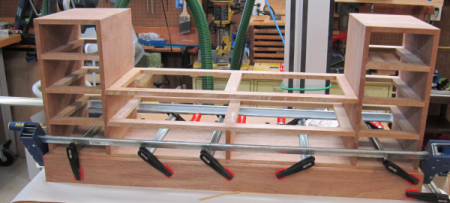
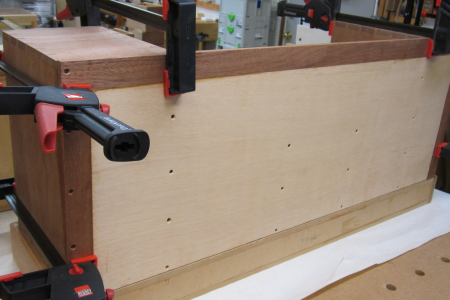
With the unit laying flat (on
the rear side) the tower unit was then glued to the bottom of the carcase
and a total of 20 clamps were put into place to guarantee that all of
the joinery was tight and square. |
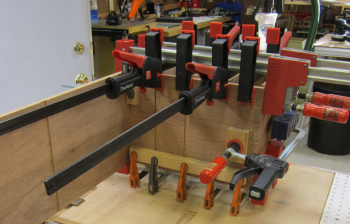 |
It's a "Clampenstein monster"! |
 |
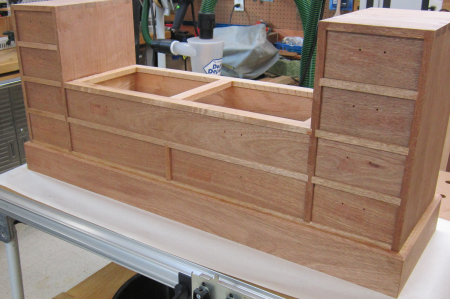
| Towers were then planned and prepped. |
 |
After the carcase was completed the unit was moved into storage along with all of the milled mahogany drawer fronts and the oak drawer side and back pieces. The project was put on hold while we built the workbench, the assembly table, the saw benches and a few other projects. During this period it was decided that when we picked back up on the chest drawers we would make all of the half-blind dovetails for the drawers using hand tools instead of the Leigh dovetail jig. So we made our very first half-blind dovetails joint in the all oak beta test drawer.
|
|
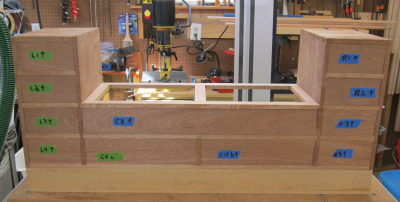
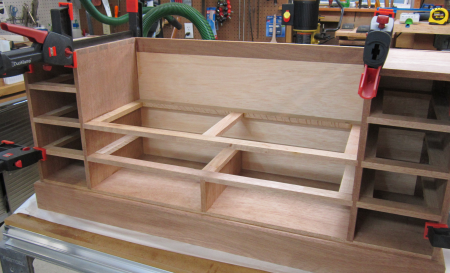
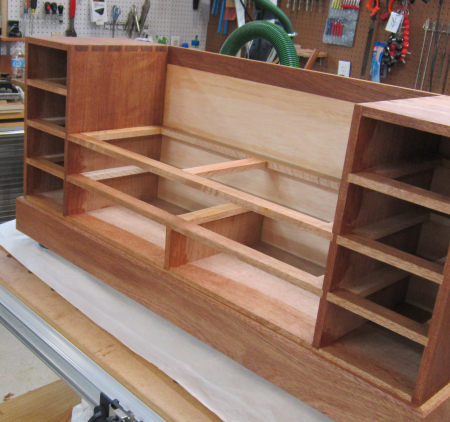
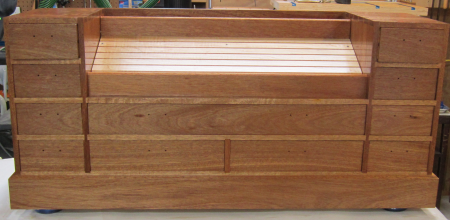
Here is the carcase with all of the drawer fronts custom fitted.
|
 |
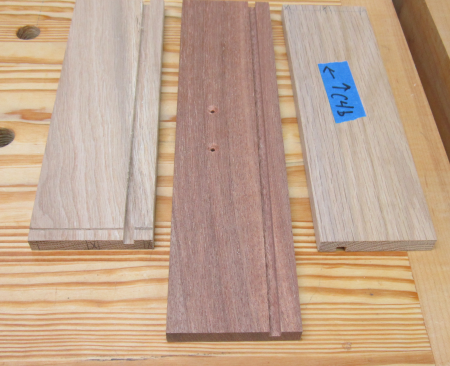
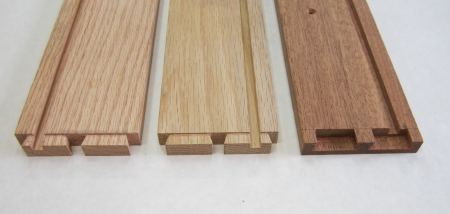
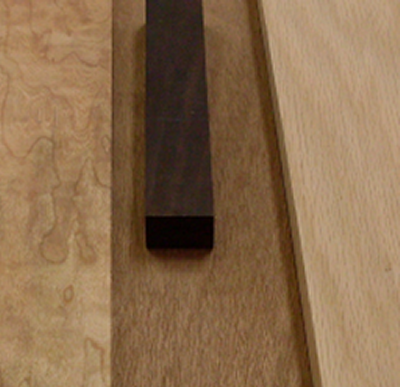
This is the range of the wood being used. Left is the curly cherry that will be used for the ramp for the rules. Center is the recycled mahogany that forms the carcase and the drawer fronts. Right is the oak used for the drawer sides. The small dark piece is Brazilian rosewood and is the choice for the pulls. Although we are also considering jotoba.
|
 |
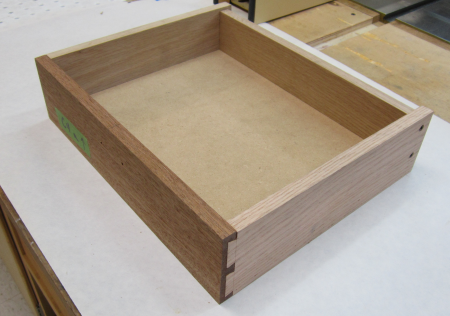
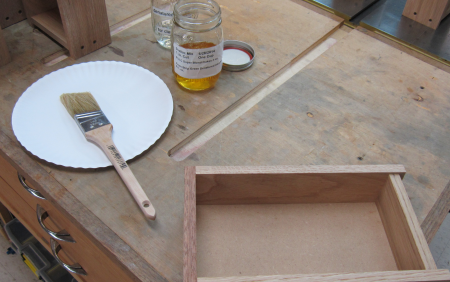
A beta drawer version was created out of oak to test out our designs...where to put the grooves, how to lay out the half blind dovetails, how to connect the rear...etc. Here the unit is glued up and clamped. |
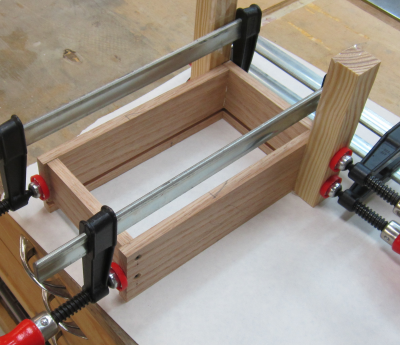 |
Side view...we screwed the rear panel rather than glued.
|
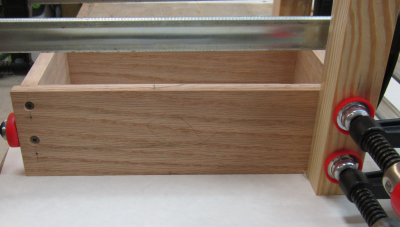 |
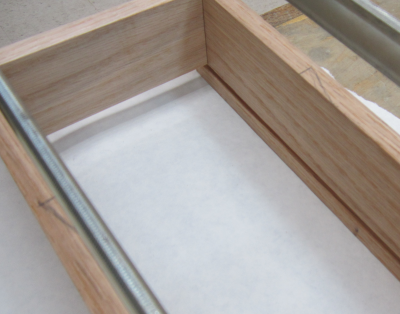
The rear piece stops above the
groove for the drawer bottom so that the bottom can be slid in or out
after glue up. |
 |
After glue up the unit was held
down for planing. |
 |
LV bevel up smoother did the
job. |
 |
Beta unit was a perfect fit. The dovetails look nice for the virgin effort. Ready to start production. |
 |
The first stage of building the half blind dovetail drawers was to finish prepping all of the fronts, sides, and backs of the drawers. The front edge of each side was squared on the LN 51 shooting board. |
 |
Then a rebate was planed into the front edge of the sides. This rebate will provide a ledge for the side piece to match up with the front piece. |
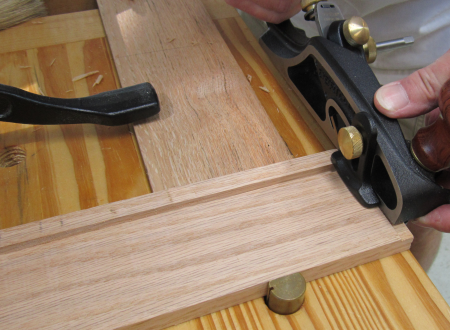 |
Close up of the rebate. |
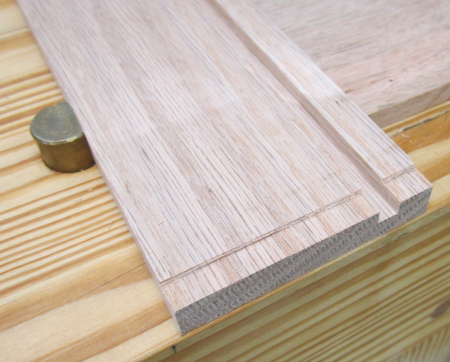 |
All of the pieces after final prepping. Front pieces are grooved and have counter bored holes for the pulls. Side pieces are all grooved and rebated. |
 |
Closer view. |
 |
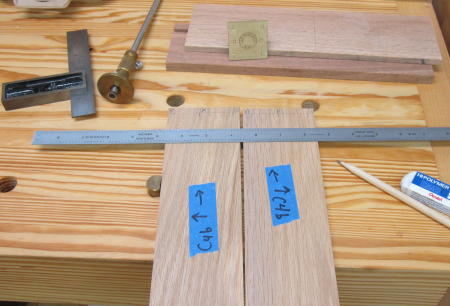
Then the matched sides and front
are ready for layout. |
 |
Layout consisted of a 1/4 inch half pin on each side along with a 3/8 inch pin centered. These distances were layed out using chisels.
|
 |
Then the pins were removed with dovetail saw... this is being held in the new Moxon style vise. |
 |
After the pins were sawed and chiseled, the layout for the tail sockets was transfered to the mahogany front piece. The sawing was then done on an angle to cut the side of the sockets. This was done with a dozuki dovetail saw. |
 |
After the angled saw cuts were
made, a cabinet scraping card was used to finish out the side cuts of
the sockets. |
 |
Here is the first finish tail
socket piece. |
 |
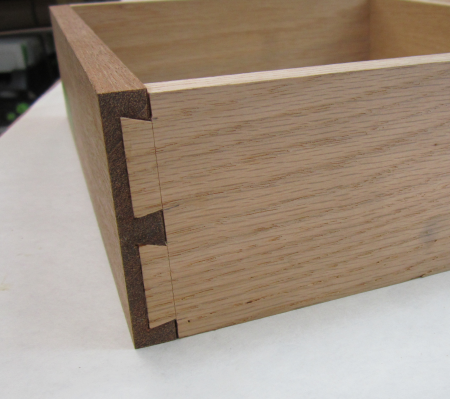
Finished tails and sockets. |
 |
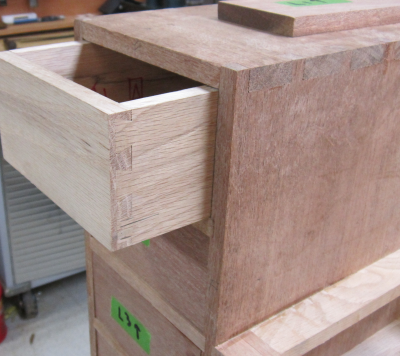
First dry fit. Nice contrast between mahogany and oak. |
 |
Dry fit drawer in chest. Drawer is too wide to fit at this stage because the side joints are "proud" so that they may be planed after glue-up. |
 |
Joint glue-up. |
 |
Cauled and clamped...final check
for square. |
 |
Drawer after clamp removed. Very strong joints and looks good for a first effort. |
 |
Side view of joint...waiting
to be planed. |
 |
Getting quicker and better at producing the half-blind dovetails. Now it is just time to repeat this task until all 11 drawers are done. |
 |
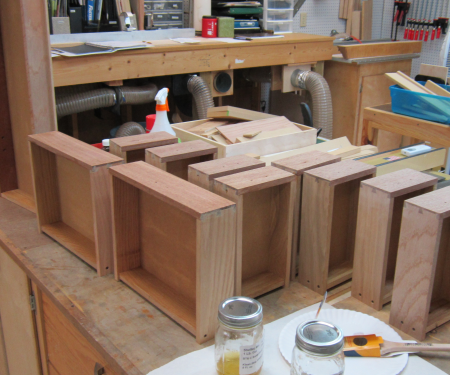
All eleven drawers have been
built and planed to fit. |
 |
A look at all of the half-blind
dovetails. |
 |
Next woodworking phases are
to finish the drawer pulls, build the ramp for the rules and finish
out the apron trim. |
 |
We decided to make the pulls with the rosewood. It is the dark wood in the middle in the image. The wood is very hard and somewhat oily. It is a bit difficult to work with but we liked the appearance. Brazilian rosewood, genus: Dalbergia nigra, is called jacarandá da Bahia in Brasil. |
 |
These pieces were some cutoffs from a cross project of my brother, Tom. He left me some exotic wood pieces a few years ago when he move to California. The dark appearance was lessened when the wood was cut, but they darken with time. |
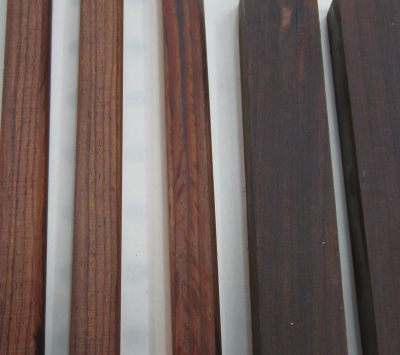 |
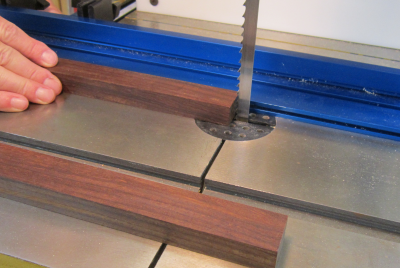
The rosewood blanks were squared on one face and one edge on the jointer and then ripped on the bandsaw. Due to the caustic potential of the Dalbergia species we were very cautious regarding dust collection and we wore masks while working with this wood. |
 |
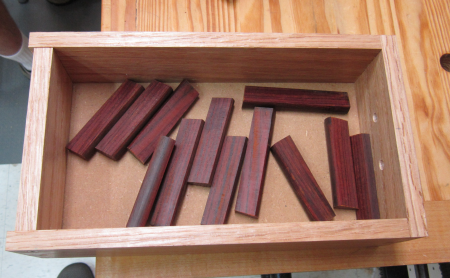
The pull blanks. |
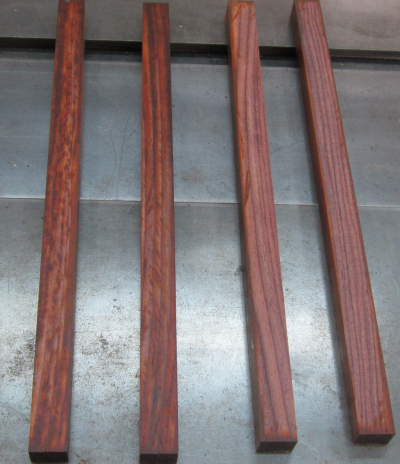 |
The blanks were run through
the router twice so that the roundover bit would create a bullnose rounded
front edge of the pull. |
 |
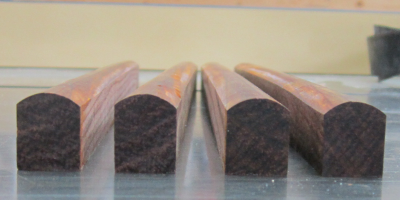
The bullnose profile. |
 |
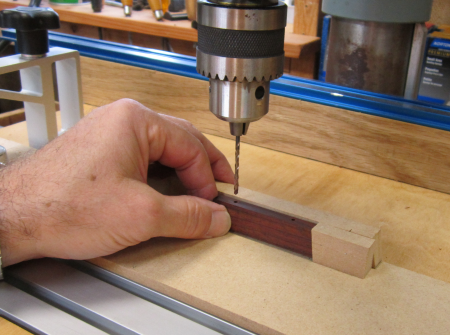
The mahognay front faces were all drilled for the pull screws. Here a jig was set up to drill the holes along with a countersink to accomodate the #6, 1 inch square drive screws that will be used to attach the pulls.
|
 |
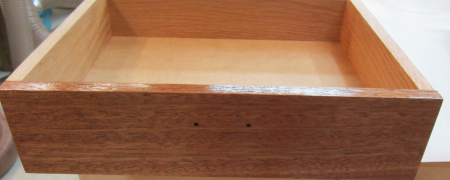
The result of the holes lined up on the front of the drawer faces.
|
 |
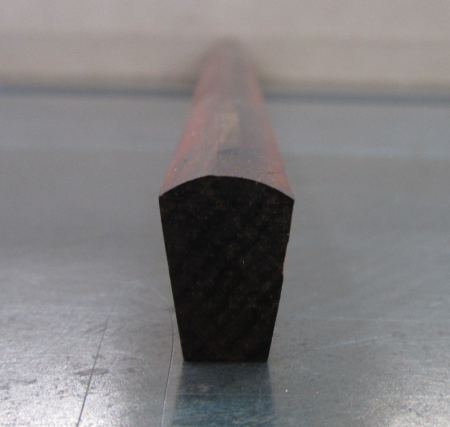
The pulls were beveled at 8°. End view of beveled pull blank. |
 |
The blanks were then fitted
into a shop built jig that would hold the beveled blanks for planing
and smoothing with a card scraper. |
 |
Shop built jig was a big help, but the rosewood was difficult to work with plane and card. |
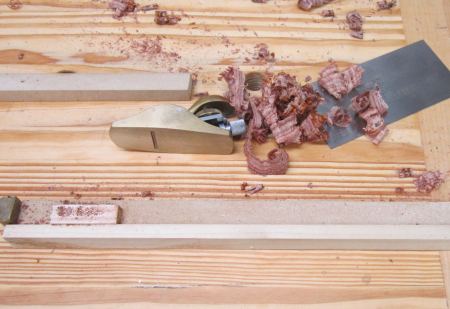 |
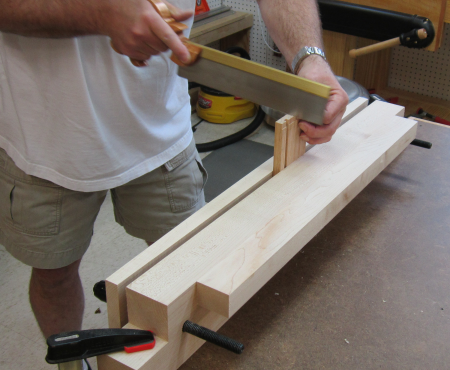
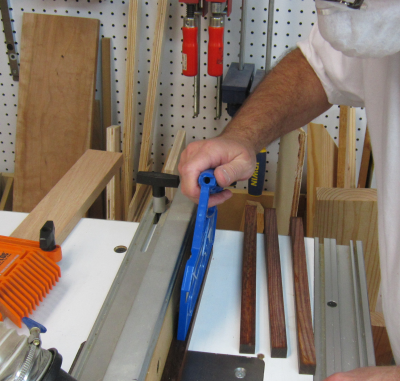
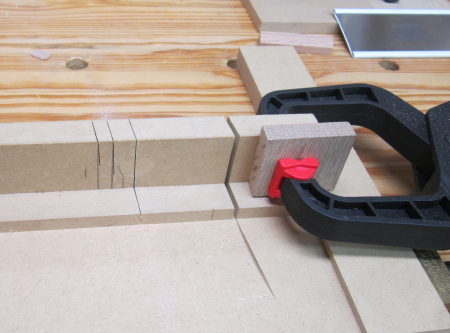
The original plan was to cut the individual pulls using the chop saw. But we wisely decided to avoid the dust, noise, and danger and changed the process. Here you can see the 8° kerf cut into the jig with a handsaw. The saw has a .020 inch plate so the guiding kerf cut is a tight fit and will result accurate cuts.
|
 |
Here you can see the 8° kerf cut into the jig with a LN tapered carcase saw. This is a new saw and we found it to work exceptionally well.
The saw has 14 TPI and it files crosscut. The sawn faces were very smooth. |
 |
The jig has a ledge that is bevelled at 8 so that the rosewood blank is in a position that the bottom edge of the bland sits in contact with the square fence. |
 |
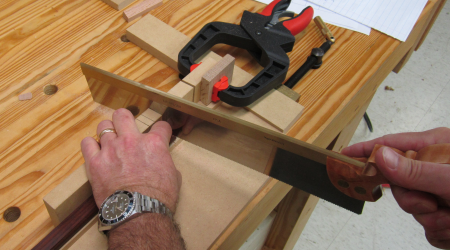
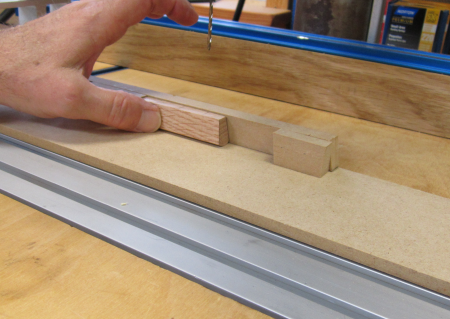
The stop on the right end created the first cut on the long blank...this produced a short blank of the right length to be flipped and sawn again. |
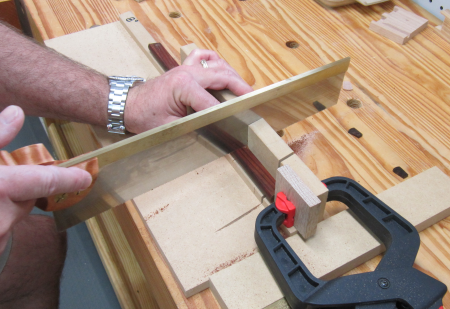 |
After all the short blanks were cut to the initial length a second stop was placed on the left side to trim off the final cut. Here is the left side stop. |
 |
This left a very small sliver to be sawn off. |
 |
The dozen pulls. |
 |
The same type of setup jig was used at the drill press. First the fence was set to make sure that the holed would be in the center of the thickness of the pull. This fence was ripped at 8 so that the edge of the pull would be square to the spindle. Then a stop was set at the each end to provide the proper spacing. |
 |
Each pull received two holes at 3/64 inch diameter with a proper depth to accept the #6 square drive screws that will secure the pulls to the drawers. |
 |
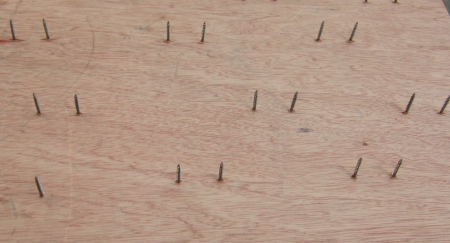
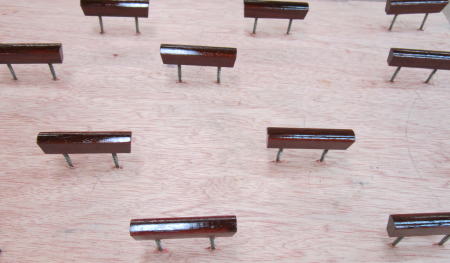
A series of #6 screws were placed in a scrap piece of Luan. These will be used to hold the pulls for finishing. |
 |
The pulls are slated for several coats of 1-lb cut and 2-lb cut shellac. |
 |
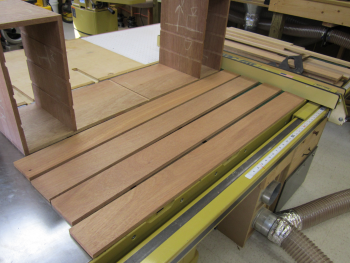
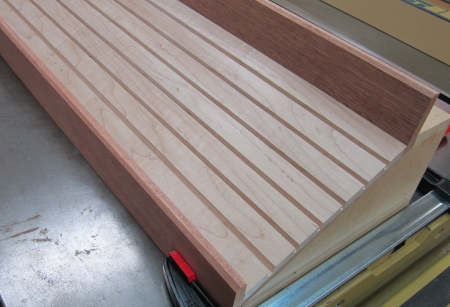
The ramp to hold rules is made by putting a series of angles cuts into a sheet of maple.
|
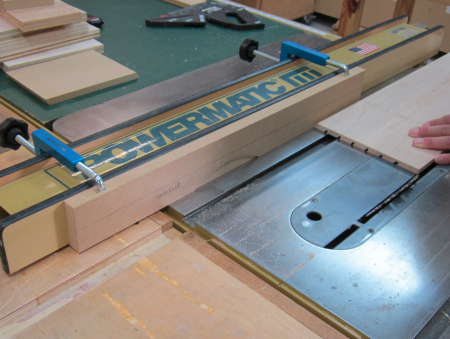 |
In the original plans the ramp was going to be curly cherry...I later opted for hard maple. The grooved ramp... |
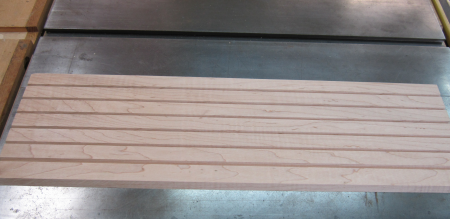 |
Side view of ramp shows the groove angles. |
 |
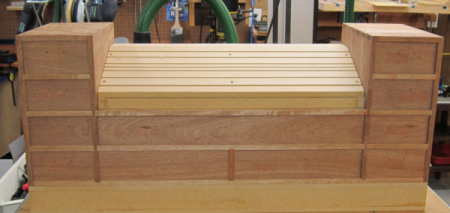
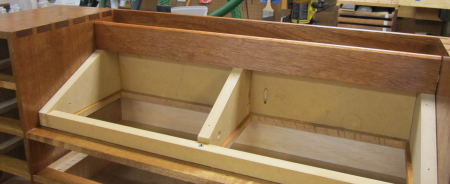
Frame of the ramp installed onto carcase. The top horizontal rail that creates the front edge of the tape measure trough is glued and pinned. |
 |
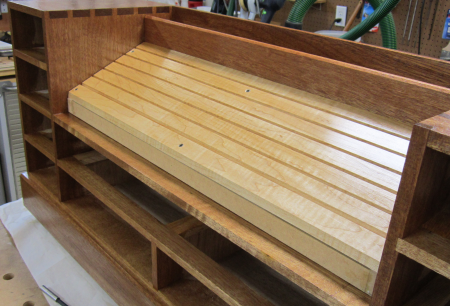
The ramp is screwed into place. |
 |
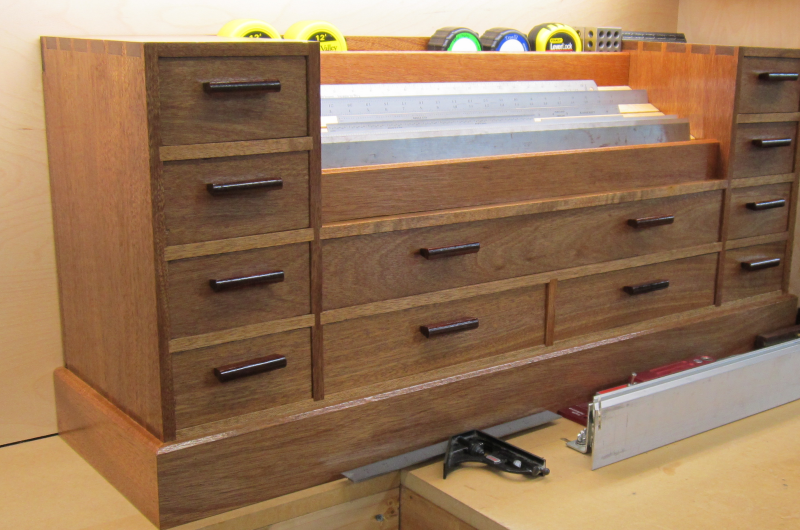
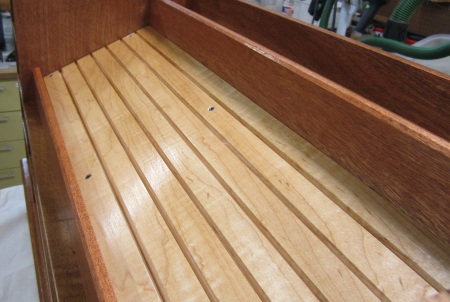
The ramp assembly is complete after the front horizontal rail is installed. |
 |
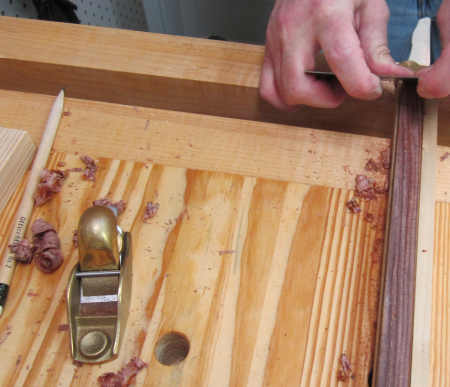
After the drawers were all finished it was time to tidy up all areas of the carcase. There was a small issue with the support for wide drawer. It was slightly higher in the center than on the sides, thus the drawer bumped slightly. |
 |
This issue was solved with some
work with the LN 101 block plane. |
 |
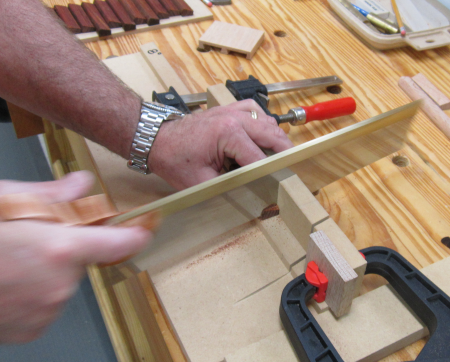
The trim for the front and side apron was ripped to size and chamfered. The corners were mitered and then all was glued to the under-carcase. Corners were pinned with #23 inch headless pins. |
 |
Front of apron being glued,
clamped, and pinned. |
 |
Trim glue up. |
 |
After glue up...the new mahogany
apron. |
 |
Carefully aligned and pre-drilled holes allowed the back to be attached via screws to the thin frame members of the carcase. |
 |
Front view with back attached to carcase. |
 |
First step in finishing was to shellac the inside of the drawers. I used Super Blonde Flakes, #1 lb. cut. I applied it with a brush. |
 |
After the quick dry first coat I knocked off the whiskers with 000 steel wool and applied a second coat. |
 |
After the carcase was glued up the first coat of finish was applied...a 1-lb. cut of shellac was rubbed on. |
 |
Carcase after the first rub. |
 |
A shellac rub was also applied to the sides and fronts of all the drawers. |
 |
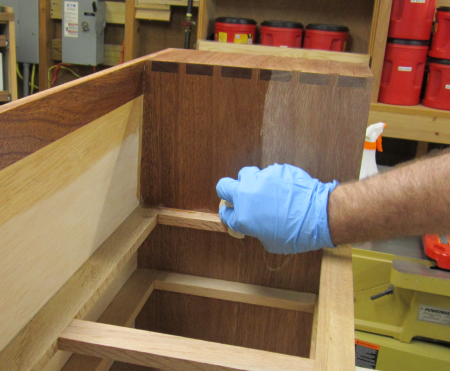
After two coats of shellac, a hand rubbed coat of Waterlox Original Sealer and Finisher was applied. Waterlox is a varnish/oil proprietary mix made since 1916. Major ingredients are tung oil, ester gum, phenolic resin and linseed oil. |
 |
A fairly heavy coat was applied using an application pad and circular movements to rub into the grain. Then longitudinal long swipes are made with the grain. Dried overnight, the second coat will be applied without any sanding. This will really build up a layered finish. |
 |
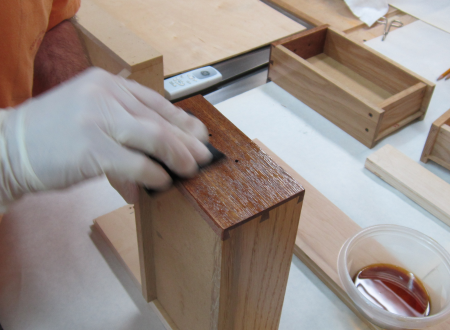
Waterlox was also rubbed onto the mahogany drawer fronts. To minimize odor the interior of the drawers was shellac (2 coats 1-lb cut) and the outer side oak faces were shellac (2 coats; 2-lb cut).
|
 |
The first two rubs of Waterlox were laid on heavy with no intermediate sanding. The third coat was rubbed on and immediately sanded with 400 grit wet/dry paper. |
 |
The pulls pulls received two coats of shellac 1-lb cut. |
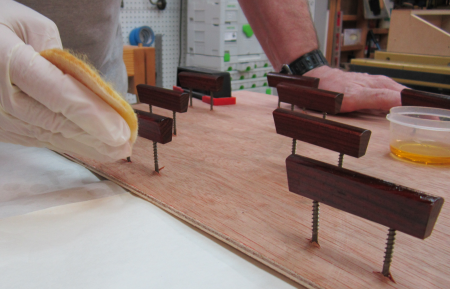 |
The oily nature of the rosewood at first seemed to work poorly with the shellac but subsequent 2-lb layers looked pretty good. |
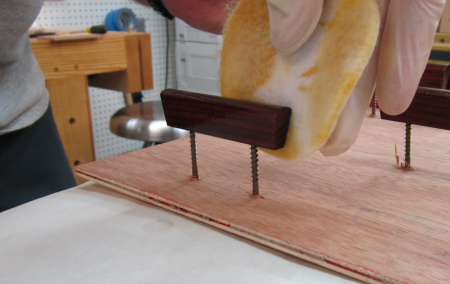 |
The pulls ended up getting 8 coats of shellac. Ready to go. |
 |
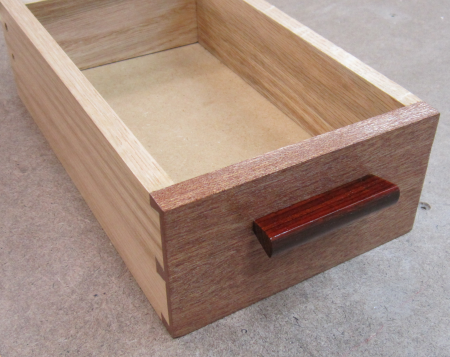
The first installed pull. |
 |
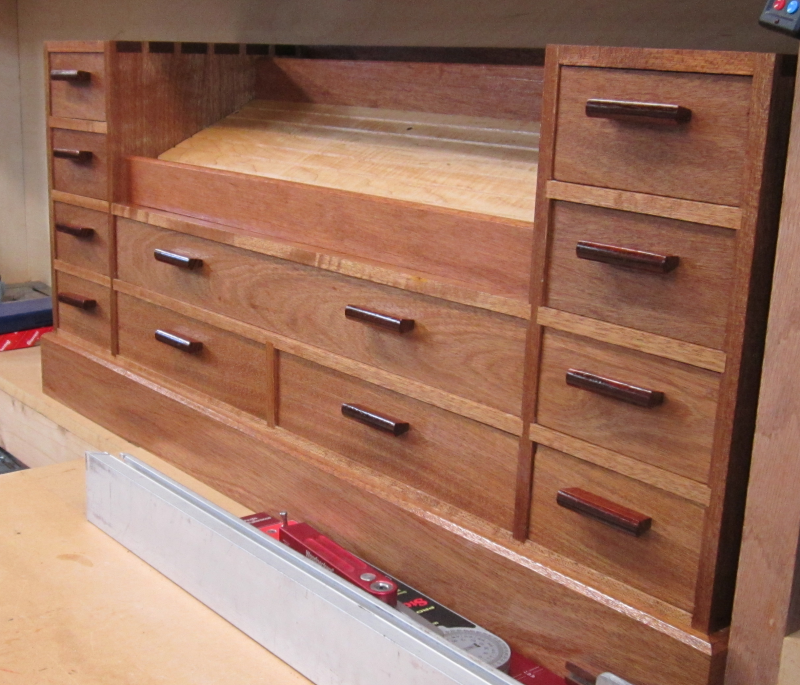
After numerous coats of shellac and Waterlox the drawers are all complete except for pulls. Here is the test fit. Dovetails looks good with the finish rubbed in. |
 |
Chest ready for pulls.
|
 |
Chest moved to the cabinet where it will live. |
 |
Pulls installed...a done deal.
|
|
A few tools in place...
|
|