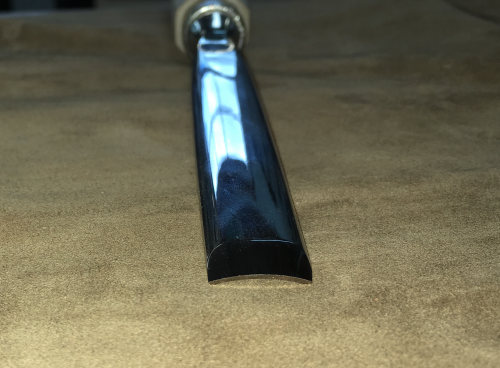
Before I could learn how to do woodcarving for accents on my future furniture builds, I had to learn how to sharpen a gouge. I followed the basic path of Chris Pye's No Fear Sharpening process...his notes and the videos from his Woodcarving Workshops.tv website. For my first attempt I took on a Hirsh gouge. This is a #5 sweep, 14 mm straight gouge.
And it turned into a tragedy/comedy of errors...see how it went... After learning from my mistakes I took the commisioning of a second gouge. Pfeil #6, |
|
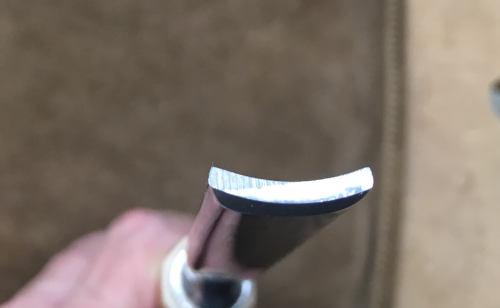
Shaping Phase Step 1 Square the Cutting Edge Here the gouge is squared at the bench grinder...used a crowned 80x CBN wheel. |
 |
I had added a Veritas grinder support with improved angle and height setting... plus I like the wrap around surface. It was much easier to holding the gouge at 90°. It was also easier to align the support withe the center of the wheel shaft so that the end was square in two planes. |
 |
| I took way less material off than I did on my first gouge. |  |
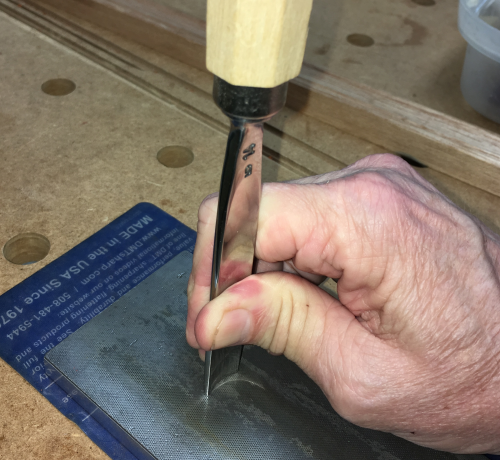
Shaping Phase Step 2 Square the Cutting Edge With the square edge being better and smaller, it was much easier to polish the edge. Worked it on the Atoma 1200x. |
 |
Shaping Phase Step 3 Set the Inside Bevel Worked the inside bevel with a Norton CP 12 mm coarse India slip stone...tried for around 5°. |
 |
Shaping Phase Step 4 Set the Outside Bevel The outside bevel was ground at the Baldor...worked it at the same angle that the gouge came at...around 20°. |
 |
The ground outside bevel... |
 |
Sharpening Phase Step 1 Sharpen the Inside Bevel Continued working the 5° inside bevel with a Norton CP 12 mm hard translucent slip stone... |
 |
Sharpening Phase Step 2 Sharpen the Outside Bevel Started working the bevel on the Atoma 1200x diamond plate. |
 |
Tried to work the bevel consistently...used marker to check my progress... |
 |
| Moved to the DMT extra fine diamond plate... |  |
| Then to the DMT extra, extra fine 8000 mesh plate. |  |
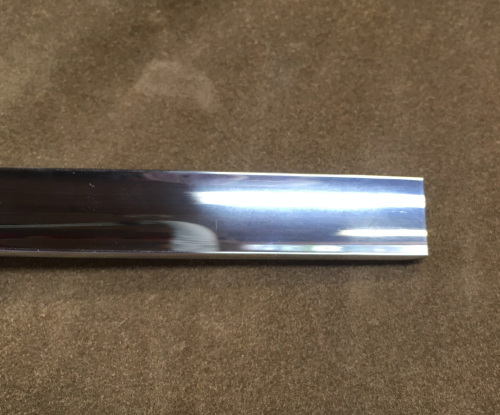
As the bevel polished, it was clear that there were still some stone marks and I went back to DuoSharp plate...even dropped down to the red plate and then back to the green plate...polished off at the 8000. A look at the polished bevel. |
|
Continued working the inside bevel and outside bevel and pushed the burr around...the finished sharpened gouge. |
|
Stroping Phase Step 1 Strop the Inside Bevel Continued working the inside bevel and outside bevel and pushed the burr around...the finished sharpened gouge. |
|
Stroping Phase Step 2 Strop the Outside Bevel Continued working the inside bevel and outside bevel and pushed the burr around...the finished sharpened gouge. |
|
|
|
Gouge # 1 |
|
The first step in the commissioning of my Hirsch was the Shaping stage...in this step you true the cutting edge and form the inside and outside bevels. Here the gouge is squared at the bench grinder...used a crowned 80x CBN wheel. |
 |
Purpose of the grinding is to produce a new edge that is reground...end is square... |
 |
The cutting edge is square...nice clean end in both planes... |
 |
Future shaping of bevels will be made in reference to this end view...so it needs to be brighted so that it will appear as an edge of light... |
 |
This is done with a stone to polish the cutting edge...here the end is placed on a 1200x grit Atoma diamond plate. Gouge is held perpendicular to the stone and the edge is polished. |
 |
First attempts showed that I ground the end poorly...the polished edge has a low spot on the corner that still has the grinder marks. |
 |
After regrinding and polishing again on the Atoma...the end was placed on an Extra Fine DMT and further polished. |
|
My grinding work had shortened the gouge a bit and I needed to remove a lot of metal to regrind a lower angled outside bevel...used the SVS-32 jig on the Tormek. This jig allows rotation of the tool while it remains square. |
 |
Here the gouge was set by eyeball to grind the new bevel. |
 |
New roughed in outer bevel |
 |
Thinning the end... |
 |
After getting the gouge thinned dramatically, I resurfaced the Tormek stone for a finer finish and continued to shape the outer bevel. |
 |
I then used a oilstone...a coarse India stone...Norton Chris Pye slipstone 12mm model to match up with the inner bevel as well as possible...worked on creating a 5 degree inner bevel...worked it until I got a slight burr. |
 |
Then switched to the 12mm hard translucent Arkansas stone. |
 |
|
|
