As I started using the Festool Domino device more and more, I became frustrated by the amount of time necessary to properly clamp down the workpiece. It was not a matter of difficulty in clamping
the piece...the However, when you were mortising the work pieces multiple, repetitive instances it just took too long to clamp and unclamp each piece. Or, if you changed sized of workpieces often then the setup became tedious. While doing repetitive work for the Machinist Chest Project, I quickly cobbled togethger a jig that helped work with a some small long pieces of a particular width and thickness.
|
|
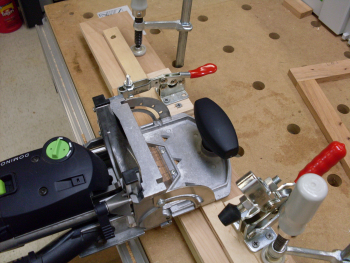
Here is that prototype jig. We clamped a jig rail down to the MFT3 and used some toggle clamps to hold down the workpiece. There were problems with the toggle clamps having poor clamping options on varying materials. Any attempt to use a reconfigure caused some distress. |
 |
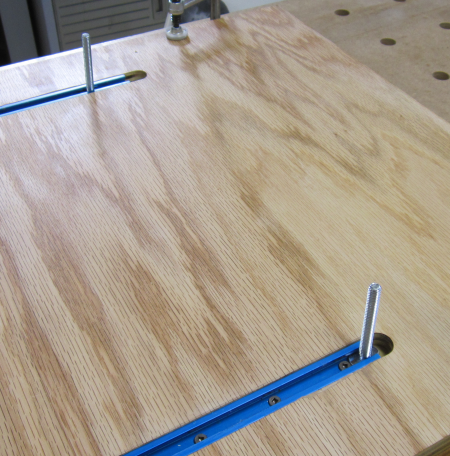
| We needed an appliance-jig that would do much, much more. To create a more versatile production jig, we made a base out of two layes of 3/4 inch oak cabinet grade plywood. Then two dadoes were routed to hold some T-track.
|
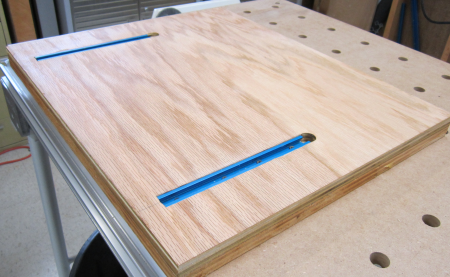 |
The base dimensions were set so that the size worked out perfectly in regards to the MFT3 dog hole pattern... thus the back edge abuts two Qwas dogs. This prevents any movement of the base when it is pressed from the front edge with Domino device. |
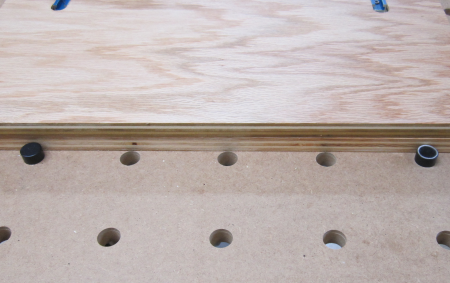 |
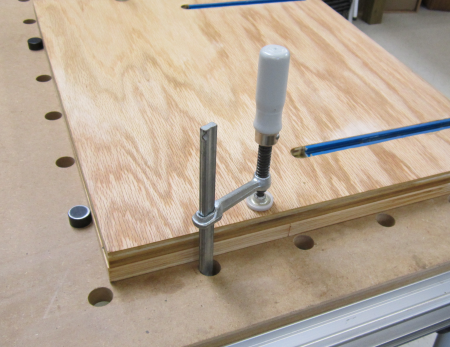
In addition, the width of the base was aligned to a row of dog holes so that clamp connectivity was simplified. These clamps hold down the base very well. With the base held tightly all subsequent clamping is effective. |
 |
T-bolts were fed into the T-slots. |
 |
The clamping sled was made from Birch plywood and edged with oak. Variable hole spacing allows the sliding palatform to connect at varying distances from the front edge. We designed the unit so that, for the most part, the most commonly needed measures would be acheivable from the center hole. |
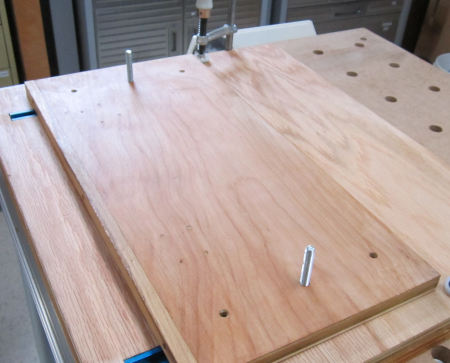 |
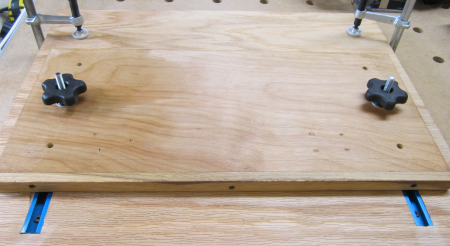
A couple of knobs make for easy and quick adjustments. The clamping sled can move toward or away from the front edge as needed. It is important that the work piece is slightly proud of the front edge of the jig so that indexing the Domino device is simplified. |
 |
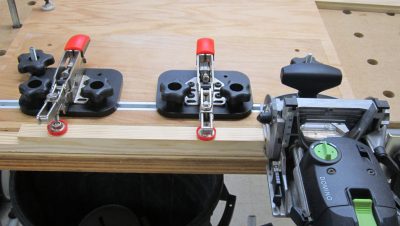
A pair of the new, self-adjusting Bessey toggle clamps were then installed in the most advantageous location. These new clamps are very heavy duty and the self-adjusting capability makes all other toggle clamps seem useless.
|
 |
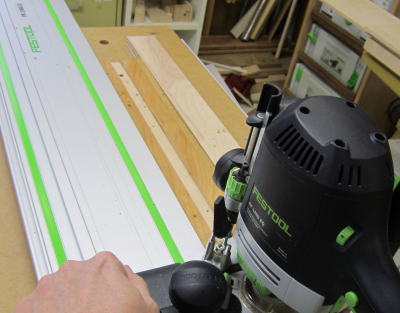
Here the jig is shown with a thick work piece.
|
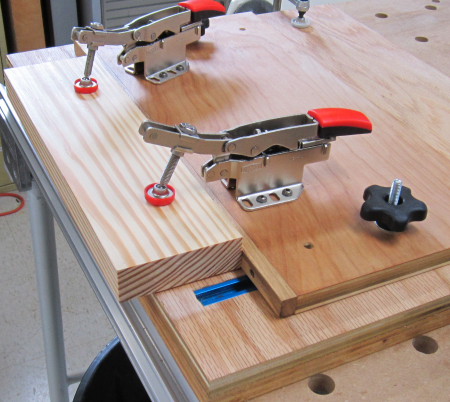 |
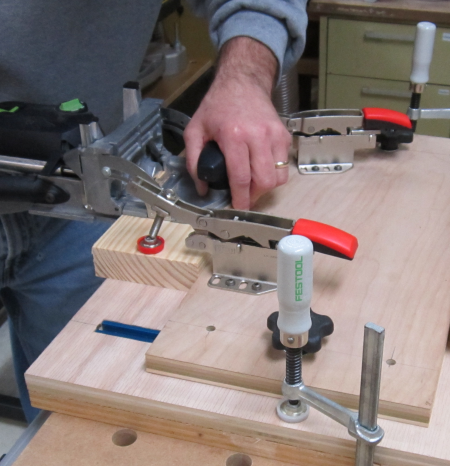
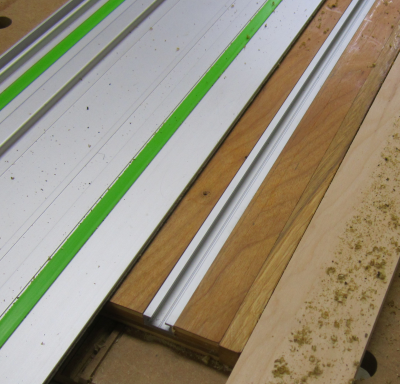
Here the jig is holding a thinner piece...thinner in width and thickness...without any kind of readjustment necessary except for the quck toggle action on the Besseys. The Domino device fits perfectly between the two clamps...the clamping power when both units are engaged is extreme. However, when putting a mortise towards the end of board there is still adequate clamping power with only one unit engaged. |
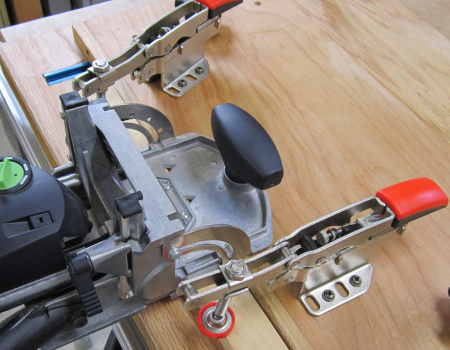 |
The left side clamp was installed at an angle so that there was more room available for the left arm to ergonomically and effectively hold the Domino device by the forward hand grip.
|
 |
The jig was surface finished with my BLT rub. The unit was immediately put to work installing indexing Domino tenons for glue-ups on the workbench project. Results were excellent. |
 |
After a year of using the jig as configured in the image above...two issues arose... #1...with the Bessey clamps screwed into fixed positions the only available mortising area was in the space between the two clamps #2...the original jig was designed to hold down material as mortises were put into the side of a piece. I had no effective way to hold material while cutting a mortise into the end of a board. So...while working on a project that
needed Dominos in a number of pieces with a total production run of
6 units (see Slantboard Project)
I made time to update the jig... |
|
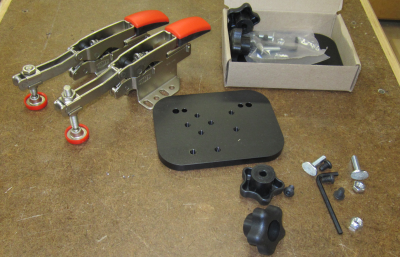
Issue # 1...to make the Bessy
clamps mobile... from Lee Valley I bought some 2 foot sections of T-track
plus bases for the Besseys that would allow movement and fixation points
allong the track. |
 |
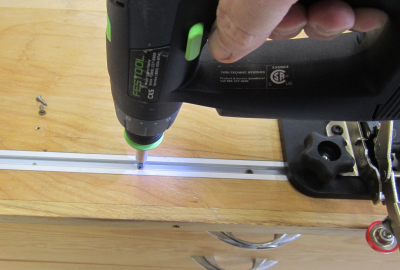
I dadoed a groove in the clamping sled. |
 |
The 3/4 x 3/8 inch track fits slightly below
grade. |
 |
Hacksaw was used to cut track...then deburred
with sander. |
 |
There was little depth left in the 3/4 Birch so after drilling holes in the track I did not counter sink the holes because I did not want the screws to break through the clamping sled. The #6 x 1/2 square drive screws sit up proud off the track but there is ample room for the track bolts in the Bessey bases. |
 |
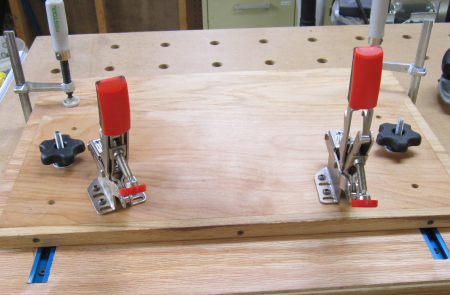
With the clamps on the outer runs there is ample room for the Domino to cut mortises in the center of the run. The clampls are essentially in the same location as before... . |
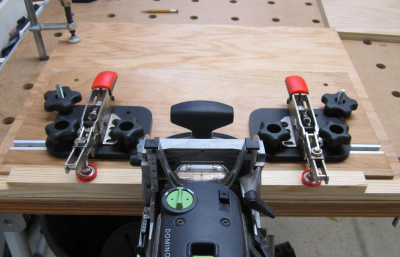 |
The new feature is that when one of the end clamps is moved into the center there is room to cut mortises at the end of a run with two clamping points for security.
|
 |
Issue #2...to enable secure holding of a piece while putting a Domino mortise into the end of the piece... I dadoed a grove and installed another T track across the back of the base. Because a number of different sized track bolts will be used I countersunk the heads of #6 x 1 1/4 inch screws. The thickness of the base accomodated the longer screws. Cindy and I also drilled a series of 20 mm holes. These will hold becnh dogs as stops. |
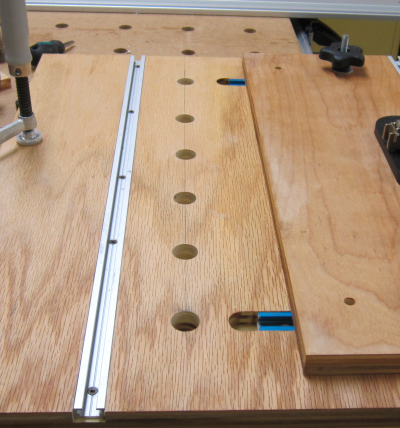 |
The clamping sled can be moved along the
blue tracks to establish a "fence" on the right edge and a
variety of 20 mm dogs and stops that I use with the MFT3 table will
fit in the holes to provide a stop. |
 |
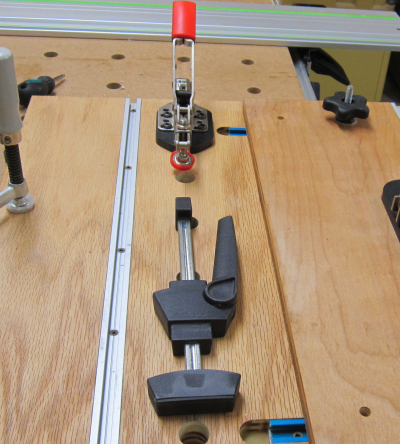
Shown here are a variable Festool Clamping
Element and a self-adjusting Bessey toggle clamp on a LN base anchored
in 20 mm holes. |
 |
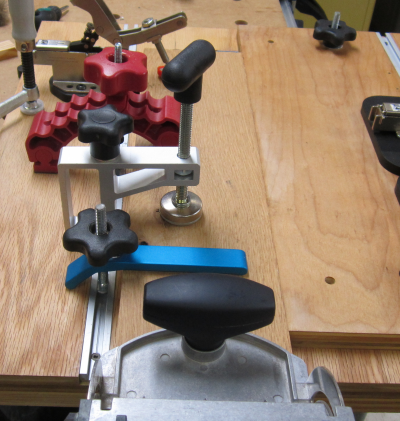
Here a board is secured against the sled fence and stopped by a Qwas dog. There is a variety of Rockler, Woodpecker, and Bessey hold downs that are anchored in the track. Any one of these devices would provide security that would effectively hold the board for mortising. The Festool Domino is shown resting on the board. |
 |