Wood Selection, Milling Wood and the Box Joints Sanding, Finish Application and Final Product
|
|
This is a multi box project with box joint joinery...some napkin boxes for Renee and Aimee and a letter tray for my office...
|
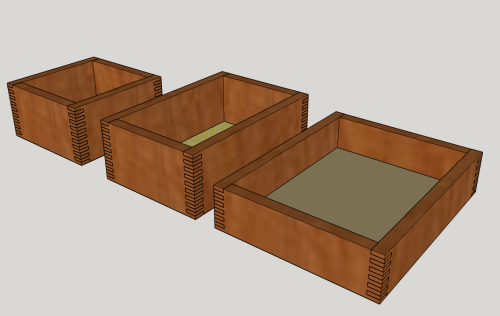 |
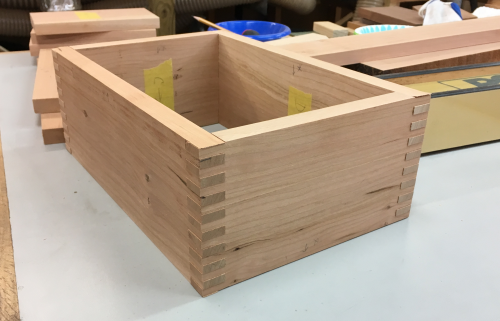
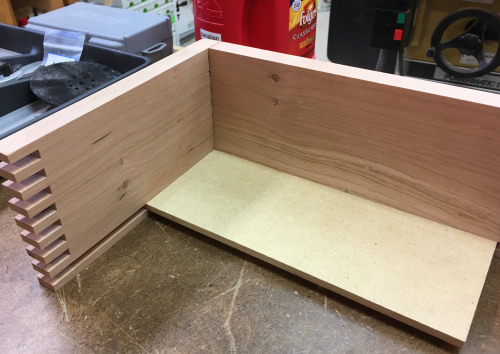
The letter tray will have cherry sides with an MDF (1/4 inch) bottom...sides are 3/4 inch thick, 3 inches tall with dimensions of 14 x 11 inches... |
 |
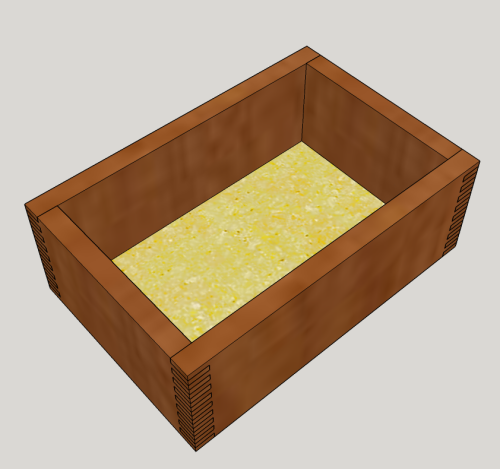
The napkin box for Aimee will be rectangular...it will hold folded cloth napkins...it will have cherry sides with an MDF (1/4 inch) bottom...sides are 3/4 inch thick, 4.5 inches tall with dimensions of 12 1/2 x 8 3/8 inches... |
 |
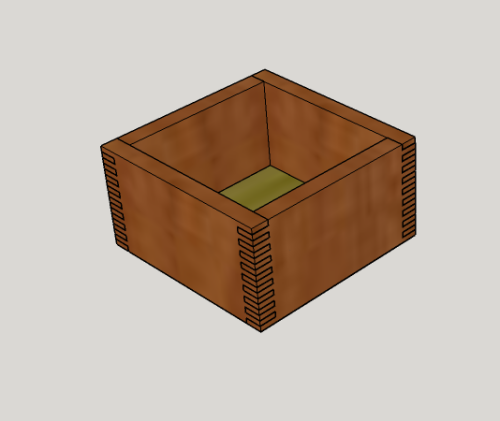
The napkin box for Renee will be square...it will hold paper napkins...it will have cherry sides with an MDF (1/4 inch) bottom...sides are 3/4 inch thick, 4.5 inches tall with dimensions of 8 3/8 x 8 3/8 inches... |
 |
|
Box Joints |
|
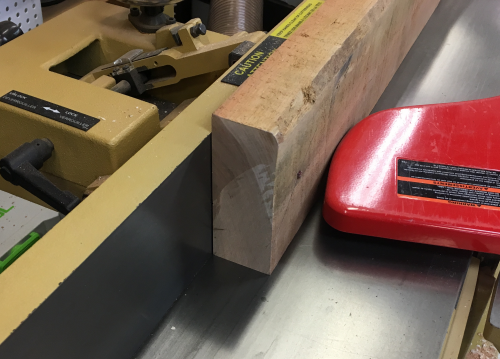
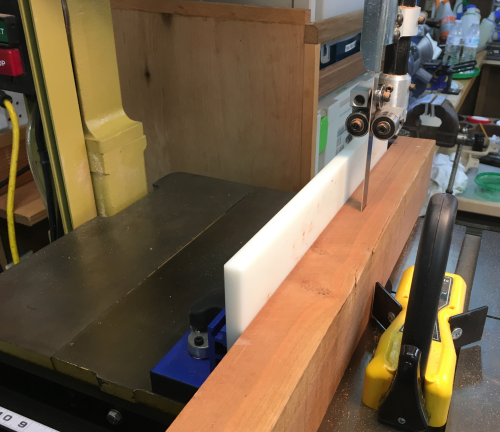
Found some cherry slabs in the attic...ripped them on the bandsaw so that they could be run across the jointer... |
|
At the jointer...one face and one edge were jointed to establish a square corner... |
 |
Bandsaw blade set at 3/4... |
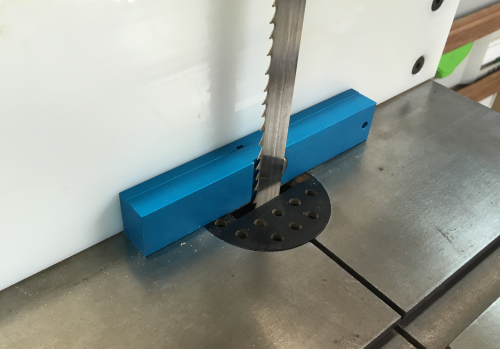 |
Jointed face to the fence...jointed edge to the table...boards resawn on the bandsaw... |
 |
The 3/4 slabs were set aside for planing...the 1 1/4 cutoffs were taken to jointer and faced...then all were ready for surface planing.
|
|
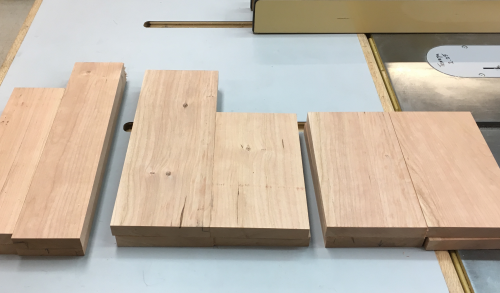
After planing down to ~3/4 inch... |
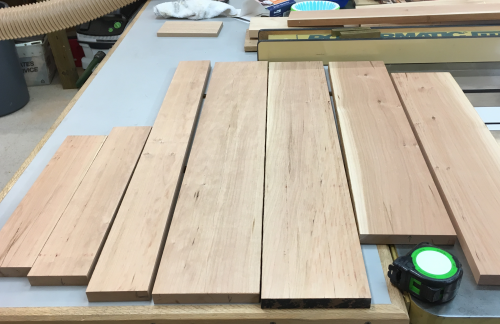 |
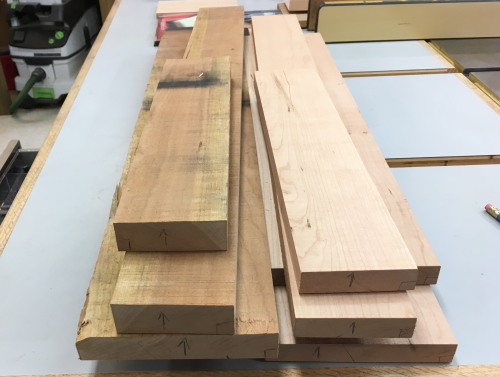
...sides were ripped and then chopped...12 sides for the three boxes. |
 |
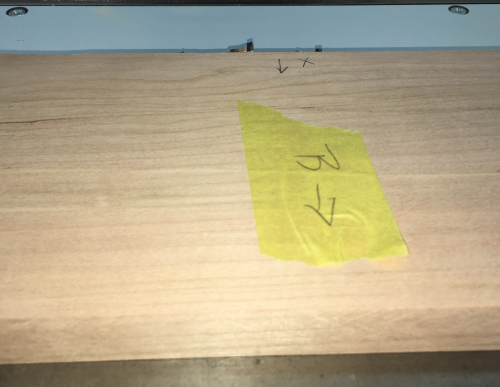
The layout marking pattern of one side... |
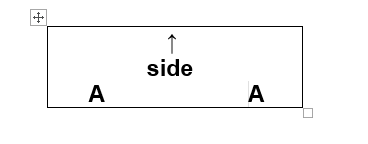 |
Typical marking pattern for all four sides... |
 |
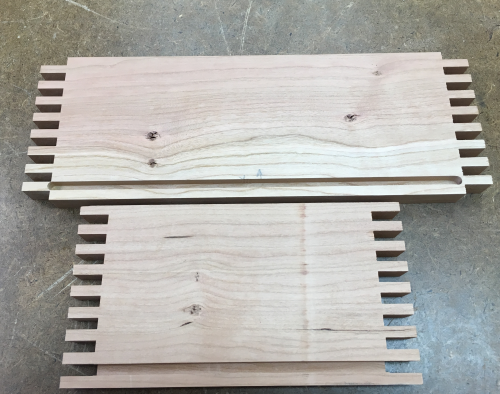
Sides for all three boxes laid out... |
 |
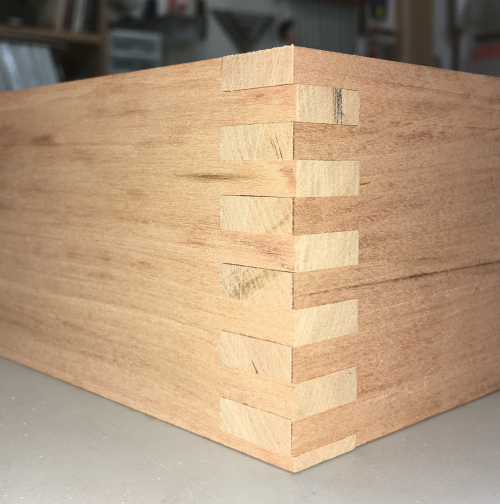
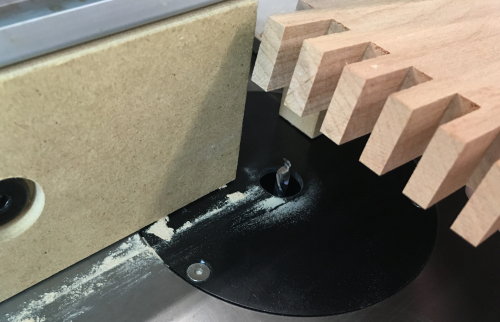
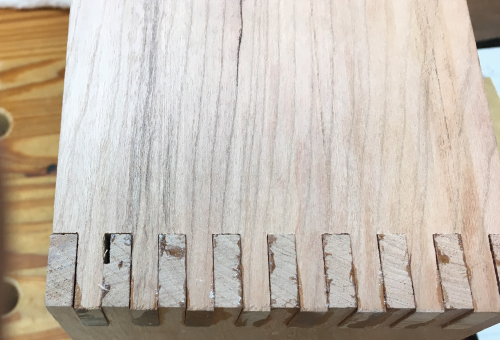
The Infinity blade height was set at slightly above the thickness of the material. This will make the finger ends slightly proud. |
 |
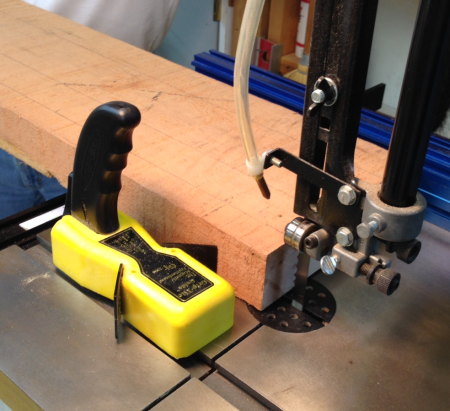
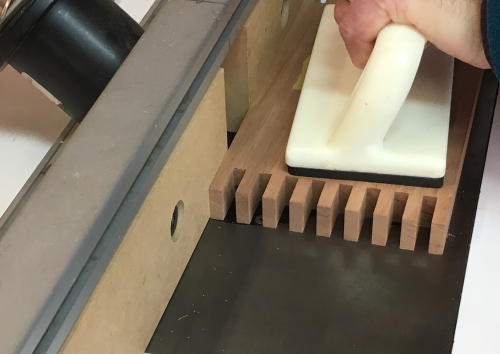
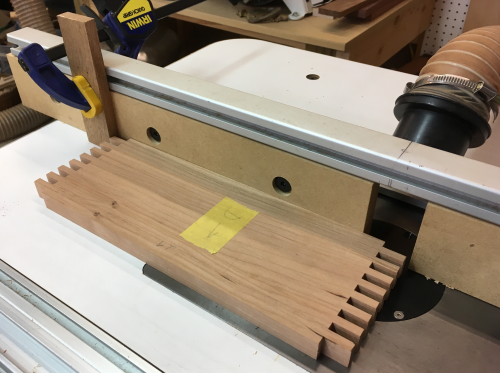
Finger cutting at the box joint jig...the width of the cut is 1/4 inch which is the thickness of the Infinity blade. The height of the cut is slightly higher than 3/4 inch. |
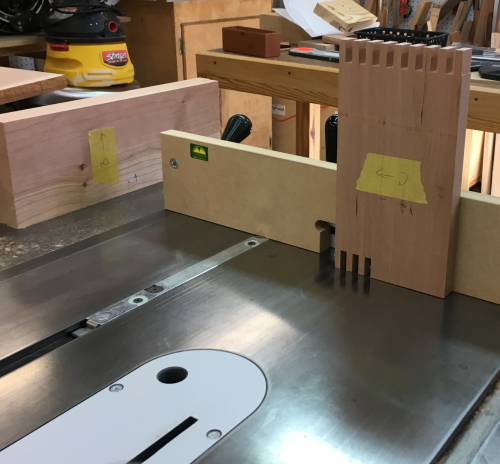 |
Critical to always make sure the top marking arrow is pointed to my right. |
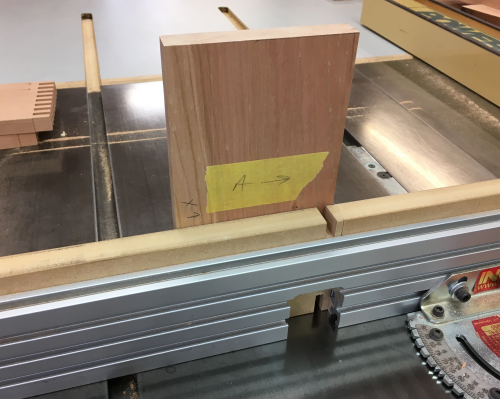 |
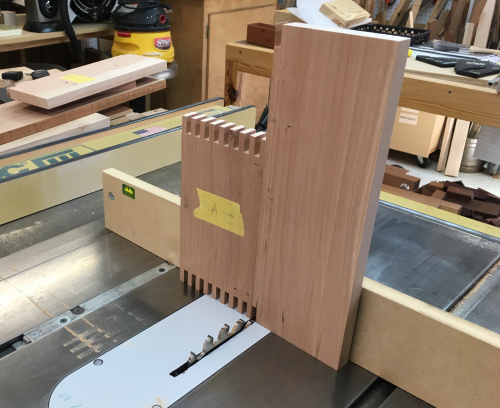
When setting up the next piece...the spacer piece arrow faces away from the fence...but the work piece still points to the fence... |
 |
Test fitting...the fingers are not as proud as I had anticipated...the PM66 blade height might have lowered... |
 |
...full box dry fitting... |
 |
I created a 1/4 inch groove to accomodate a piece of MDF for the bottom. Through grooves in all four sides would show...so I made a 1/4 inch by 1/4 inch groove at the router table (with an up-down spiral bit). I took the two sides and aligned the groove to be in the middle of the bottom socket...These two sides can both be done as through router passes. The through pass is made very simply...just held down to the fence and pushed... |
 |
However, the two sides can not be done this way...a through groove would show as a void in the box joint. So I created a stop dado...by dropping the piece down onto the bit to start the groove at the appropriate location... |
 |
...and by having a stop block to halt the dado at the appropriate location on the other end of the dado. |
 |
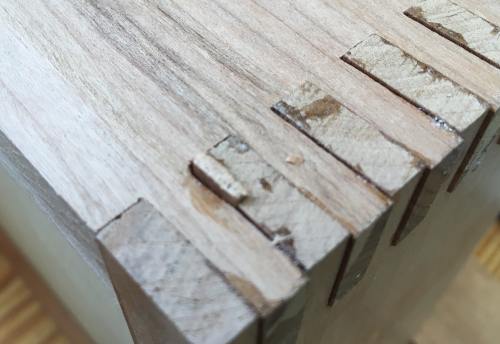
Here is an example of the stopped dado (top)... and the through groove on the bottom. |
 |
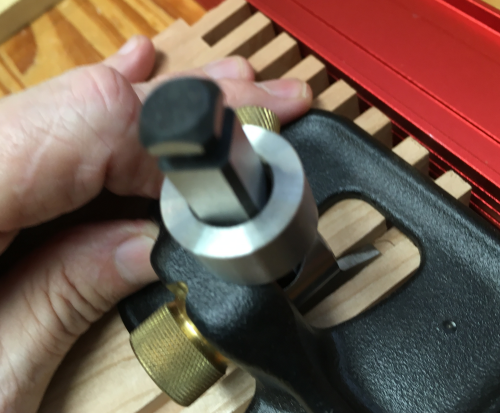
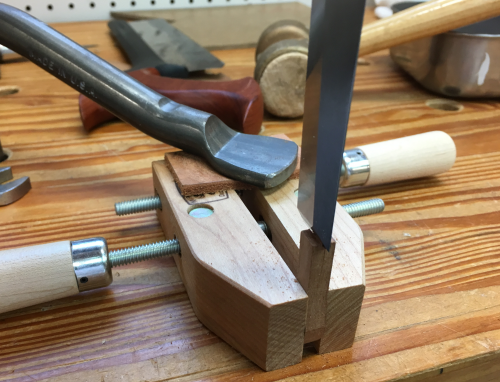
The stopped grooves had rounded ends that fell short of making a square corner in the grooves...so I removed the appropriate amount of the finger chopping with bench chisels......and leveling out with paring chisels and the Veritas medium router plane with a 1/8 inch blade.
|
 |
After chisel and router work...the notches... |
 |
The joint dry fit test... |
 |
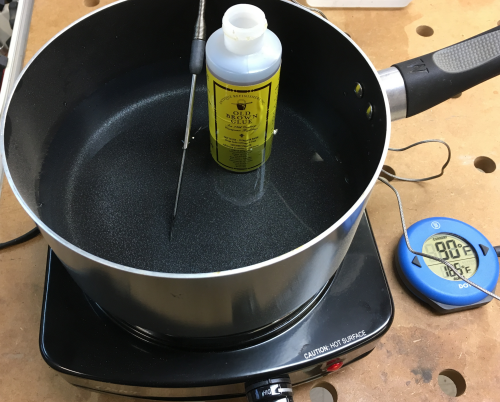
I had planned to use hide glue on these finger ...there were so many glue surfaces that when using PVA glue, by the end of the glue up, some of the fingers would have expanded and it would be so hard to put in the last piece. Image: heating up the hide glue to 140°... it had been very cold in the week before this...I hope it mixes well.
|
 |
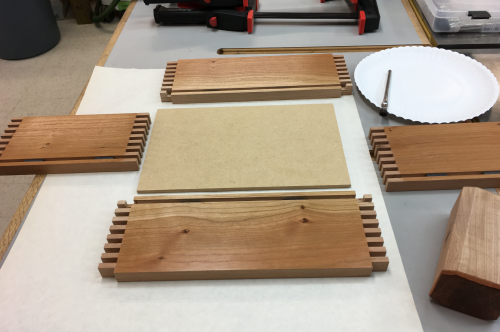
When I set up the finger joints I made them a little tighter since with hide glue the fingers would not swell as much and the hide glue would not expand and fill any gaps. Image: I have prepped all pieces and I am ready to glue. |
 |
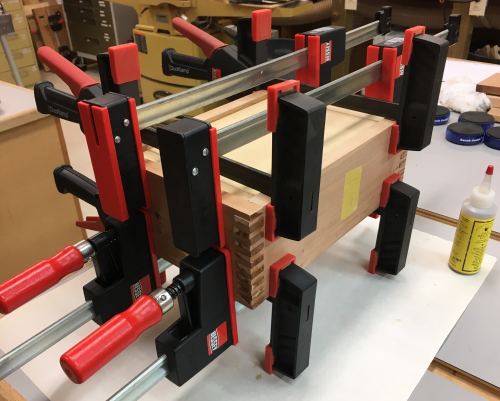
Glued and clamped... |
 |
After the box was pulled out...joints looked pretty good, box pretty square, fingers slightly proud...first, I cut off the exposed fingers using a flush cut saw...I saved the saw dust. |
 |
Then put into the bench vise...and planed down the proud fingers... |
 |
Filled any gaps with TimberMate Chestnut wood filler along with some of the cherry saw dust. Ready to sand...
|
 |
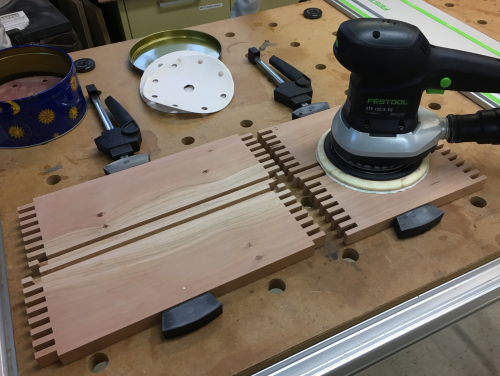
Sanded the inside surfaces before glue ups...used Rotex 120x, 220x to 400x. |
 |
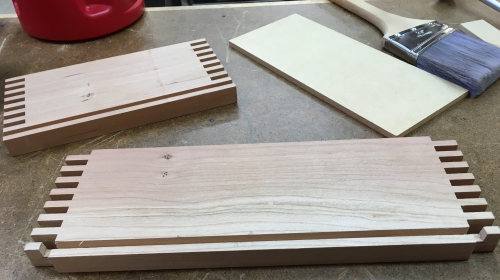
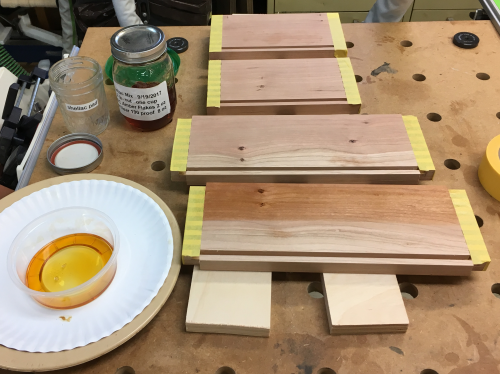
After sanding, cleaned with acetone and covered fingers with tape to prevent future glue surfaces from getting shellac on them...padded on amber shellac...a two pound mix of shellac crystals and 190 proof Everclear. |
 |
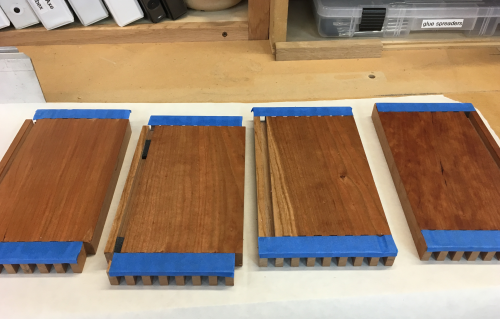
Finished box exterior...same sanding protocol as above...removed dust with acetone...rubbed on a coat of shellac. |
|
3 coats of shellac... |
|
| Finished...the rectangular napkin box... | |
A couple of coats of shop made wiping varnish were put on the inside surfaces of the box prior to glue up... |
 |
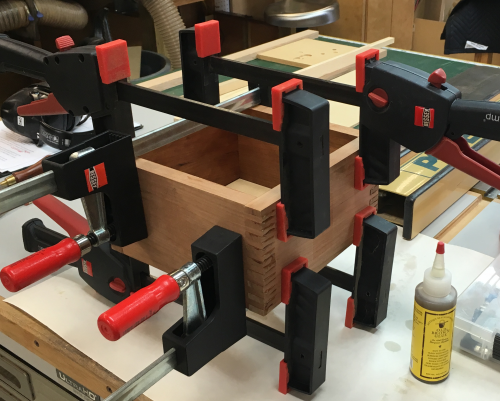
Glue up...hide glue...clamping |
 |
There had been a router bit fence movement that caused a bad run that affected two fingers. |
 |
I sliced off some cherry end grain that I then worked with sandpaper to make it a size to fill the finger gap... |
 |
...tapped it into the gap with some hide glue... |
 |
...cleaned off all the joints with flush saws. then planes, cards and sanding, |
|
Finished product |
|
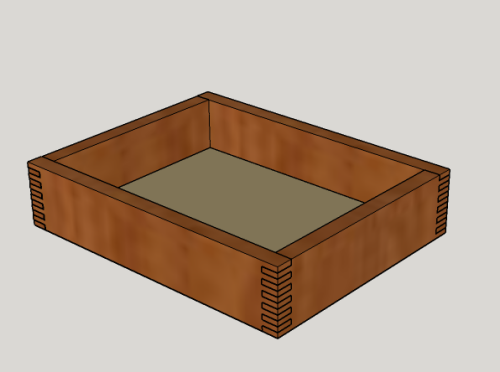
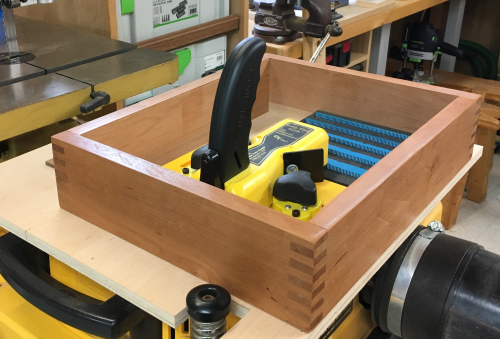
The cherry letter tray was finished with amber shellac. I decided to used the tray as part of a tool tote to used by the bandsaw... |
|
...the letter tray repurposed. |
 |