|
I need a new shop built appliance...I
need to drill angled holes along a sight line to achieve
resultant angles on the new drill press. The previous variable angle
appliance will be used as a model and perhaps offer up some
parts.
|
|
|
Design
Ideas and Requirements
|
|
| Design must fix these issues that were evident in appliance1, the previous shop built appliance: |
|
|
Appliance1...too large and too long to
be effective for the task.
|
 |
| When changing the orientation from left-right to front-back it was clear that it would not allow for the angles desired. | 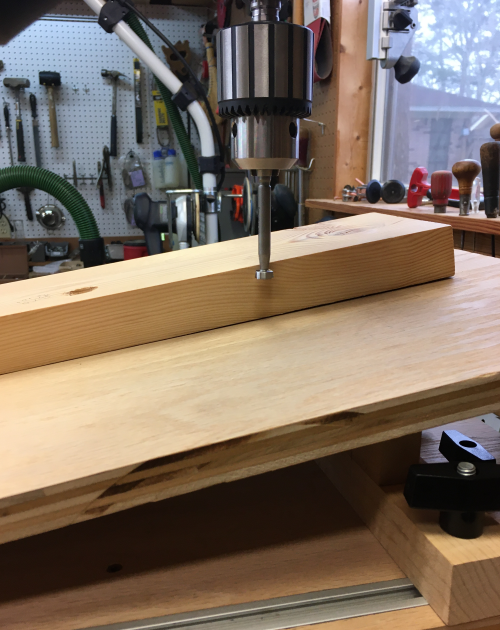 |
| So the new design (appliance2) will downsize from appliance1...the most important factor is to shorten the base. | 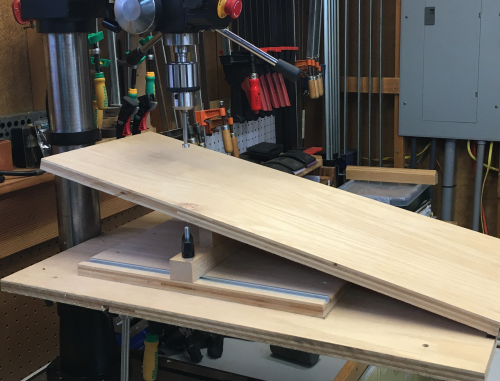 |
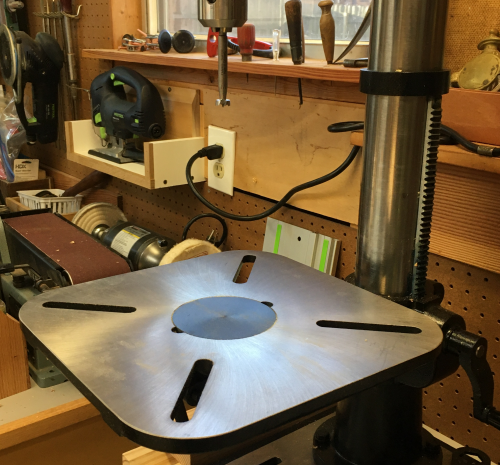
| Making some general
calculations...the Nova drill press table surface is ~8 inches
from the bottom of the Forstner bit...it is also ~8" from the
pillar to the bit...the table is 12.5 x 12.5...the front edge of
the table is ~14.25 from the pillar. |
 |
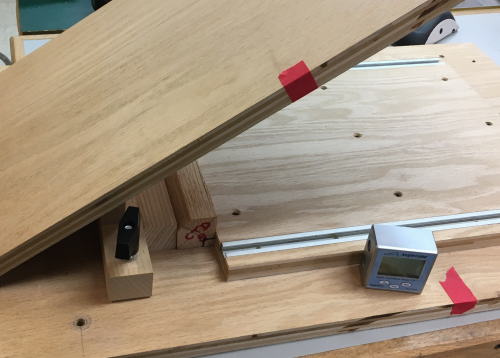
| So the first change would be to
make the bottom plate 16 inches long...this will extend it out
over the front of the table...and 13 inches wide...extends
slightly over both side edges of the table. I used appliance1 to get a feel for how the angles would work...the red tape on the bottom plate is at 16 inches. The slant plate is supported by some scraps to achieve approximate angles. |
 |
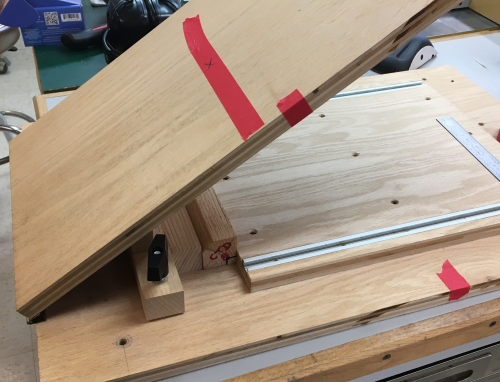
| I used an arbitrary 33° as the high end requirement... | 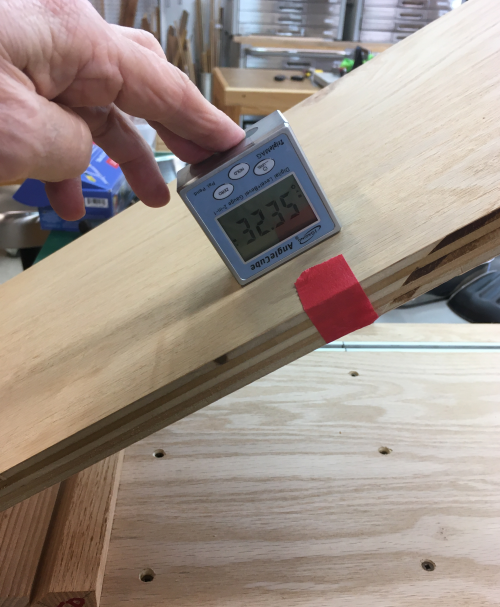 |
|
The approximate center of the
bit on the slant plate is the X on the
long red tape.
The working length allows the
target angle with clearance for the drill bit.
This allows me to move to
digital design.
|
 |
|
Digital
Designing
|
|
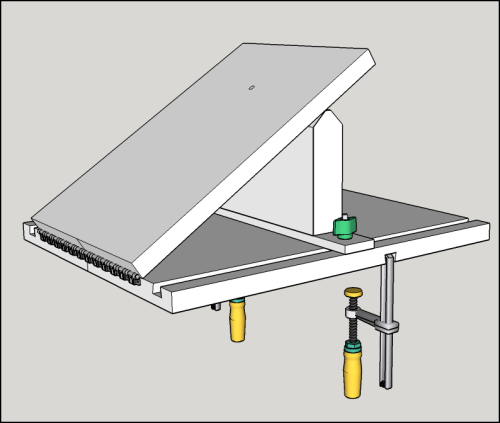
| First Sketchup vision of the device...using MatchFit dovetail grooves, clamps, and hardware. | 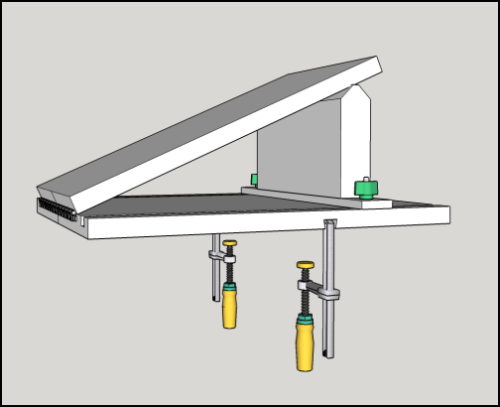 |
| Terms... | 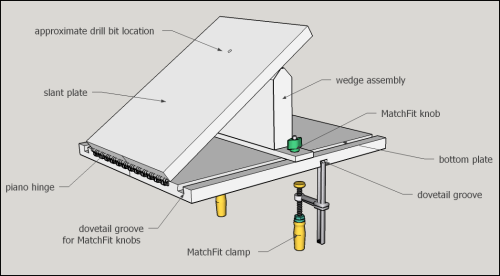 |
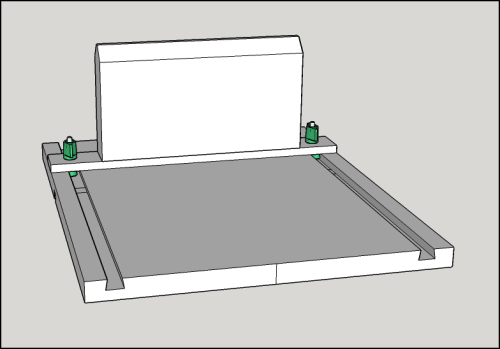
| The dovetail groove on the
underside of the bottom plate will allow two MatchFit clamps to
secure the appliance to the Nova OEM metal table. |
 |
| The two dovetail grooves on the
topside of the bottom plate will provide tracks for the MatchFit
knobs to secure the wedge assembly. |
 |
|
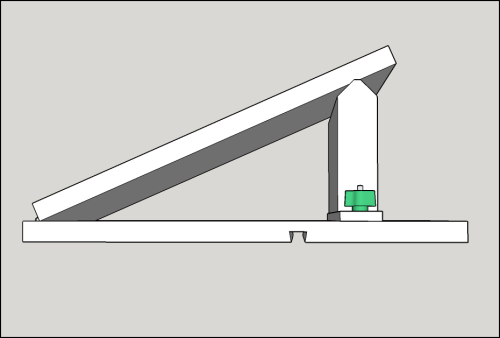
After playing with some
variations...here is the Sketchup with the slant plate at a
33° tilt...
|
|
|
Materials
and Build
|
|
| Hardware: Piano hinge, 7.5
inches...ordered. |
|
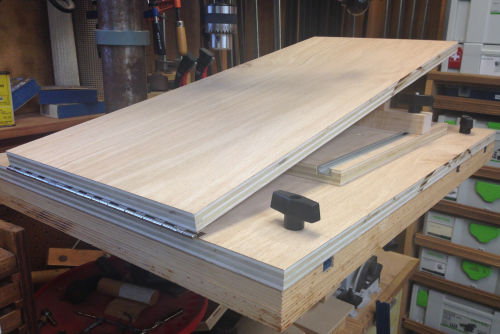
| Wood selected was walnut plywood,
gifted by Tom D. The underside of the bottom plate was dovetail grooved so that the appliance is securely held to OEM metal table with MatchFit clamps. Great hold...easy to put on and take off. |
 |
| The top surface
of the bottom plate was dual dovetail grooved to provide
tracking for the wedge assembly...using MatchFit knobs. The wedge assembly was borrowed from appliance1...the maple assembly just needed two new holes to align with the tracks. |
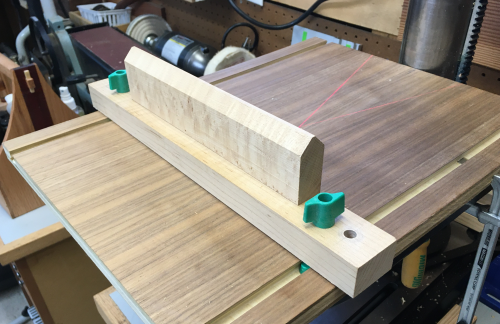 |
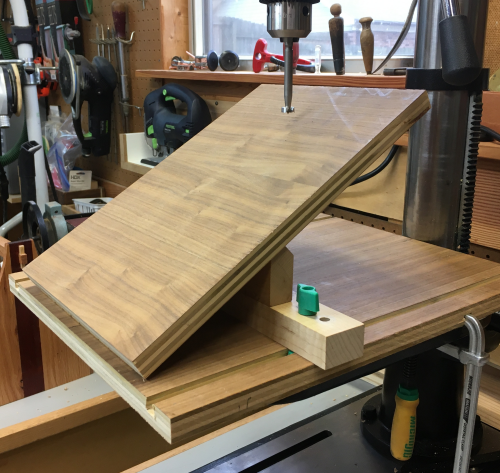
| The wedge and the assembly base are held together with Dominoes...dry fit with friction hold. This will allow alternate wedges as needed. | 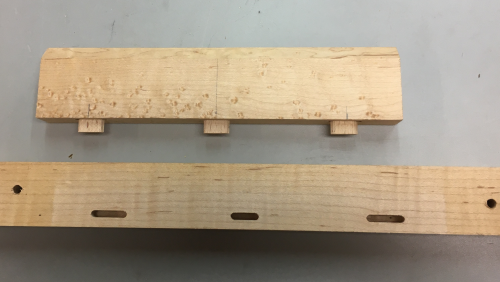 |
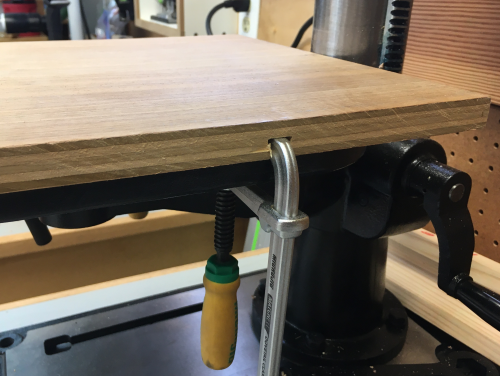
| Test run was done by holding the slant plate in place because the piano hinge is not in...the wedge assembly was moved far forward and with ample room to spare with Forstner bit, this setup allowed and angle of greater than 30°. | 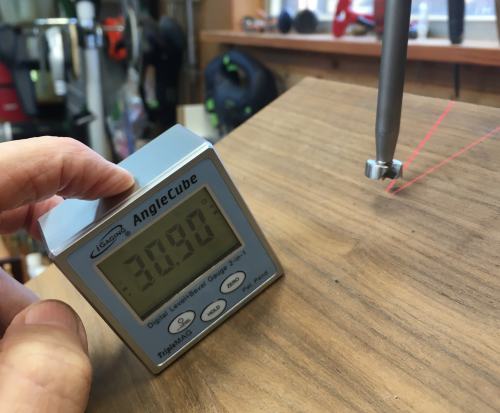 |
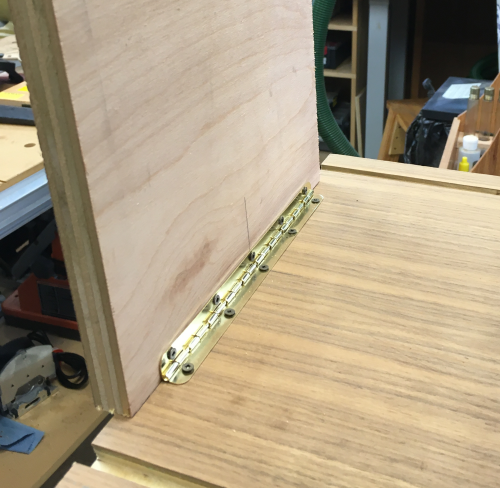
| Piano hinge hardware
arrived...screws were overly small...replaced them with #4
square drive x 5/8"...and installed the 90° stop hinges. |
 |
| With the slant plate installed
the effective angle was tested... with the wedge at the rear the angle was ~13°. |
 |
|
With the slant plate as high
as it will go and still be under the Forstner bit...
angle is ~31°. |
 |
| If the wedge is removed from the assembly the lowest angle is ~5° ...in theory, with the flat plate removed the lowest angle could be ~1°. | 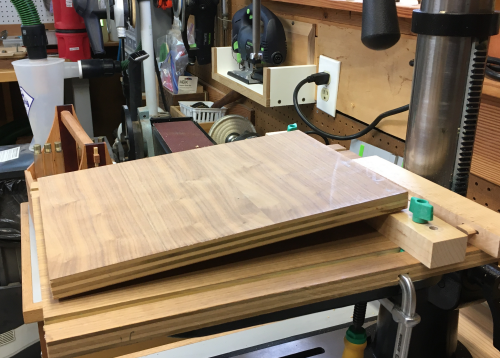 |