The Building of Daedalus
The time has come for a
new computer. My old computer, Icarus, became a home use computer.
Icarus was named for the son of Daedalus. When his father invented wings that would enable Icaurs to fly, he was admonished to neither fly too high nor too low. The ατη or "folly" of Icarus led him to fly too high thus causing the sun to melt the wax on the wings. He then lost control and swooped too low, crashed into the sea and drowned. I named this box Icarus because during the build, in a moment of ατη, I fried the motherboard and had to purchase another one.
The new box is called Daedalus, the Greek symbol of "cunning
technology". I hope that I was older and wiser during this assembly.

Daedalus and Icarus
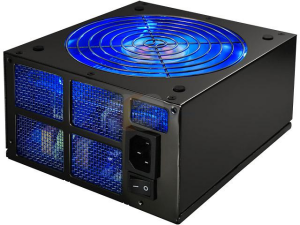
Power Supply Unit
The first item to arrive was the power supply. This unit was on sale and was such a good deal that the purchase was made well before the rest of the items were ordered. The Rosewill RX 850-S-B is a 850 W PSU that has a great variety of power connections available.
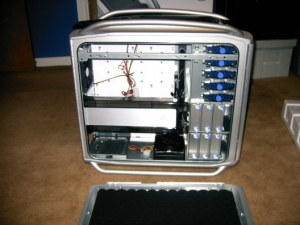
Case
A sale on my selected case, the Coolermaster Cosmos 1000 led me to the second purchase.
The Cosmos is a massive unit with good modular tool free concepts, four x 125mm fans (one rear, one bottom, two top), and it is designed for easy water cooling system.
This unit was specifically designed to hold down noise.
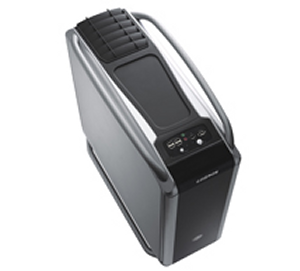
This case is larger that my previous case, an Antec case used in the Icarus build.. I used to think of that case as being huge.
Icarus build: Antec case= 18 H x 8 W x 18 D
Daedalus build: Cosmos case = 24 H x 8 W x 24 D
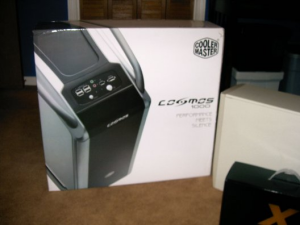
The box that the Cosmos shipped in was so large that Cindy wondered if I had ordered her a Christmas "pony" over the Internet.
In this photo, the box is shown alongside a normally sized PC.
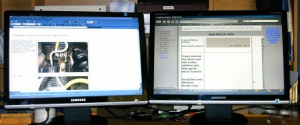
Monitors
Samsung 226BW 22 " LCD
x 2
dual monitor setup currently in use with Icarus
Step 1:
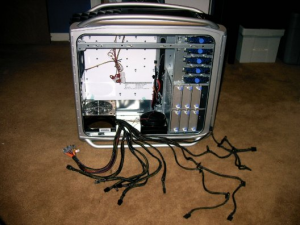
Installed the Rosewill PSU. It has a serious mirror finish.
The "jumble of snakes" in this photo are the 12 sheathed connector bundles listed below.
1x 20+4 pin Main Connector
1x 4 pin ATX12V Connector
1x 8 pin EPS12V Connector
4x 6 pin PCI-Express Connector
1x PCI-E 6-pin to 8-pin Adapter
6x 4 pin Peripheral Connector
6x 5 pin SATA Connector
2x 4 pin Floppy Connector
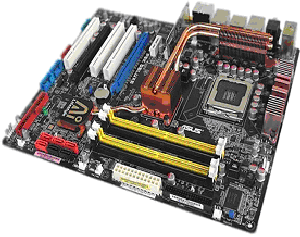
Motherboard
Asus P5K Deluxe Wireless AP
- Supports Intel® next generation 45nm Multi-core
- Intel LGA775 Platform
- Intel® P35 chipset· Intel® Core™2 Quad / Core™2 Extreme / Core™2 Duo
- Dual-channel DDR2 1066/800/667 MHz
- Heat Pipe & Stack Cool 2
- 6*SATA/2*SATA on the Go/ 1394·
- Dual Gigabit LAN
- WiFi-AP 54 Mbps 802.11G
- Dual RAID
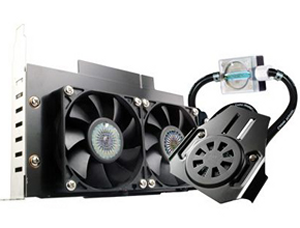
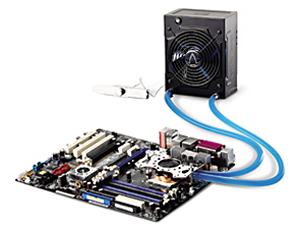
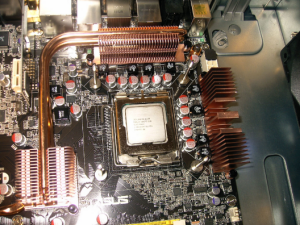
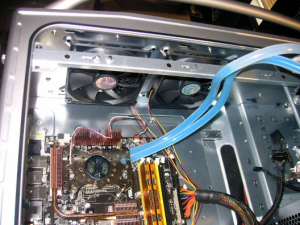
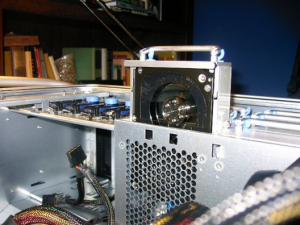
CPU Cooling
Coolermaster Aquagate S1
Universal design for Intel Core 2 Quad
Superior cooling performance
Large aluminum radiator with LED 120 mm fan
Copper water block for heat transfer
O ump integrated into water block
Step 2:
Prepped the motherboard CPU section to accept the Aquagate S1. Installed 4 bolts and washers from the backside of the mobo. Put on 4 washers and nuts on the frontside.
Step 3:
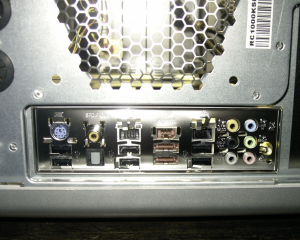
Special input/output panel had to be installed in the rear of the case to accomodate the unique I/O panel of the P5K mobo.
Step 4:
Installed the ATX form factor into the case. Used 9 6.5mm stand offs and then 9 screws through the mobo to secure.

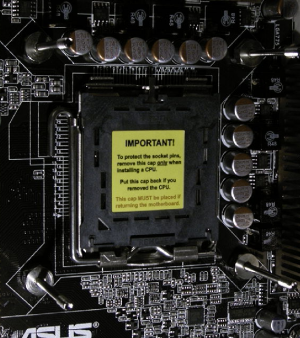
Processor
Intel Core 2 Quad Q6600
2.4 GHz
Quad Core
FSB 1066 MHz
Cache 4 MB x 2
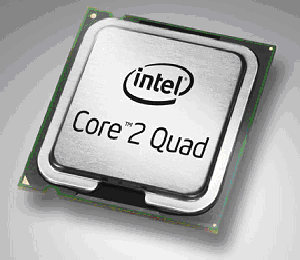
Step 5:
Installed the Q6600 CPU into the LGA 775 type socket.
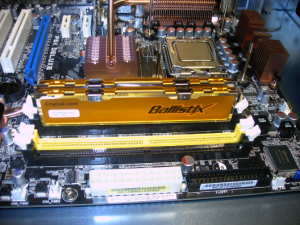
RAM
Crucial Ballistix
2GB DDR2PC 800 x 2
BL2KITa2864AA663
4GB: 2GB kit x2
PC2-5300
240-pin DIMM
non-ECC, unbuffered
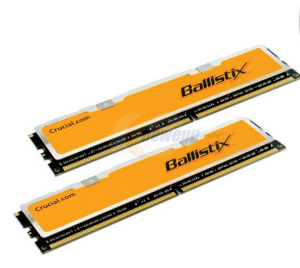
Step 6:
Installed one 2 GB RAM kit, matched pairs of 1 GB DDR2 DIMMs,
into Channel A on the motherboard.
I wanted to be able to work the water cooler around the side of them.
I have another 2 GB kit that I plan to install after the computer is up
and running. There are some RAM limitations with the 32 bit operating
system and I want Daedalus to be running at full capacity and totally
debugged before pushing it to 4 GB.
Step 7:
Dry run connection of the cooler install to work out the directionality of the water block and hoses. Permament install had to wait for Arctic Silver 5 thermal paste. Decided not to use the paste that came with the unit.
Hard Drive - System
Western Digital Raptor X
WD1500AHFDRTL
10,000 RPM
150 GB
16 MB cache

Step 8:
Installed the system drive. This is the Raptor X, a very fast drive with a unique look...the case is clear and you can actually see the drive platters. The SATA drive is secured in one of the 6 removable hard drive bays. The bay is then slipped into the frame and secured.
Video Processor
eVGA 8800 GT 512mb
Superclocked
700 MHz Core
DDR3 clock rate 2GHz
PCI Express 2.0
256-bitSLI support
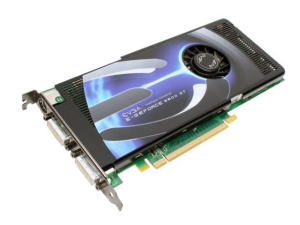
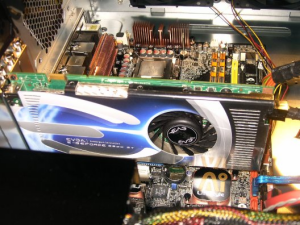
Step 9:
Installed the GPU. This eVGA 8800 GT card is massive and quite long. The end of it extended so far as to make it difficult to use the mobo SATA1 connection. It can still be used with the 90° SATA cable end.
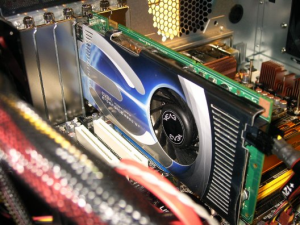
Step 10:
The card installed in the PCI Express x16 slot.The card also has a separate 6 pin 12v connection from the power supply. The Aquagate Viva GPU water cooling device is on backorder. That install will come later.
Step 11:
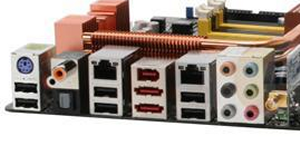
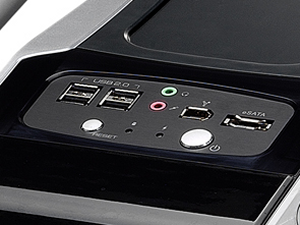
Made all the connection to enable the Cosmos case front I/O panel.
IEEE 1394a
four USB 2.0
High Definition audio
external SATA drive
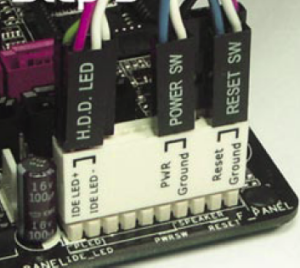
Step 12:
Case connection continued: all of the LED leads...power, hard drive function...plus power on and reboot, were connected to motherboar via the Asus Q-Connector for quick install and release.
Step 13:
Ready to connect the cpu cooler.
Step 14:
Cleared out the air bubbles from the water cooling assembly. Removed the rear 120 mm fan from the case. Installed the Aquagate radiator/exhaust fan assembly into the rear fan location.
Optical Drive
SAMSUNG Writemaster
SH-S203B
SATA
Black
2MB Cache
20X DVD±R DVD Burner / CD Burner
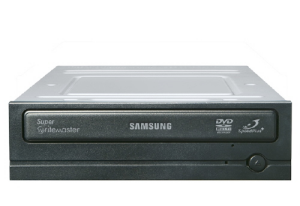
Step 15:
Installed Samsung DVD unit. Easy SATA install.
Hard Drive - Storage
Western Digital Caviar SE 16
WD5000KSRTL
7,200 RPM
500 GB
16 MB cache
SATA 3.0GB/s

Step 16:
Booted for first time, the software build begins.
Step 17:
Booted for first time, the software build begins.